
How To Use ConnectHQ Mobile App
This is the ConnectHQ mobile app general guide for all the PrevailHQ products.
Please Note: Different modules will be visible depending on the product purchased and settings selected by your organization.
Download
Download the ConnectHQ mobile app for IOS or Android.
Where to download the ConnectHQ mobile App.
Link
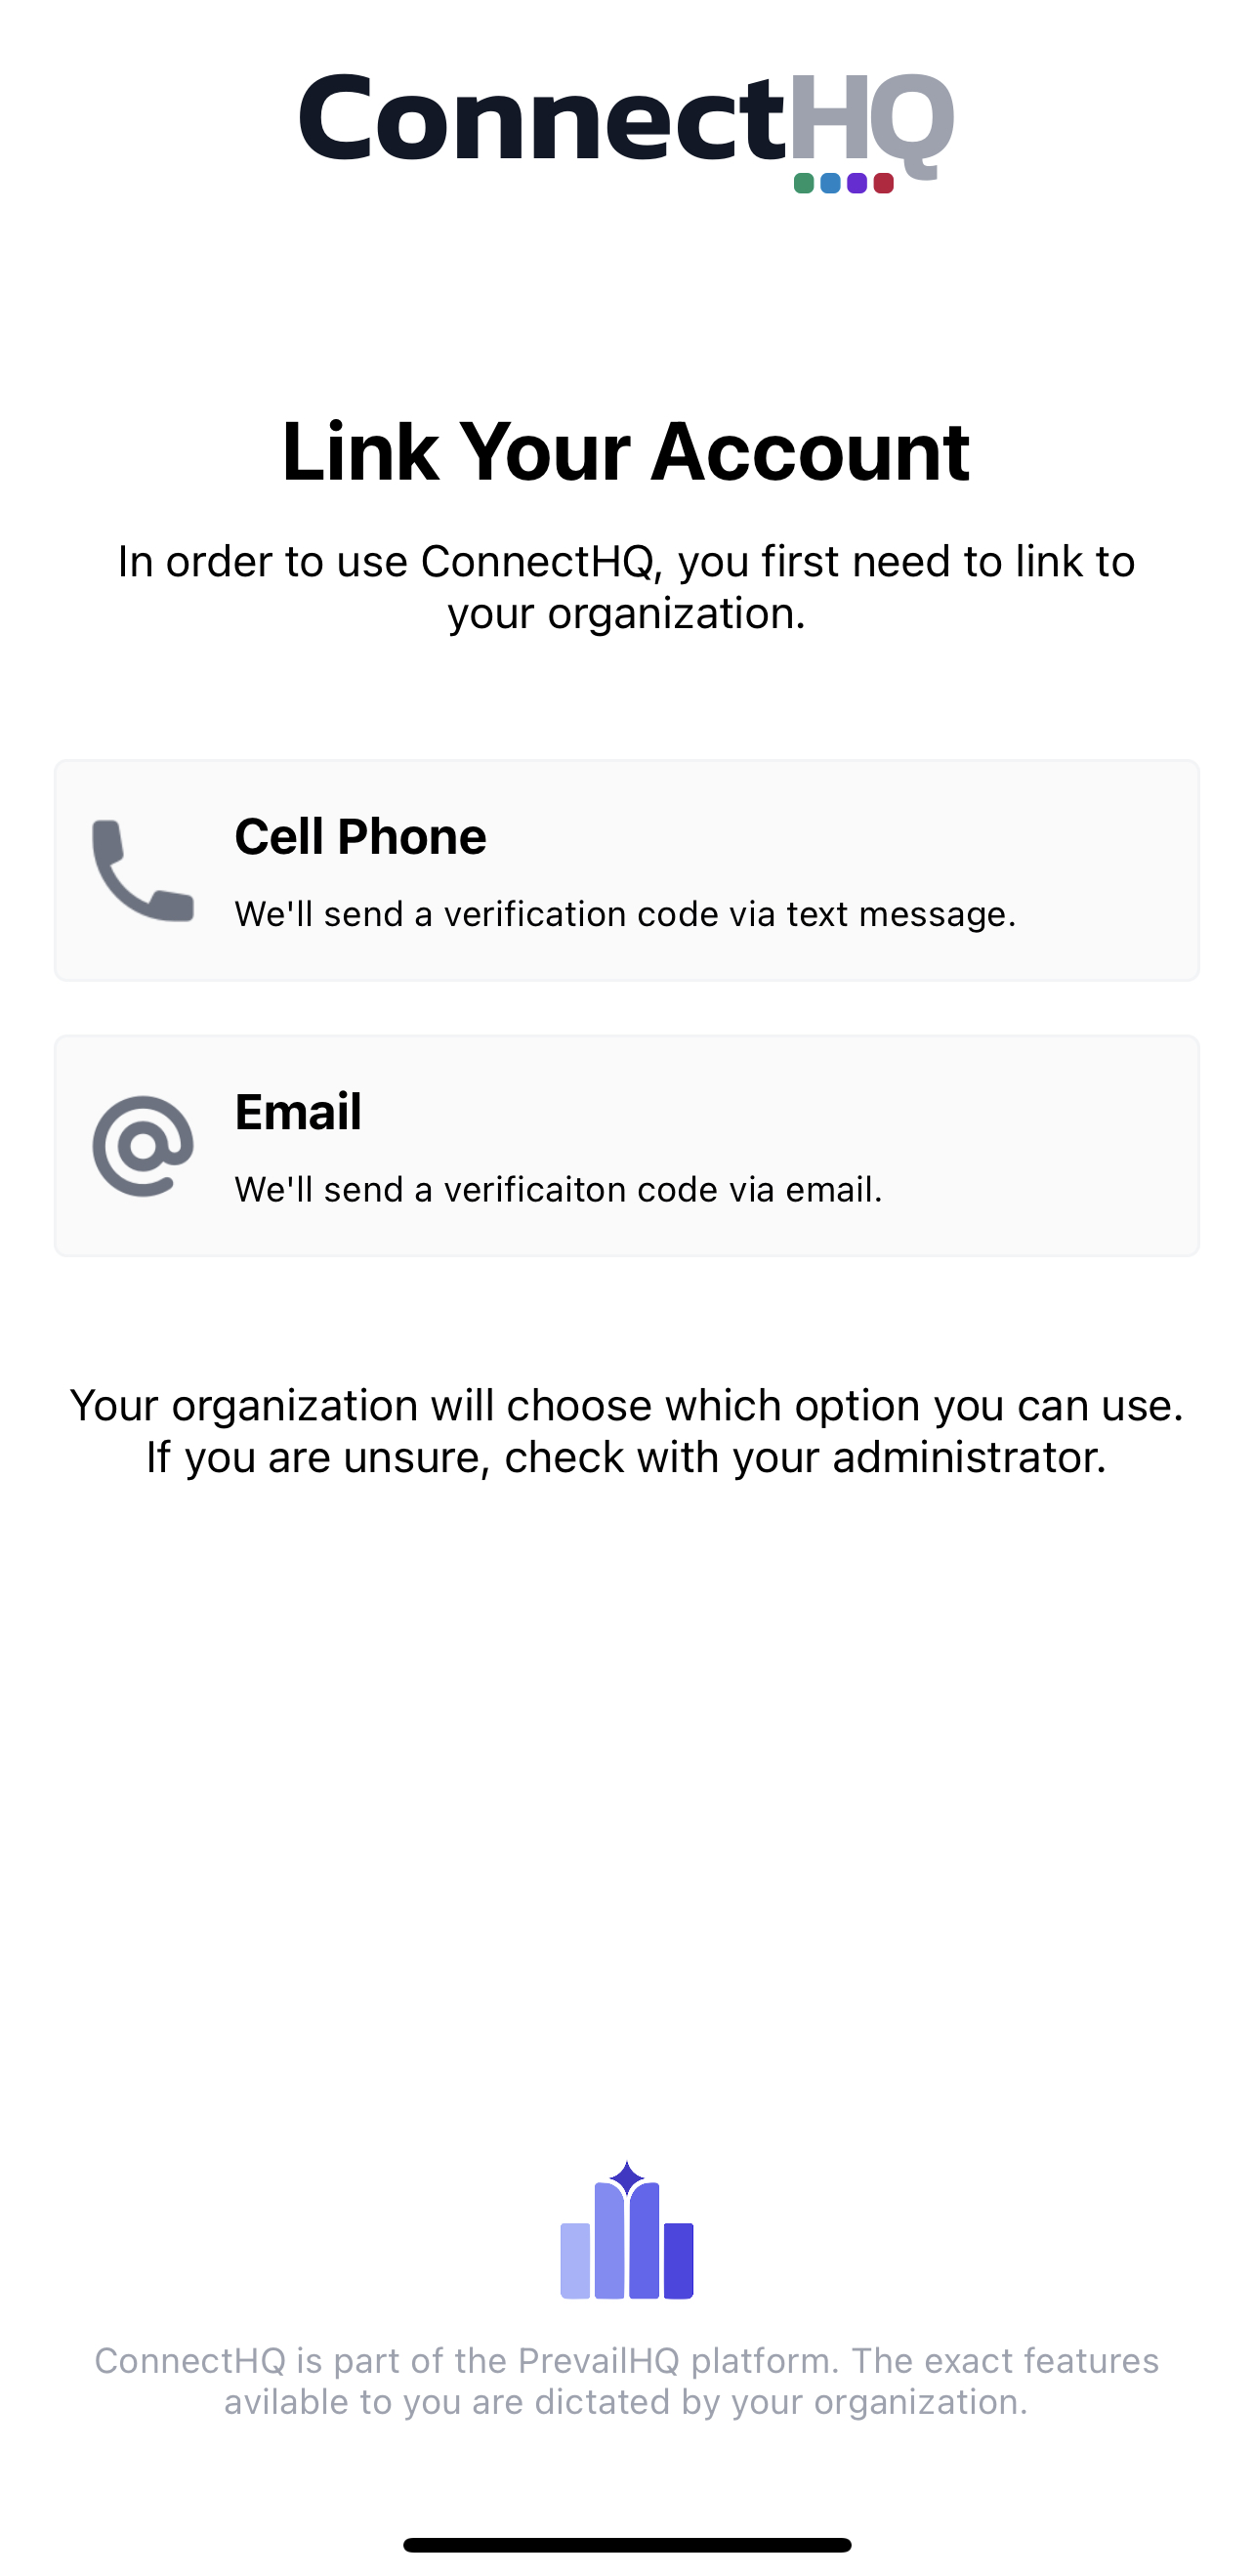
Link using your email or mobile number (one or both link methods might be available depending on your organization's setup).
A verification code will be sent to your email or cell phone via the method that was entered.
Enable Push Notifications
In order to receive push notifications, the ConnectHQ app Notifications must be enabled.
More on Notification settings for your phone:
Home
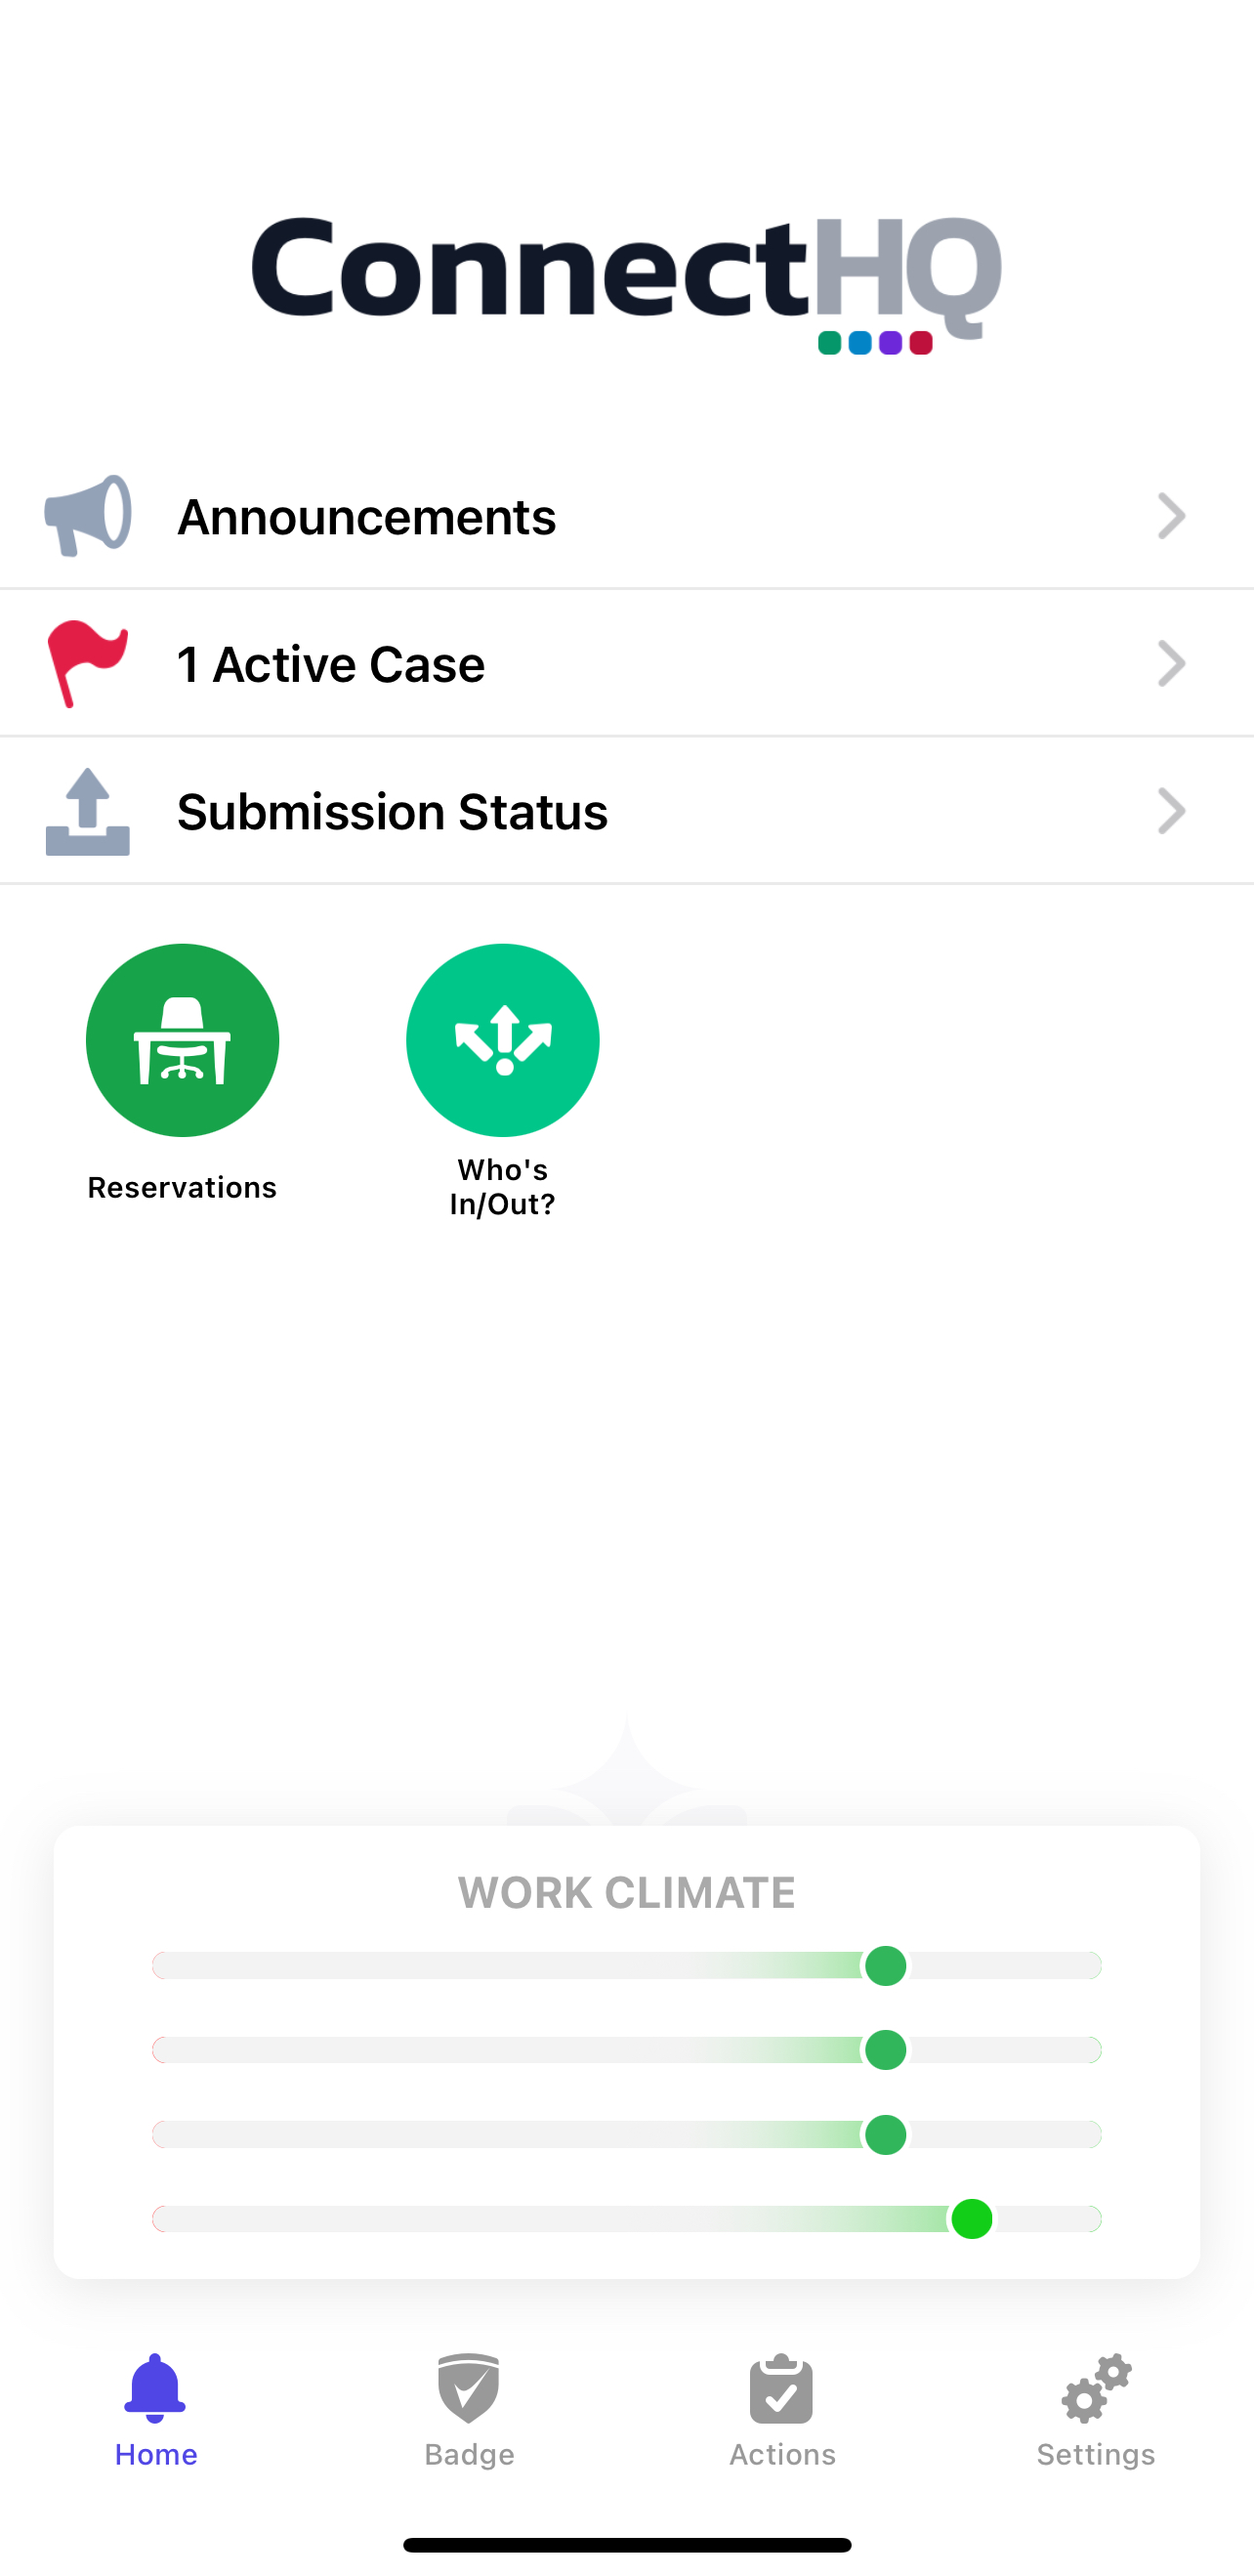
Use the Home Tab to:
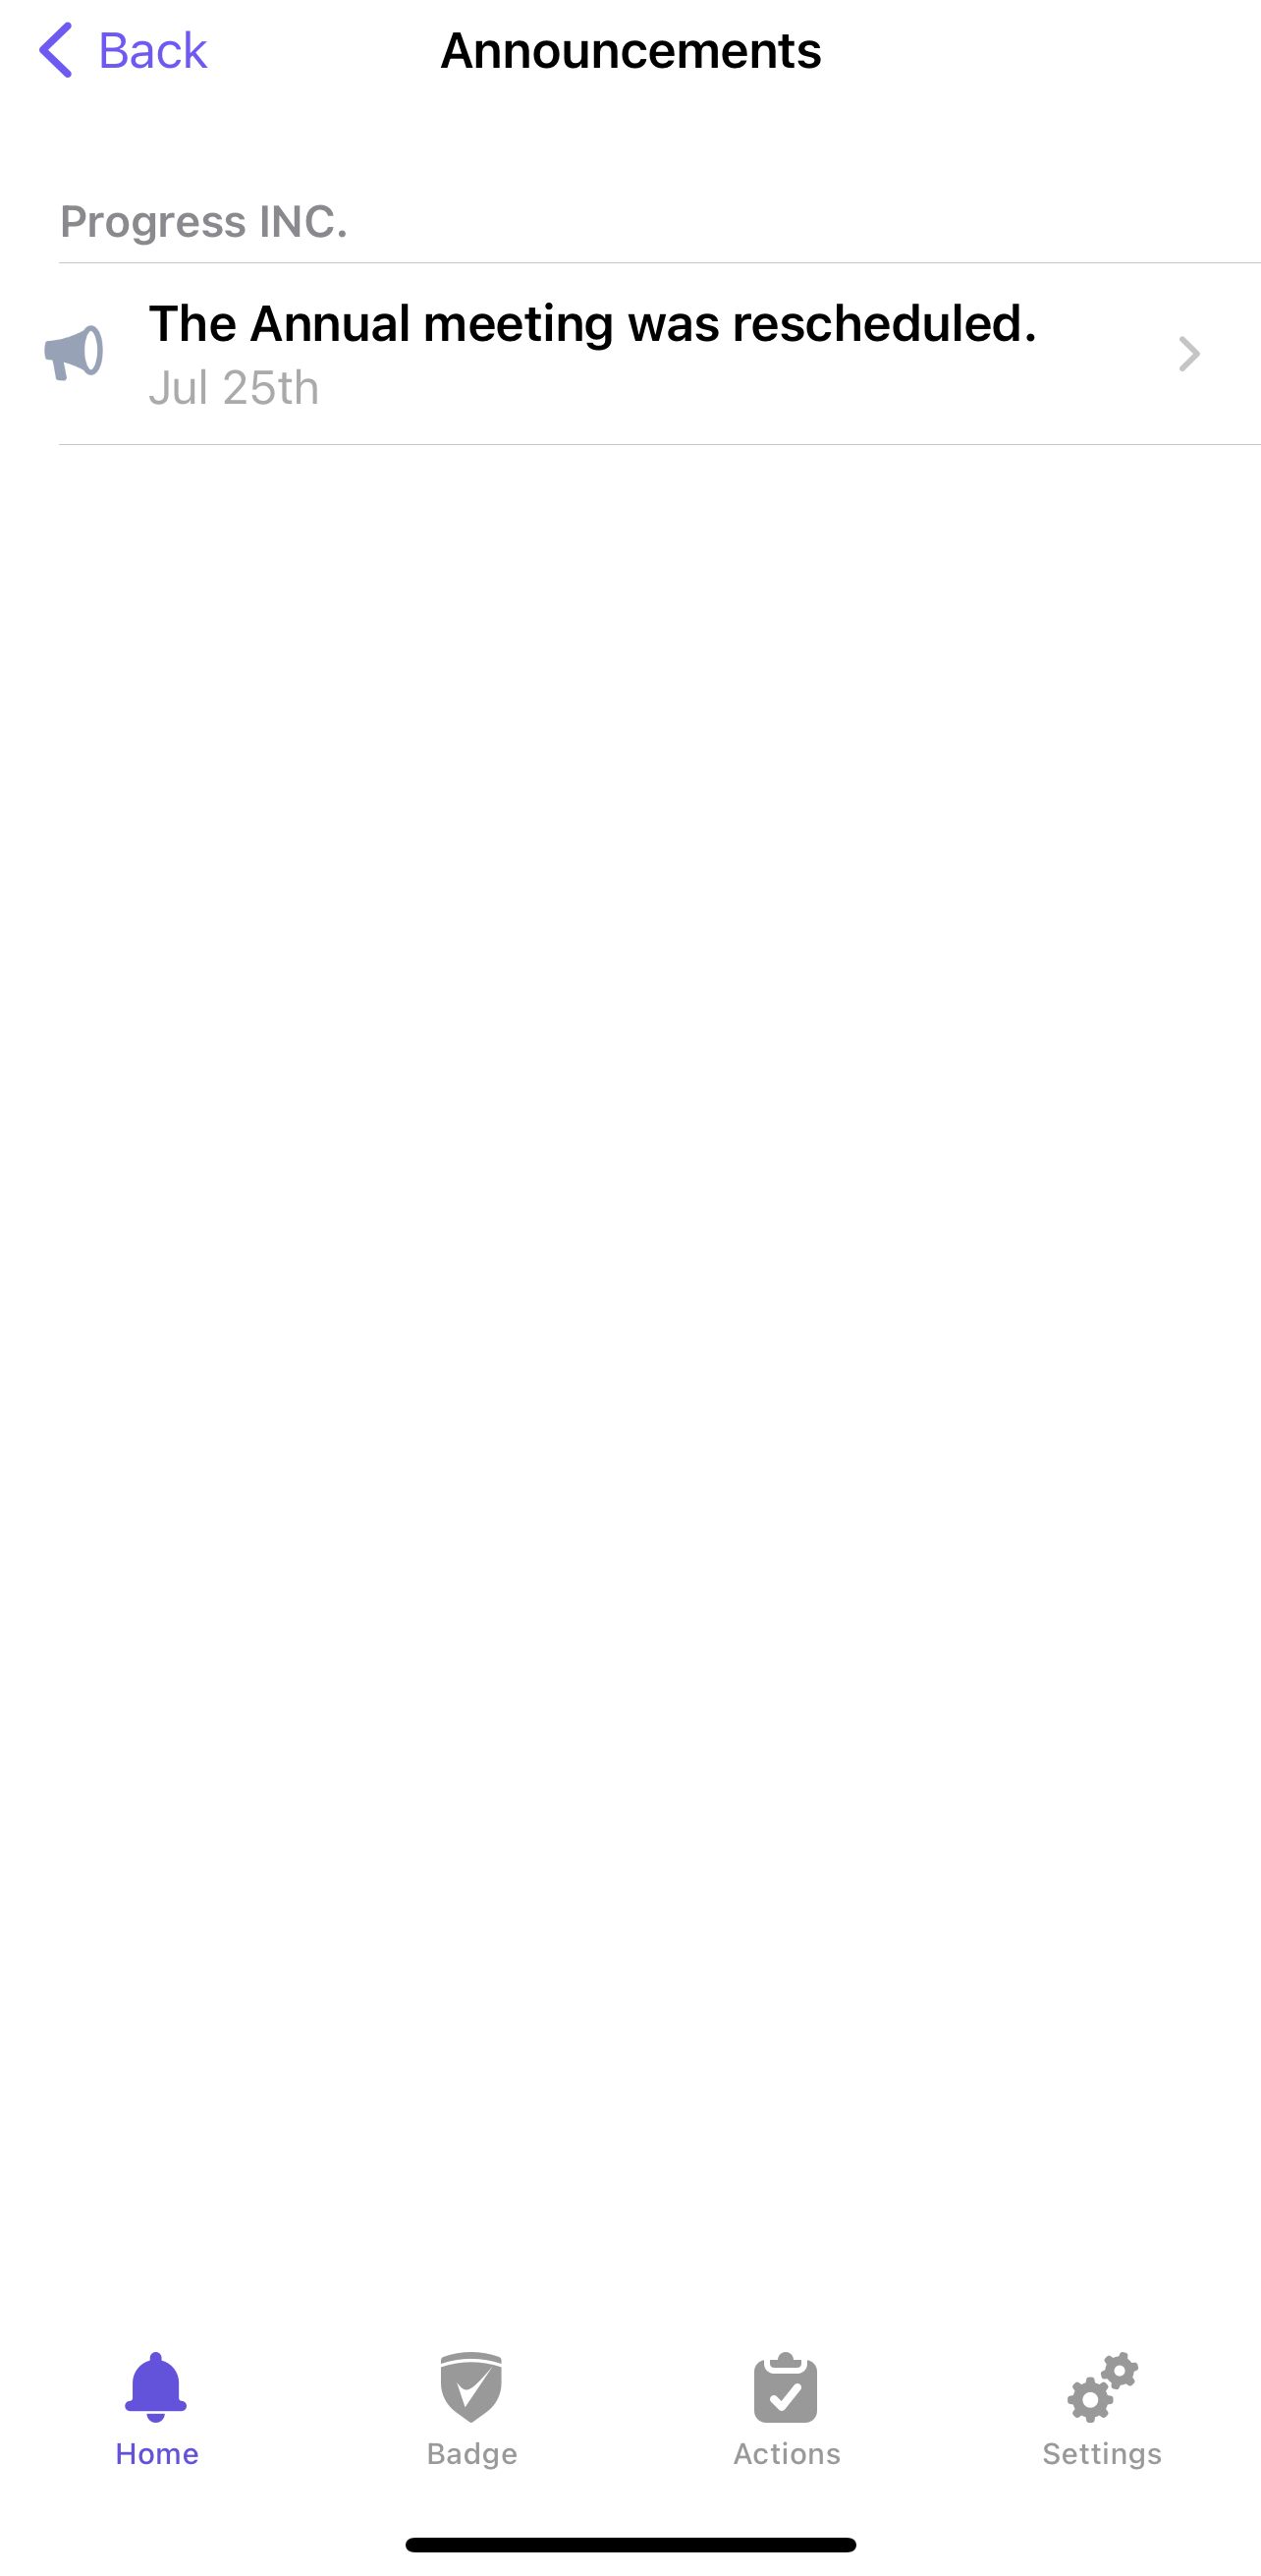
1. Review Announcements
Check your organization's announcements (important messages that organization admins send to employees).
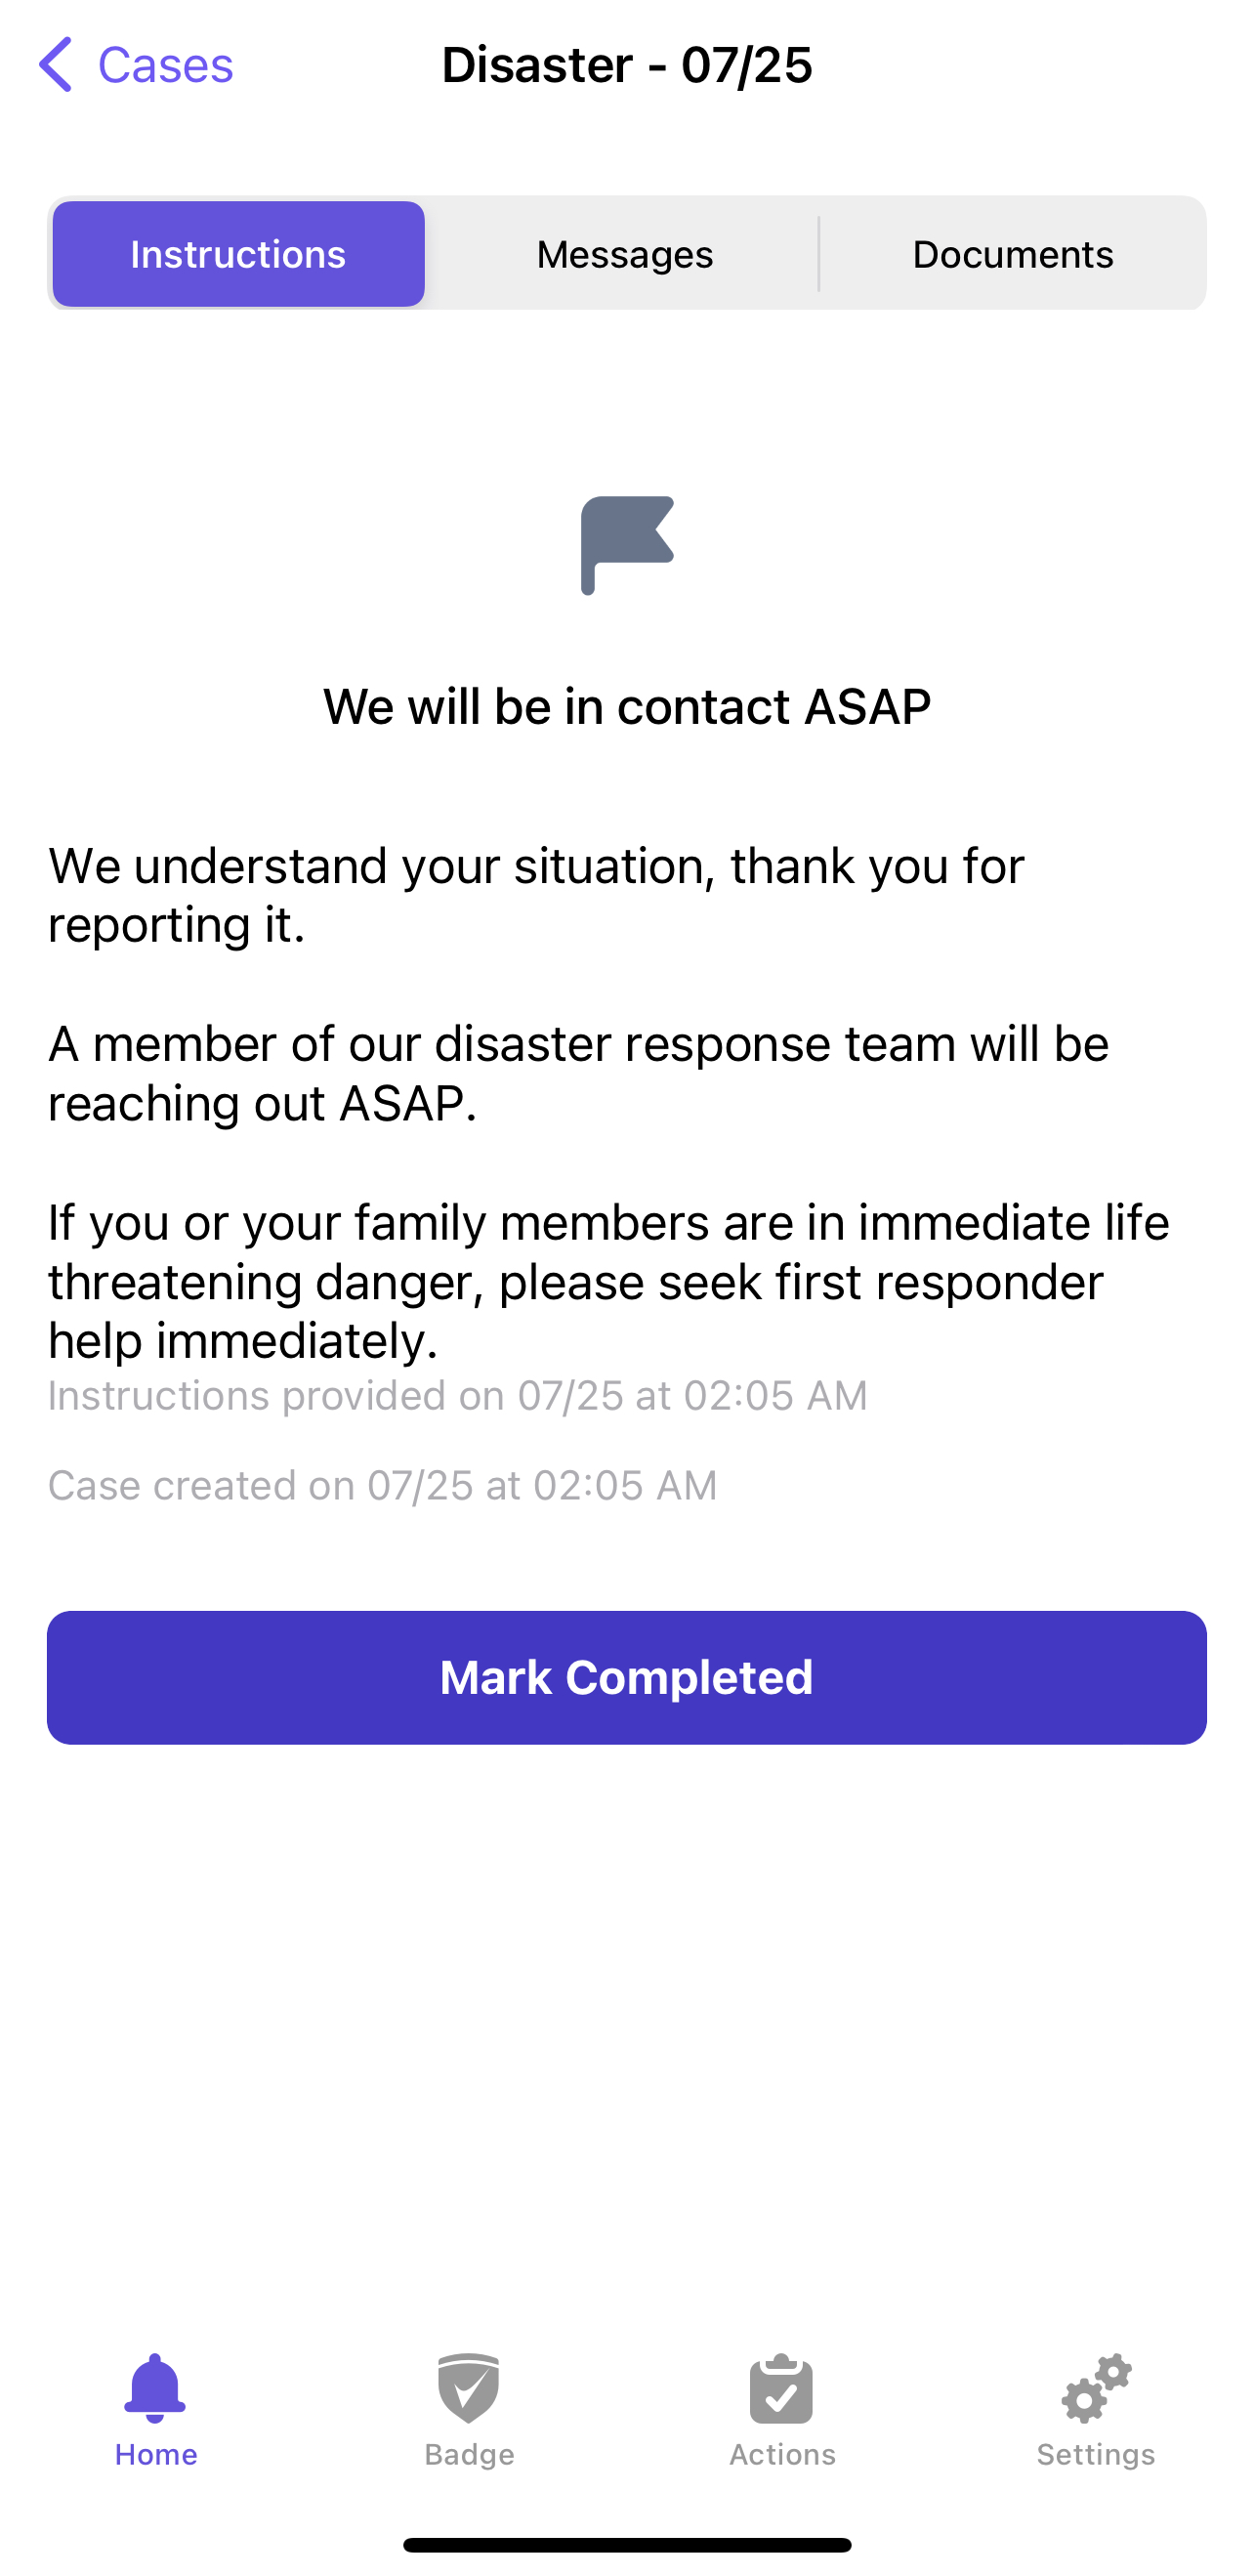
2. Review and take action on your cases.
Two scenarios could lead to a new case creation:
- You submitted a case via one of the tabs on the ConnectHQ mobile app Action tab, requested assistance via incident check-in, or failed the screening. The app automatically created a case so your organization's response team could assist further.
- Your organization admins created a case on your behalf.
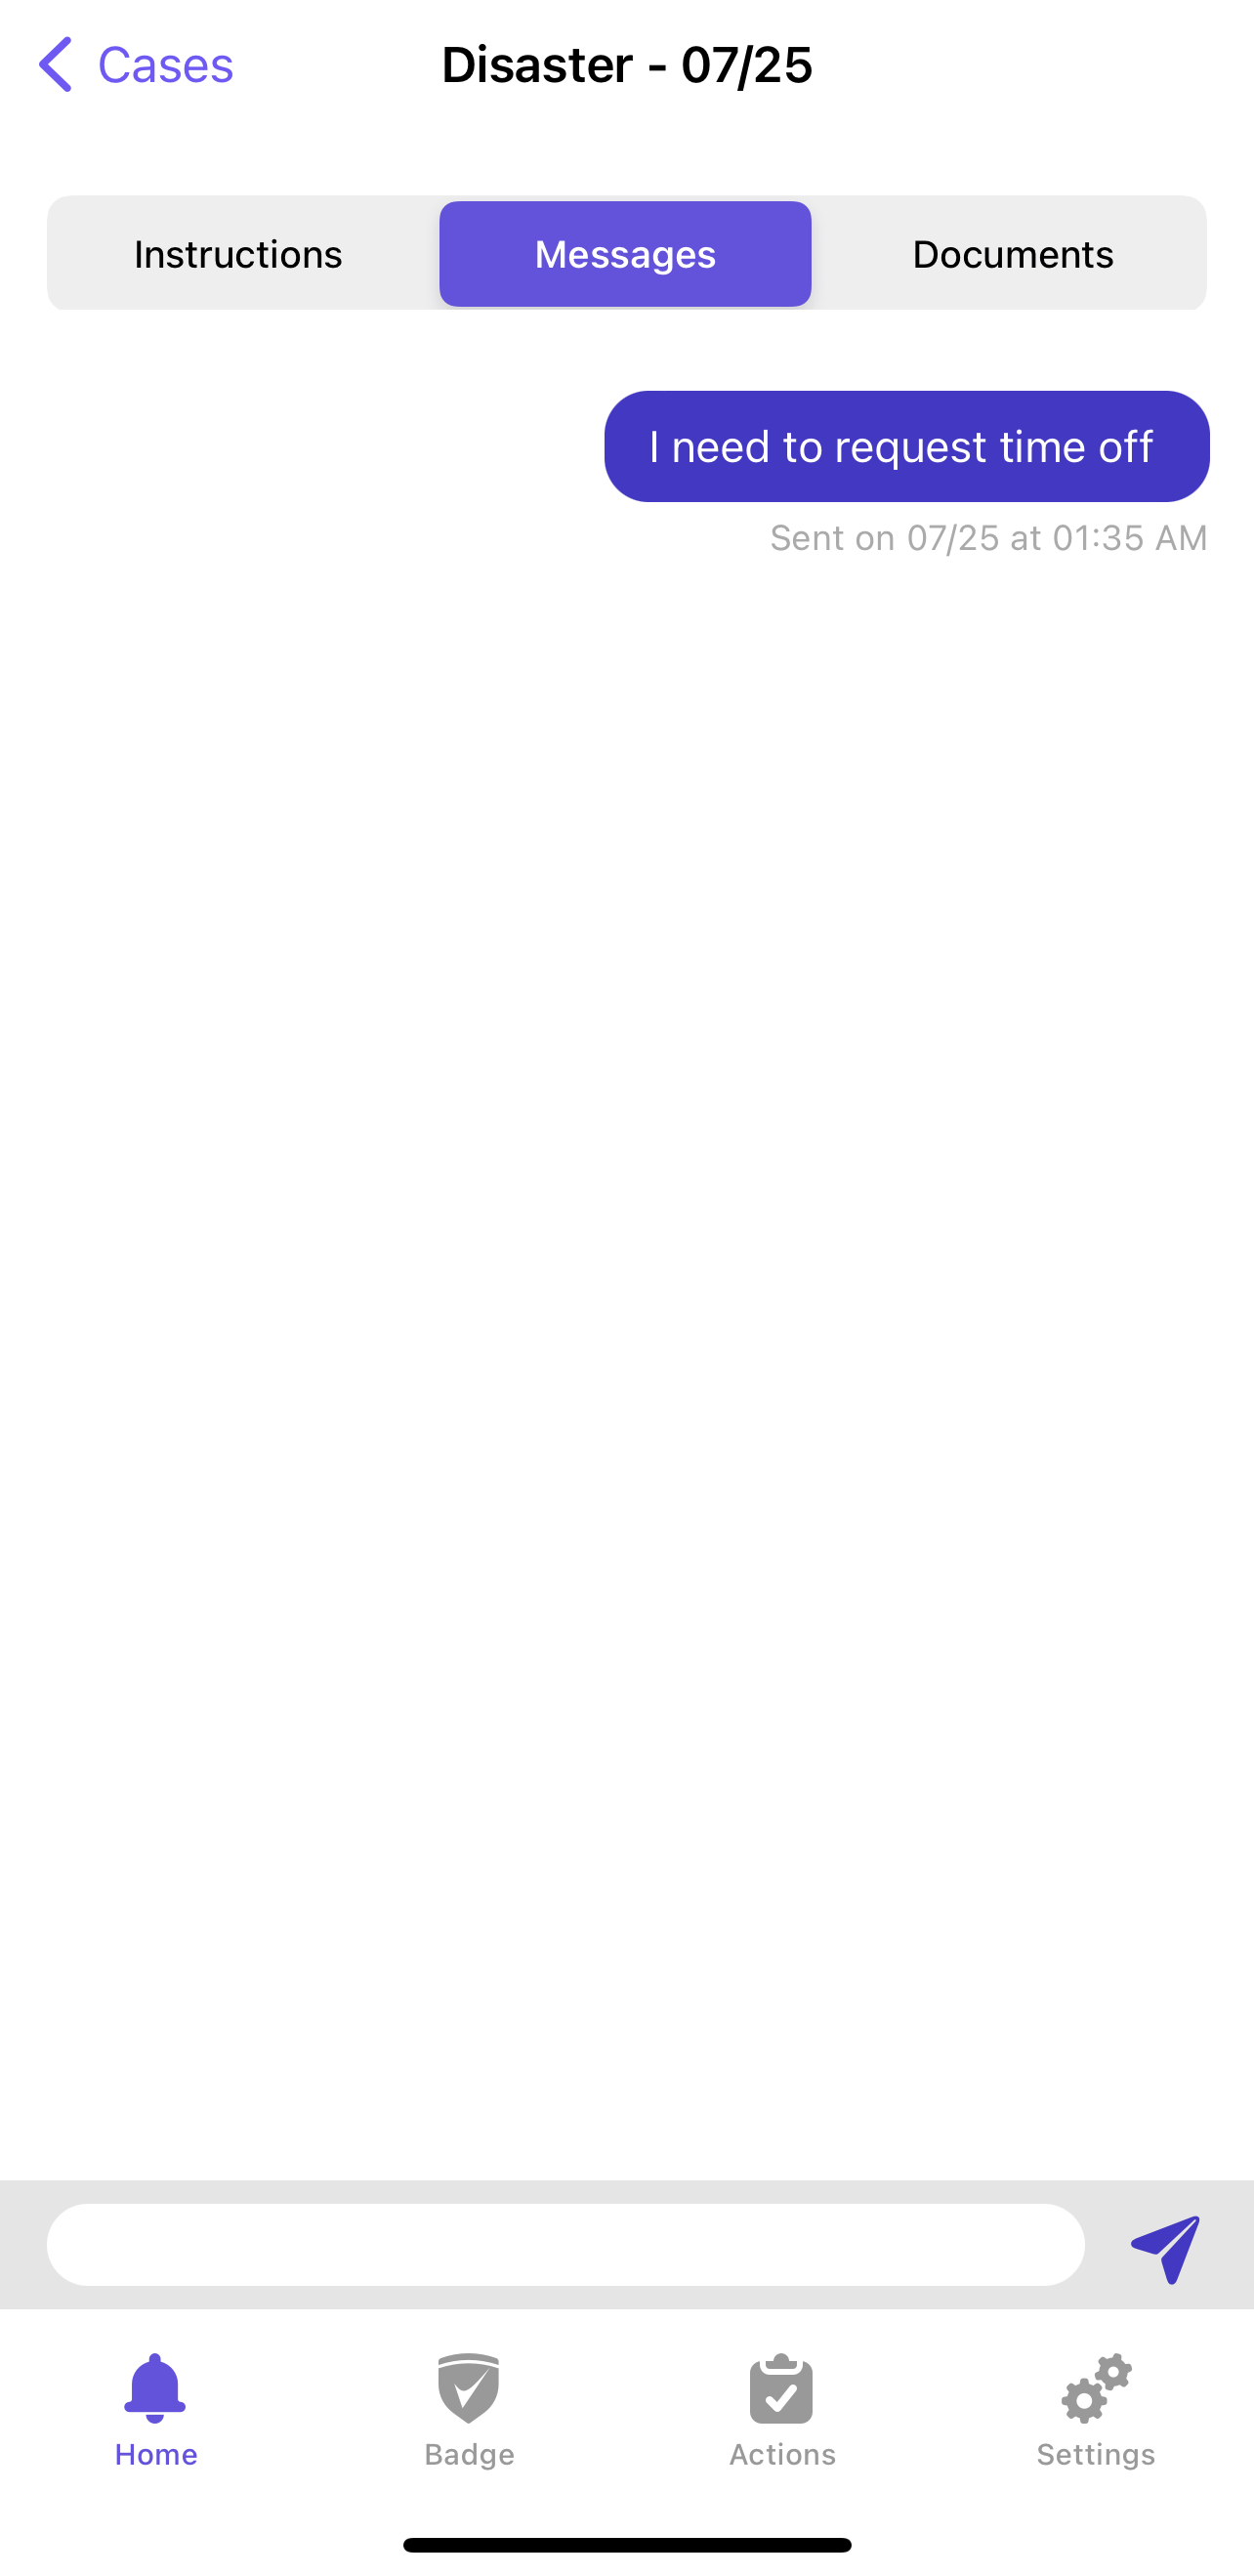
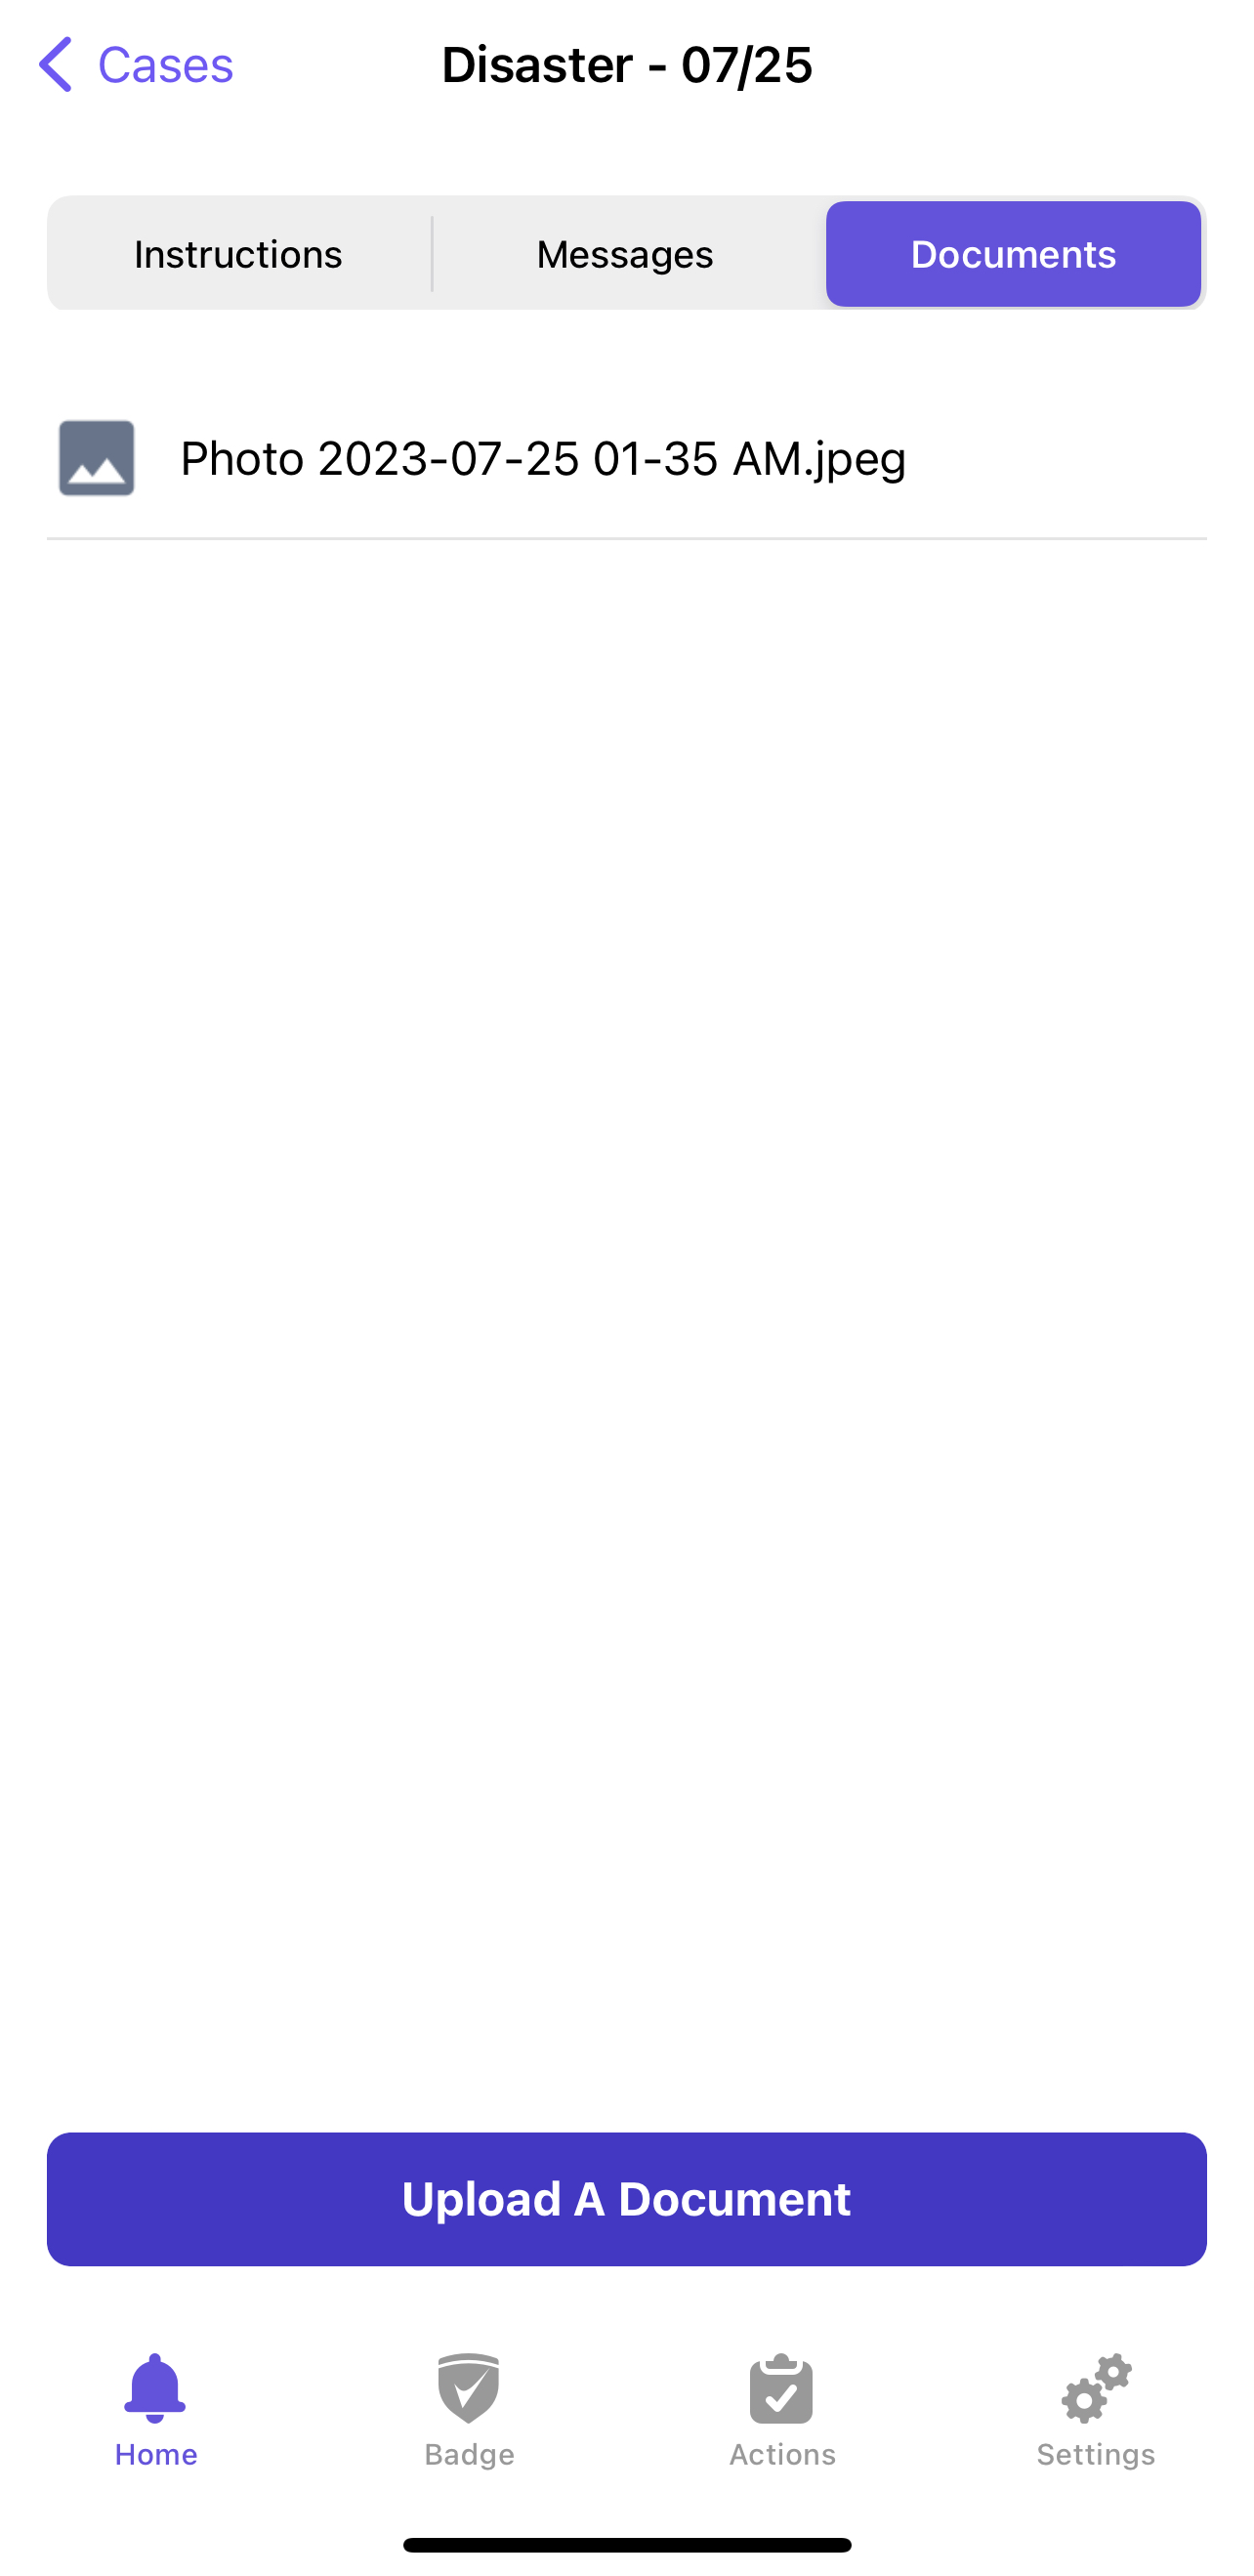
Click on the case to read the instructions provided by your organization, communicate with your support team members, and attach any required documentation.
3. Submit your Work Climate
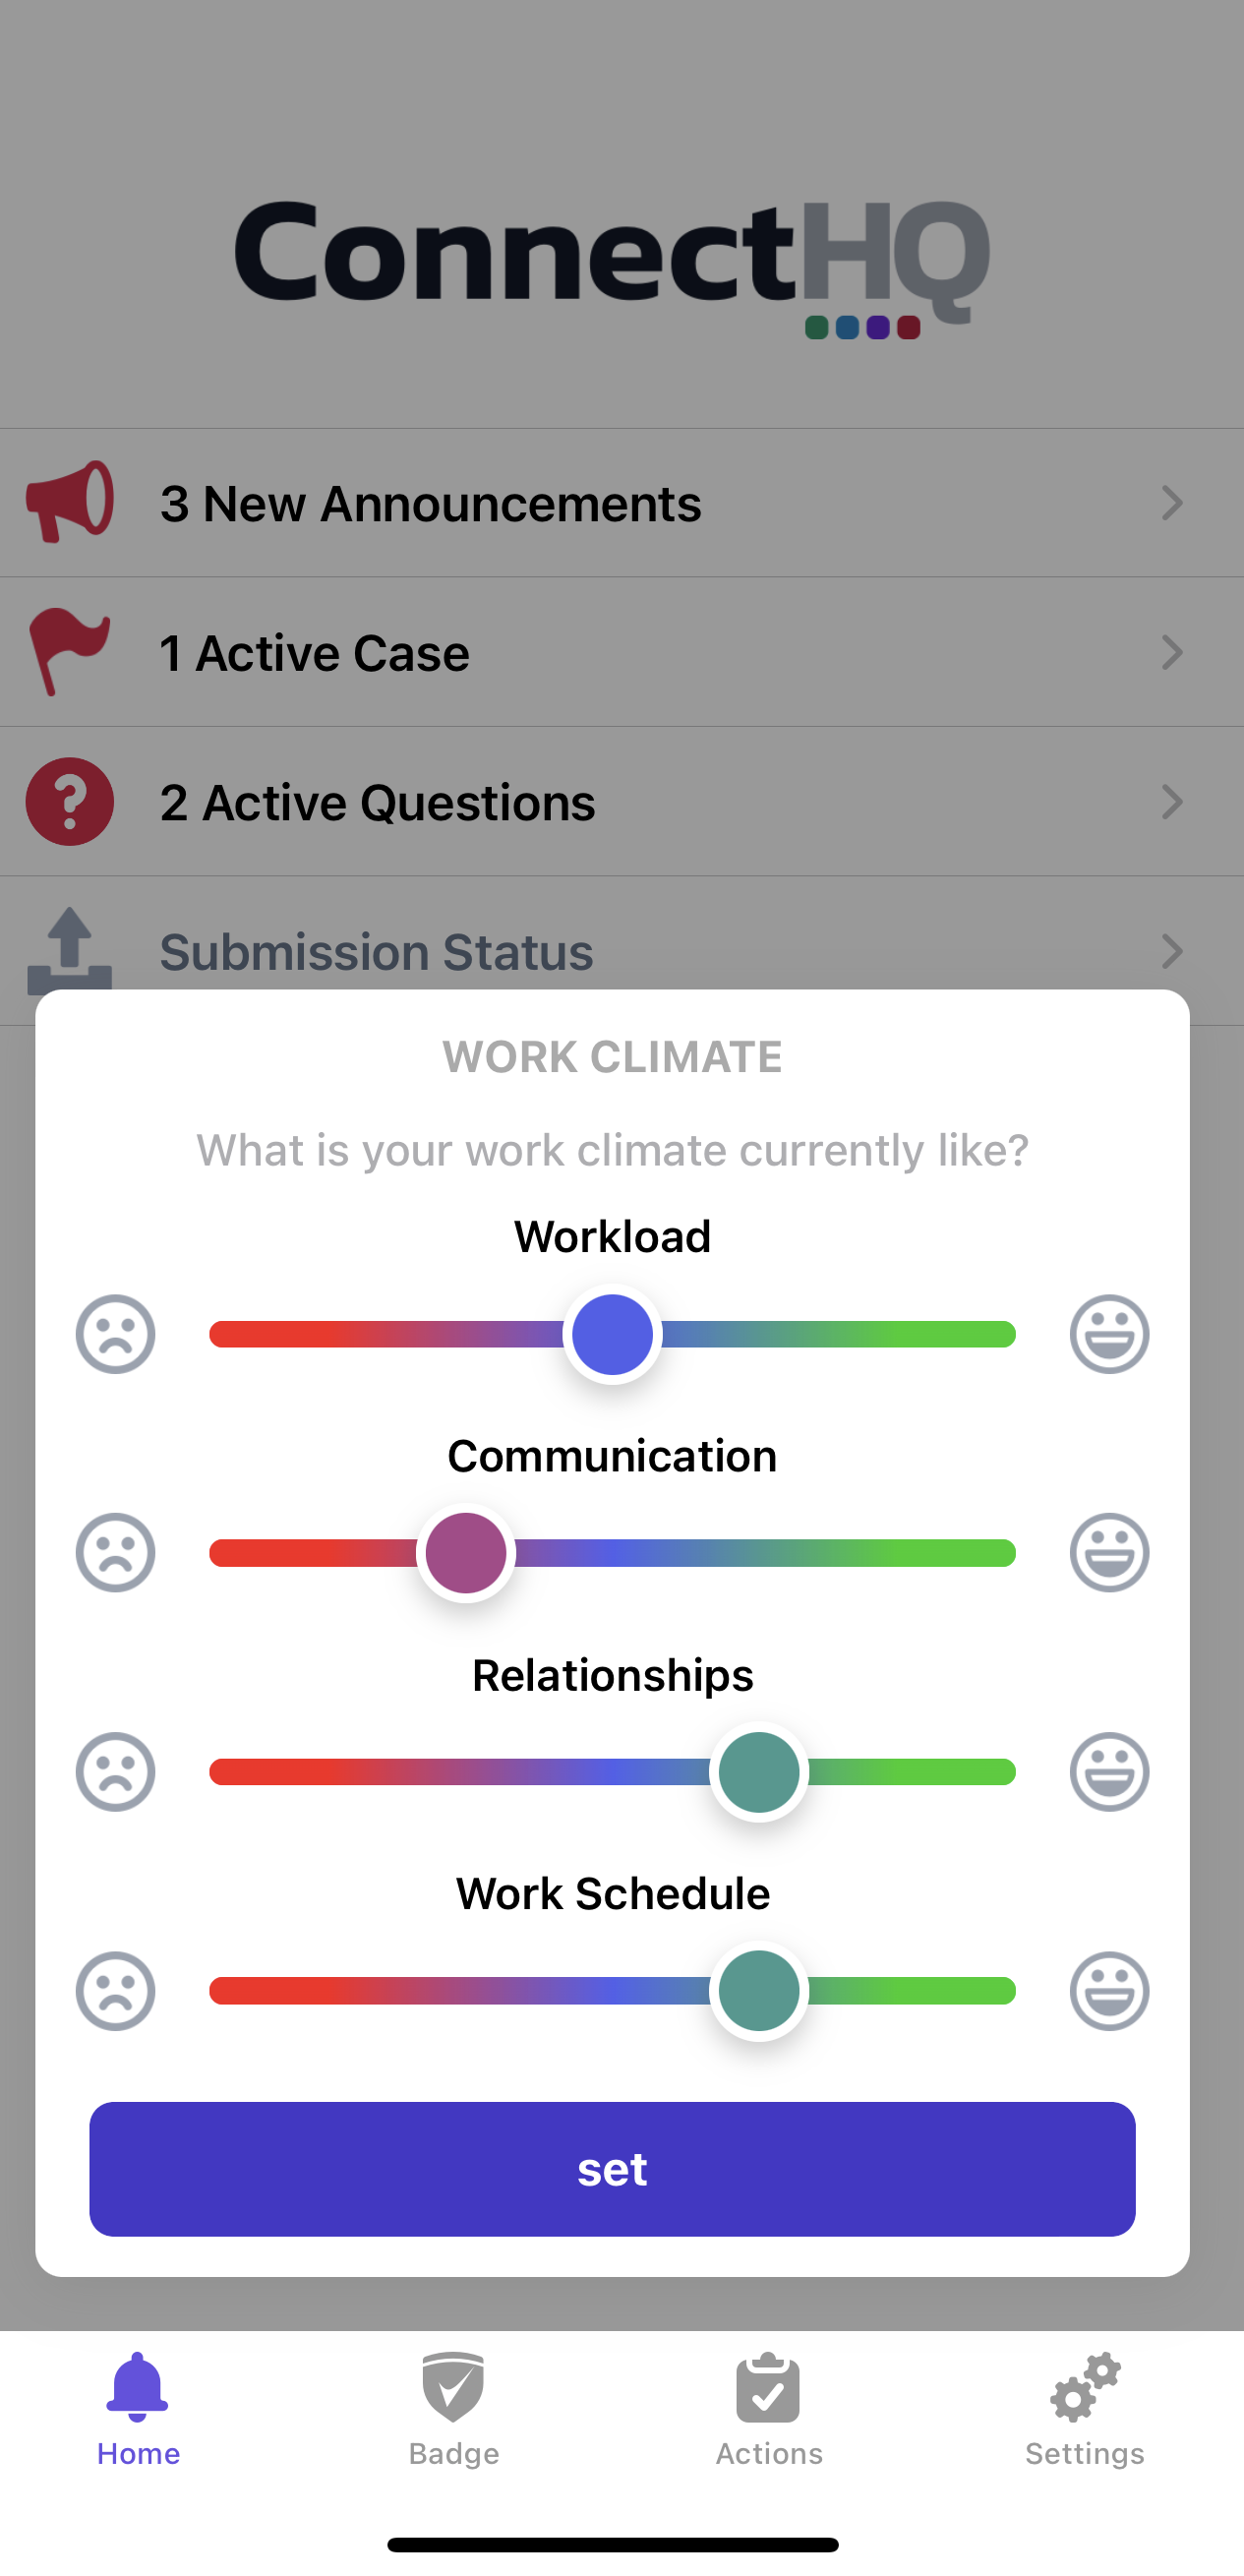
You can see the Work Climate section at the bottom of the home screen in the Connect HQ mobile App. Click on it to submit your feedback on the work environment.
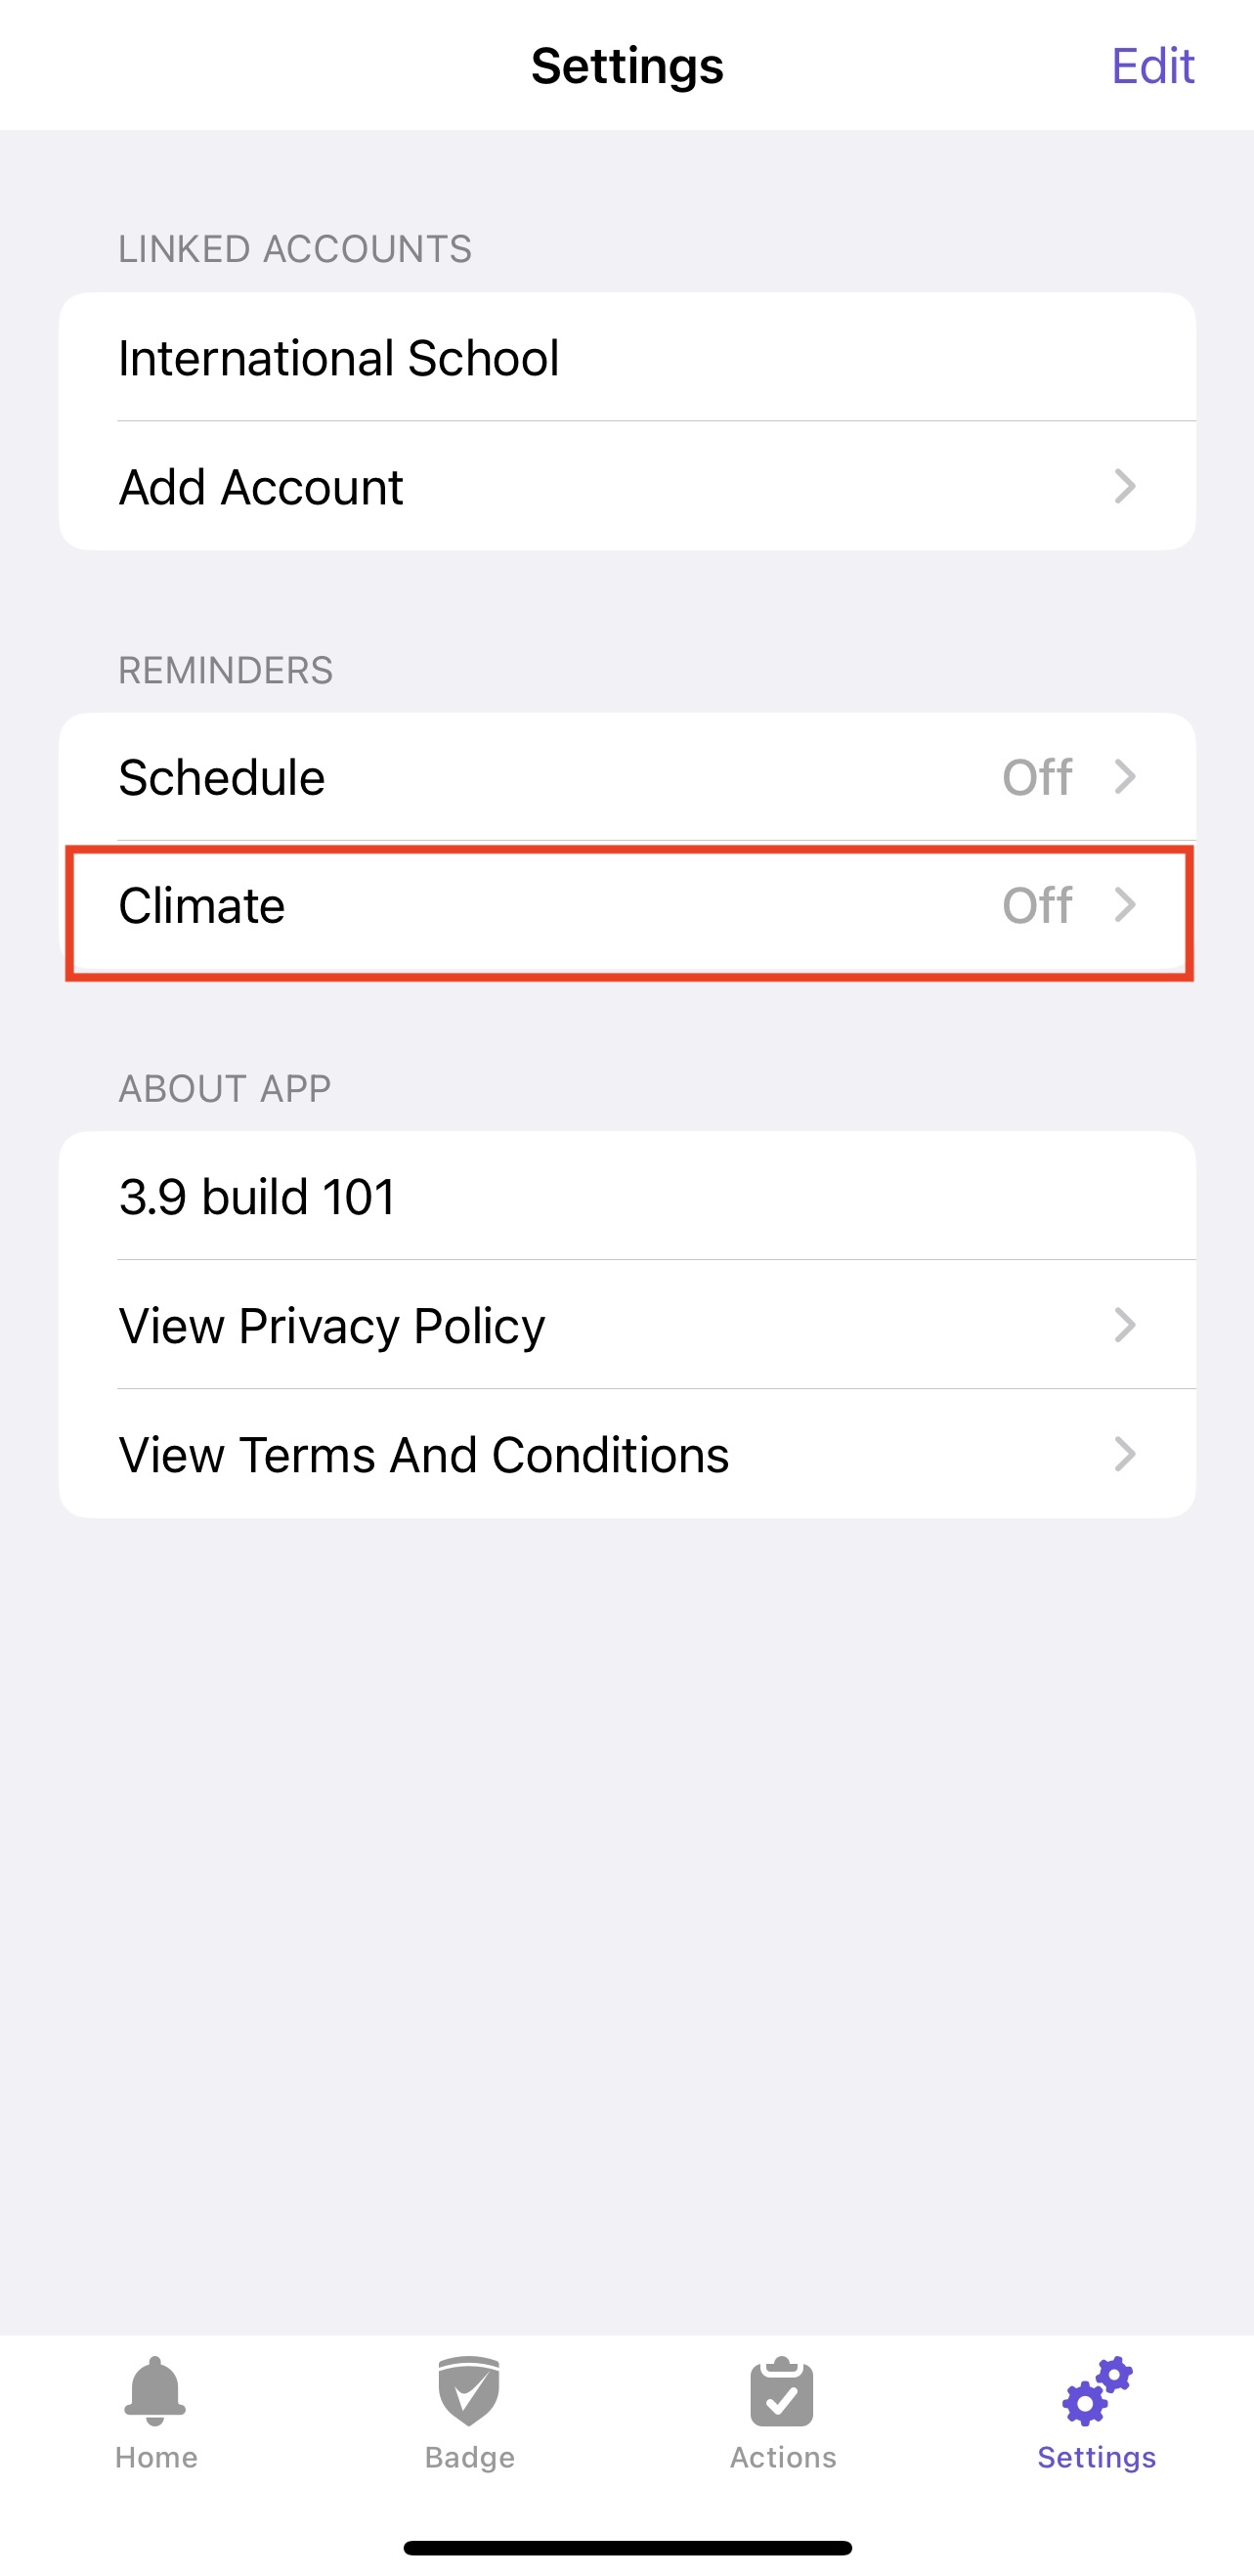
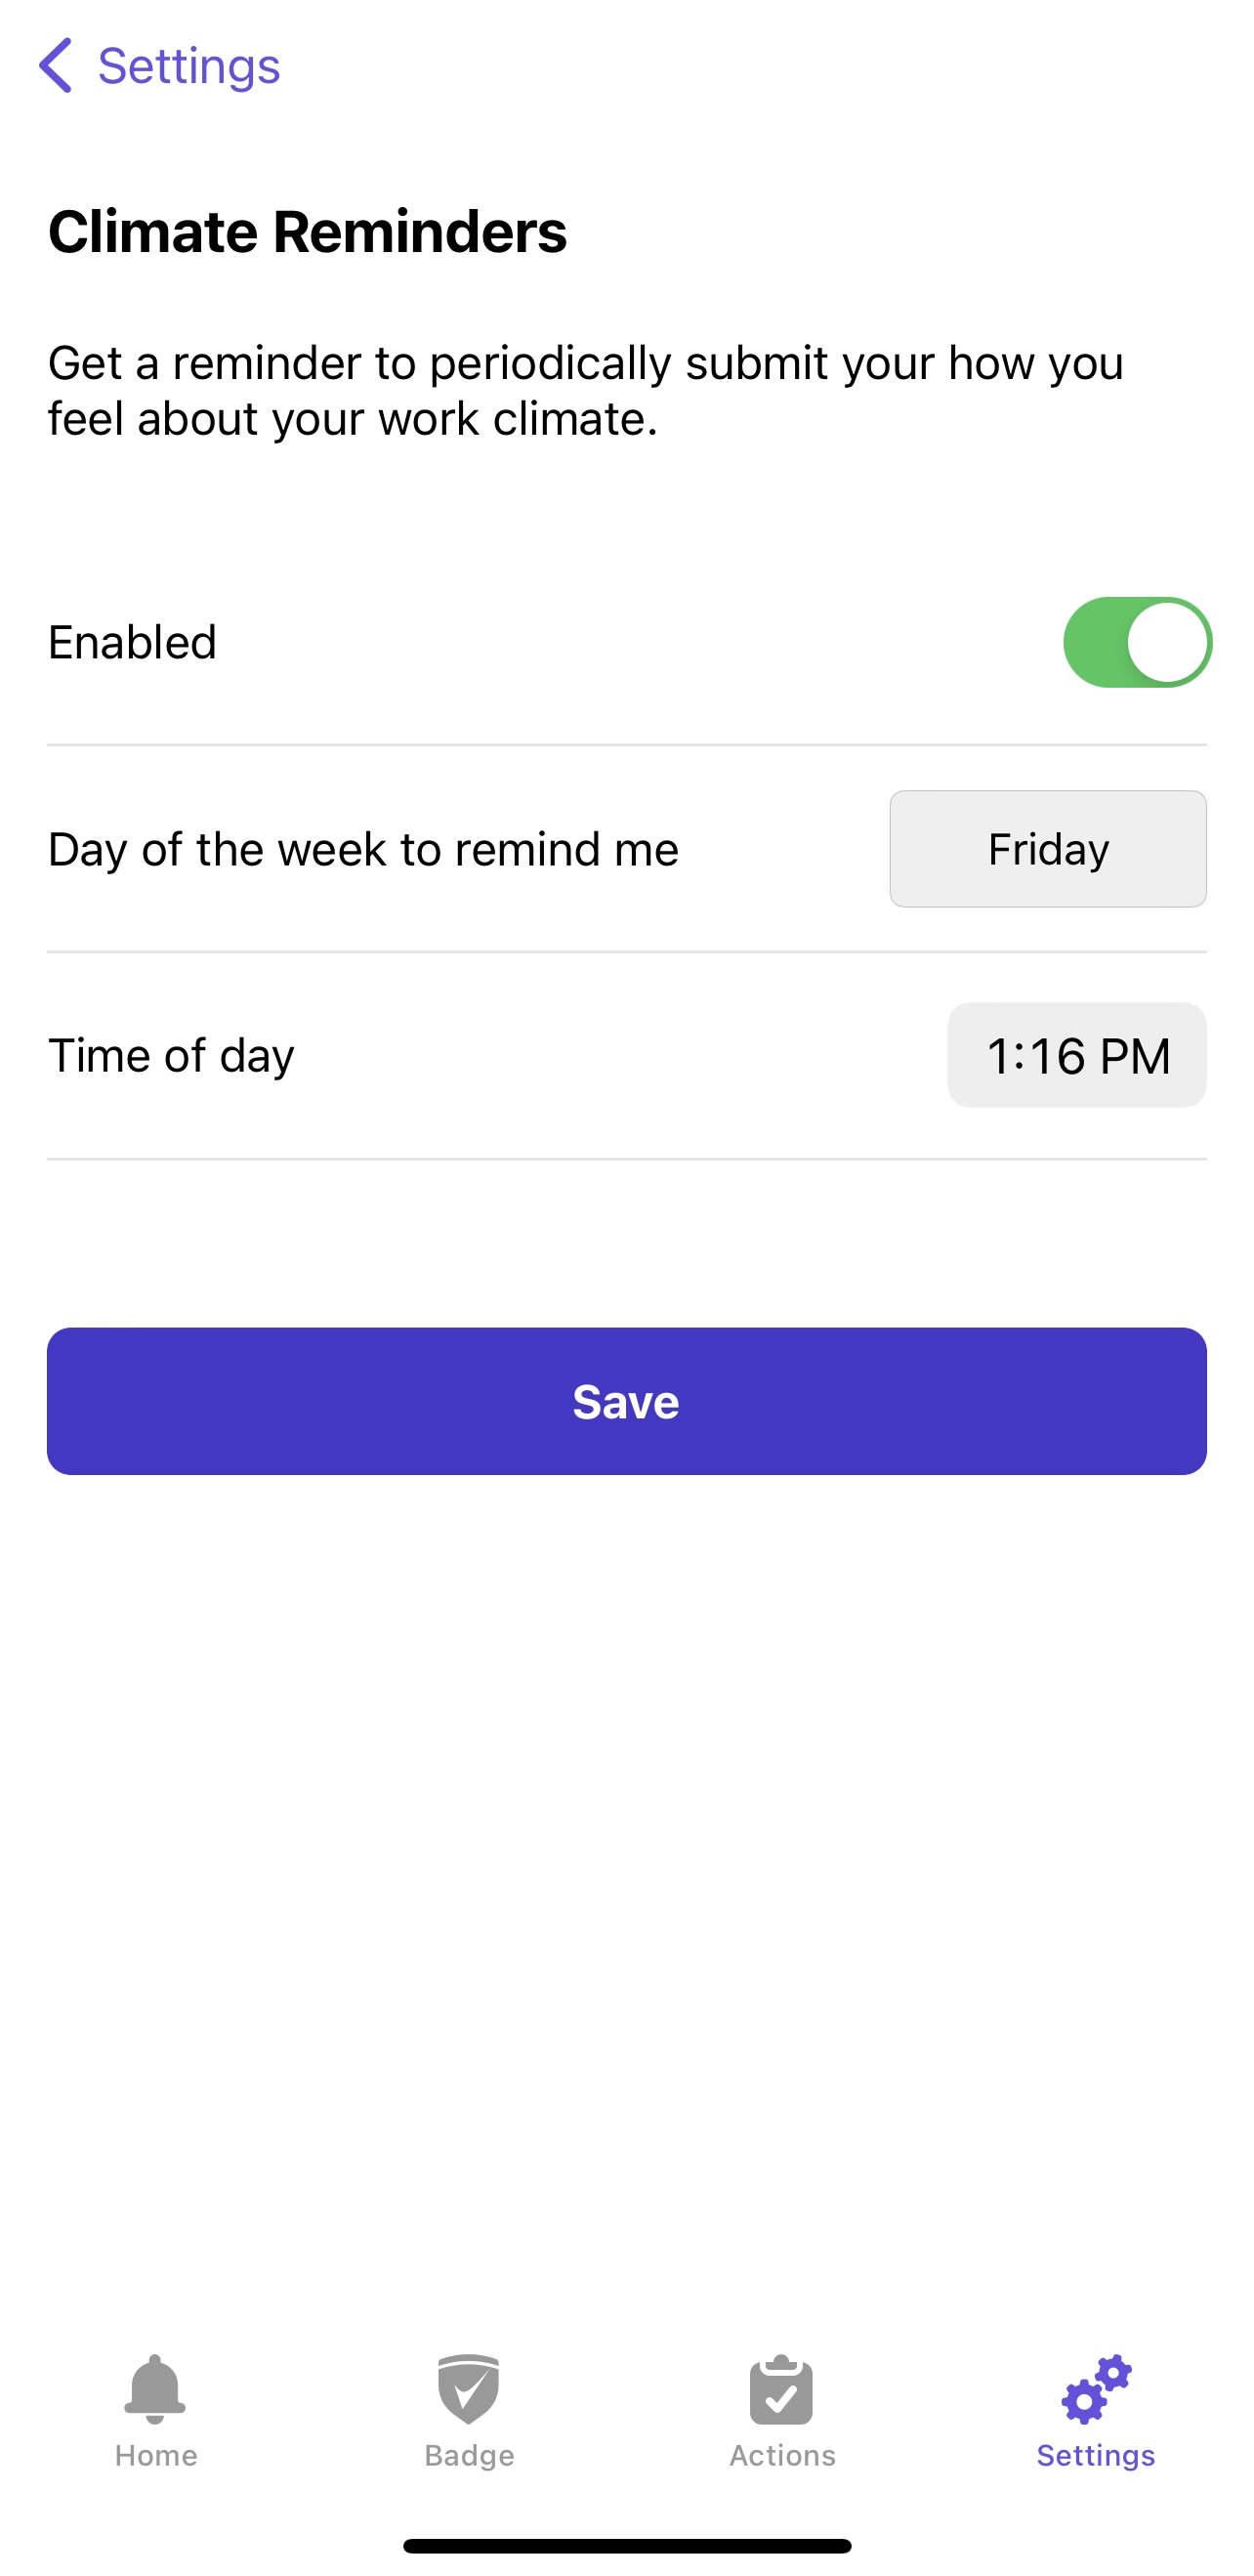
With the app's default settings, you will receive weekly reminders to submit your work climate feedback on Wednesday at 10 AM local time. Navigate to Settings > Climate to adjust these settings.
4. Review Submission Status
Here you can check the status of your recent submissions for reservations, time-off requests, test results, and vaccination documents.
5. Make Reservations
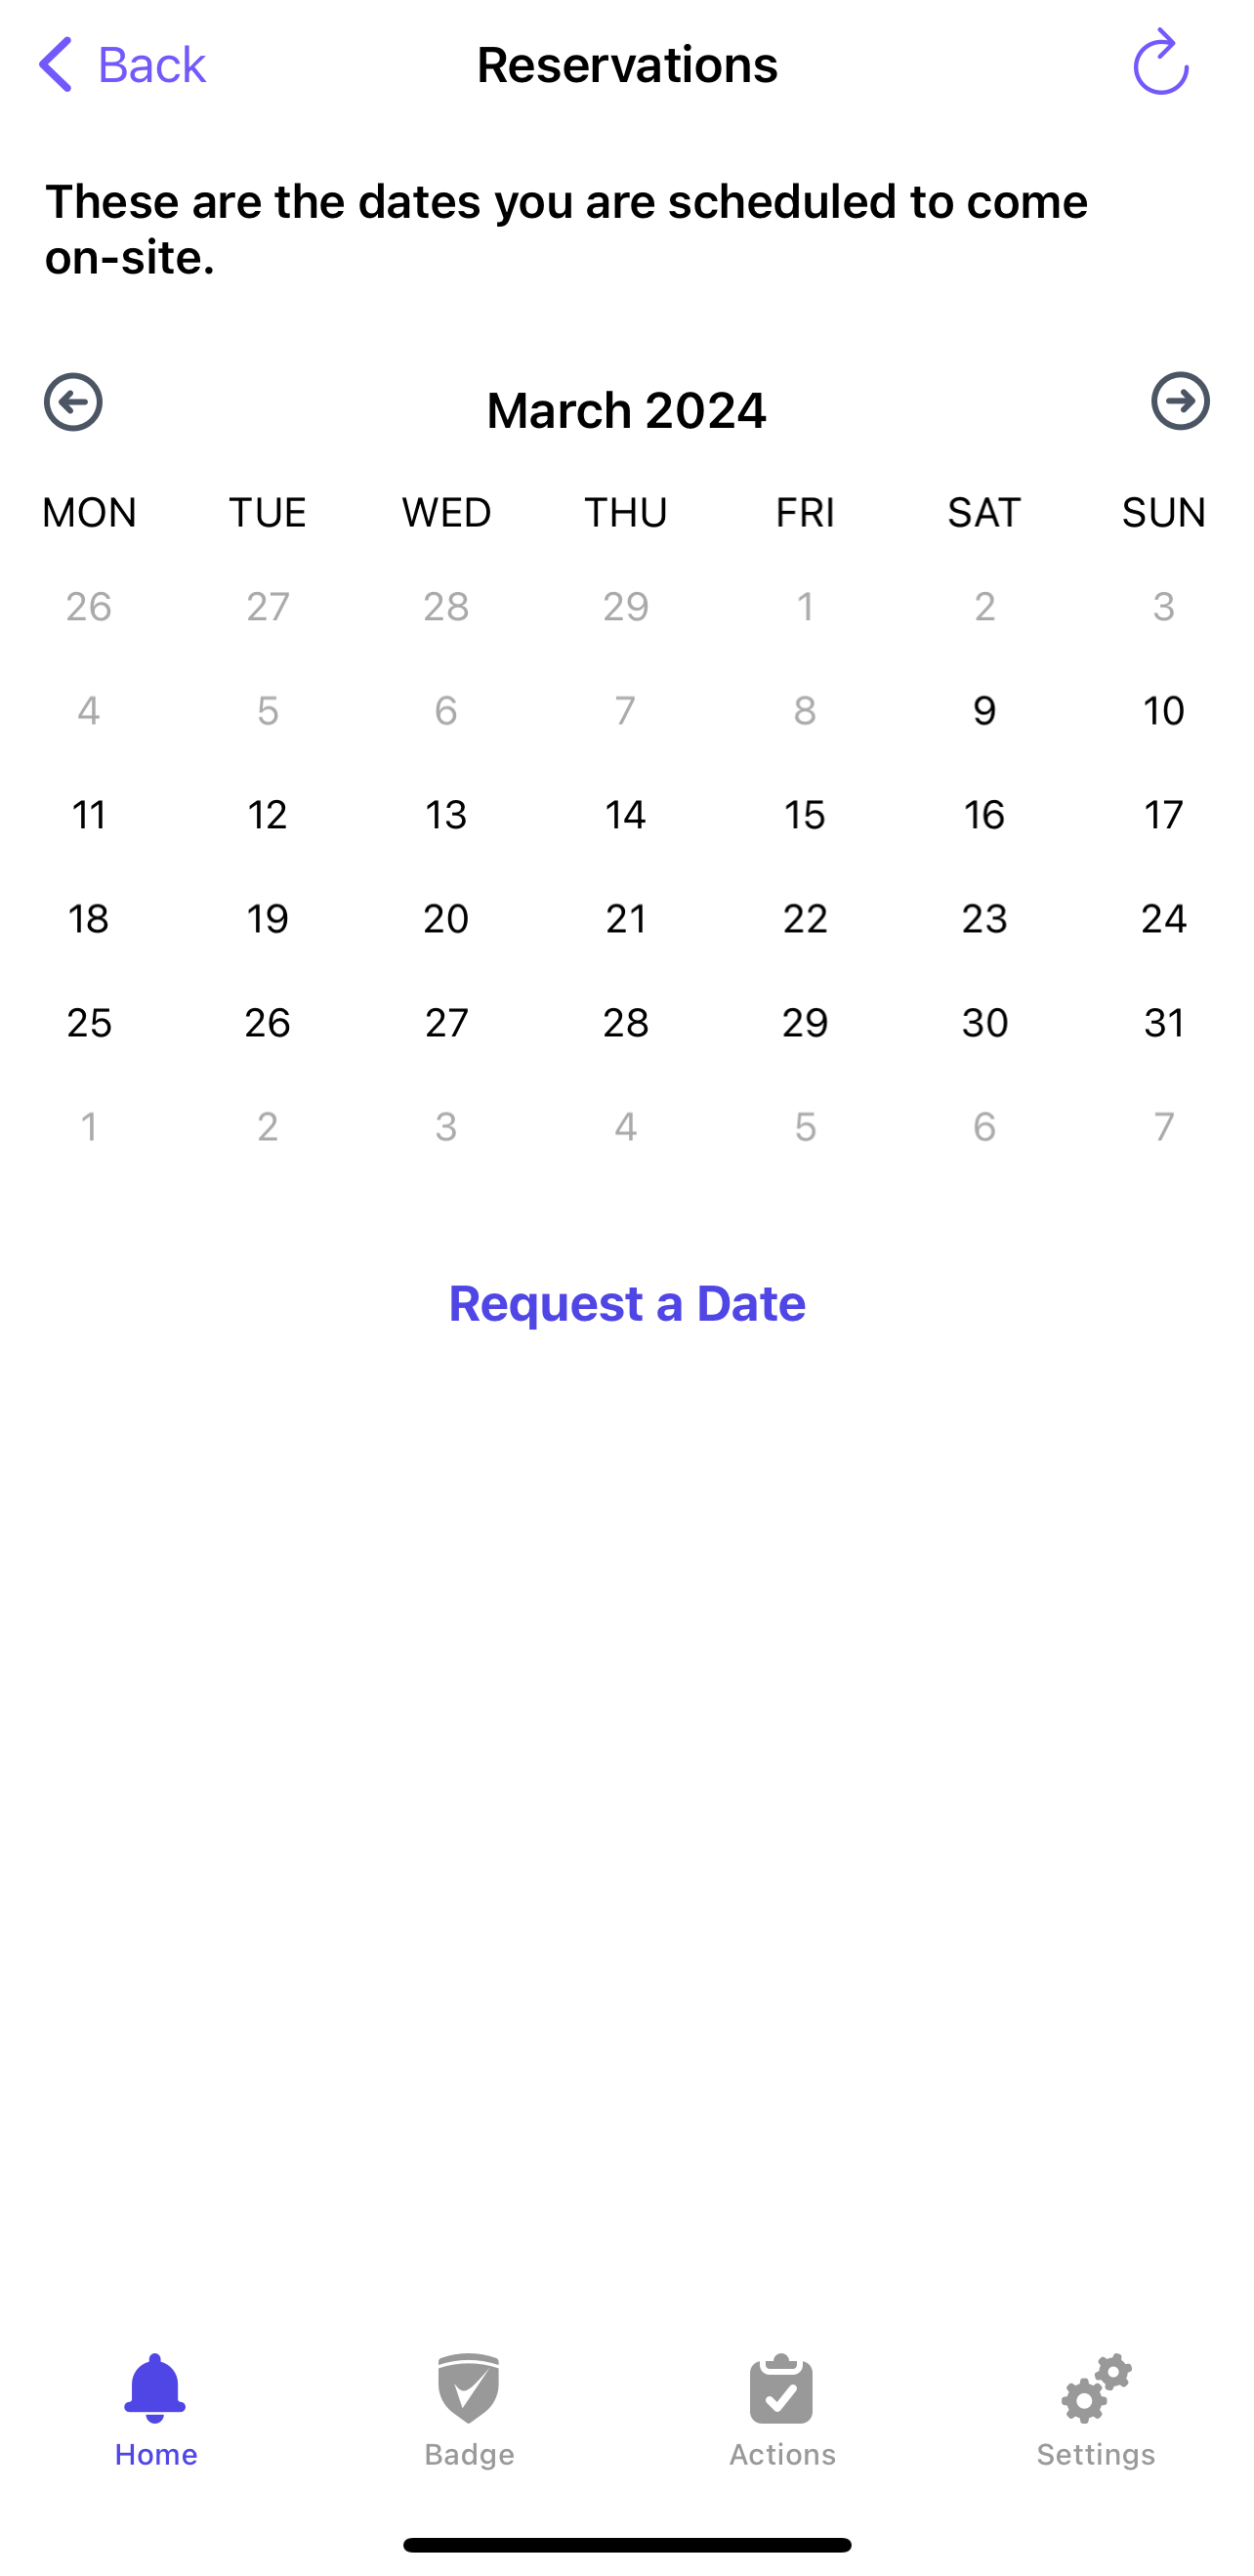
If your organization is using hybrid office areas that require a reservation, you can do so in a simple process. You can submit a reservation by tapping on the Green "Reservations" button.
From there, the user will see a calendar of the dates with reservations, and then select "Request a Date" to begin making a reservation.
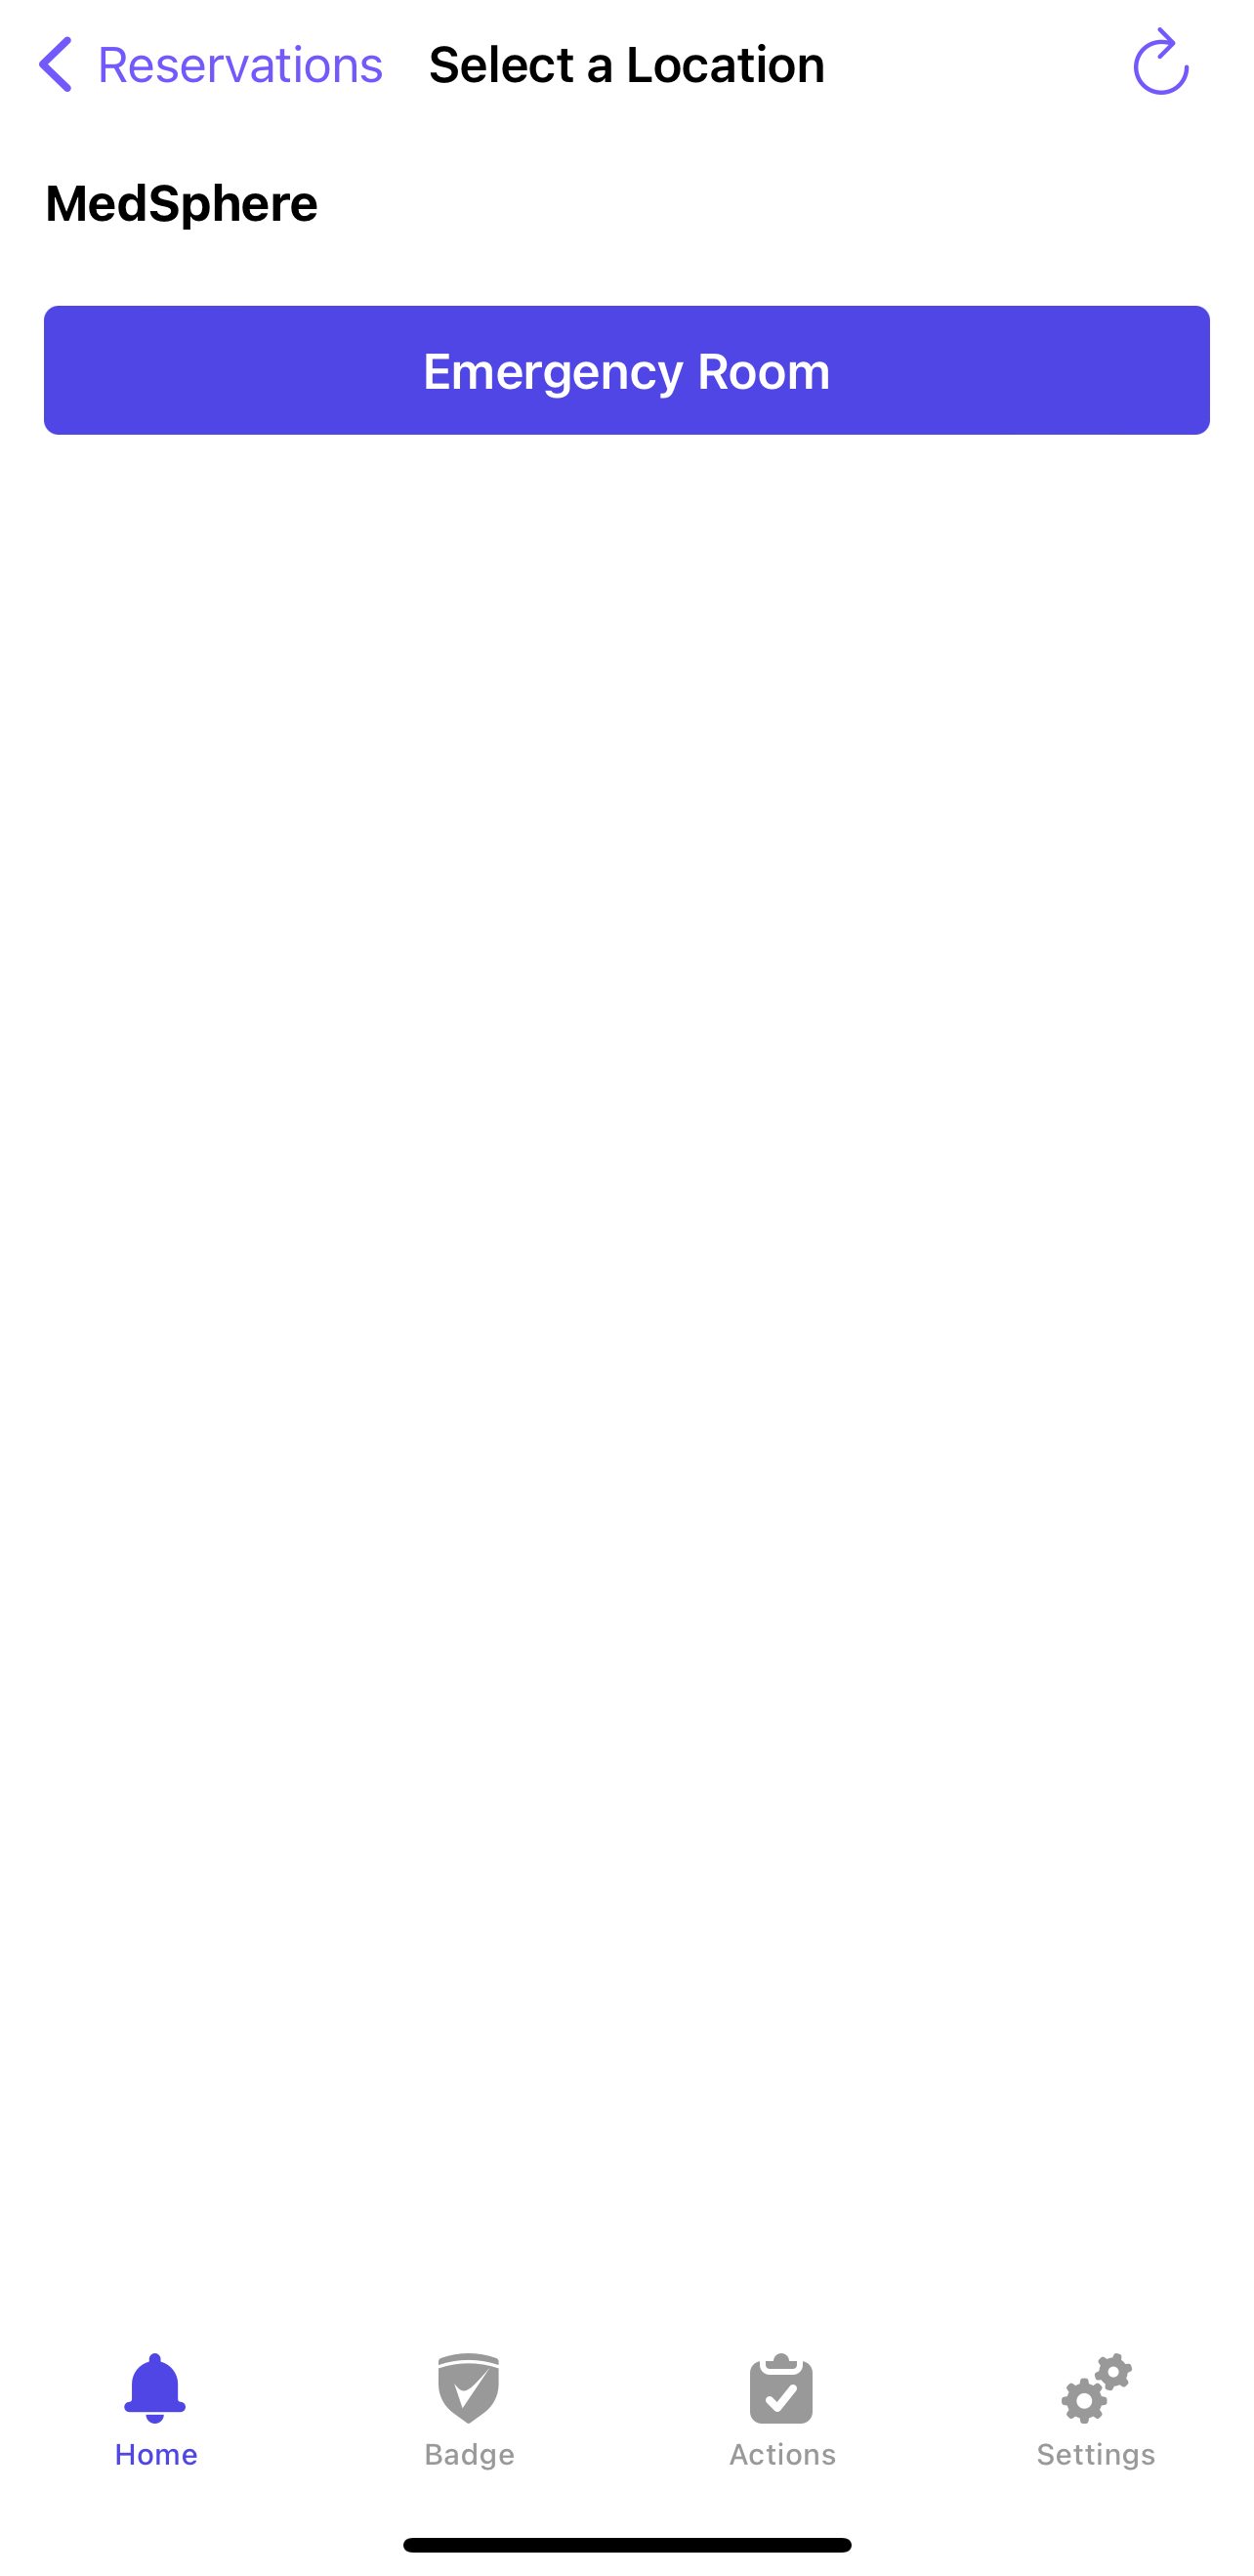
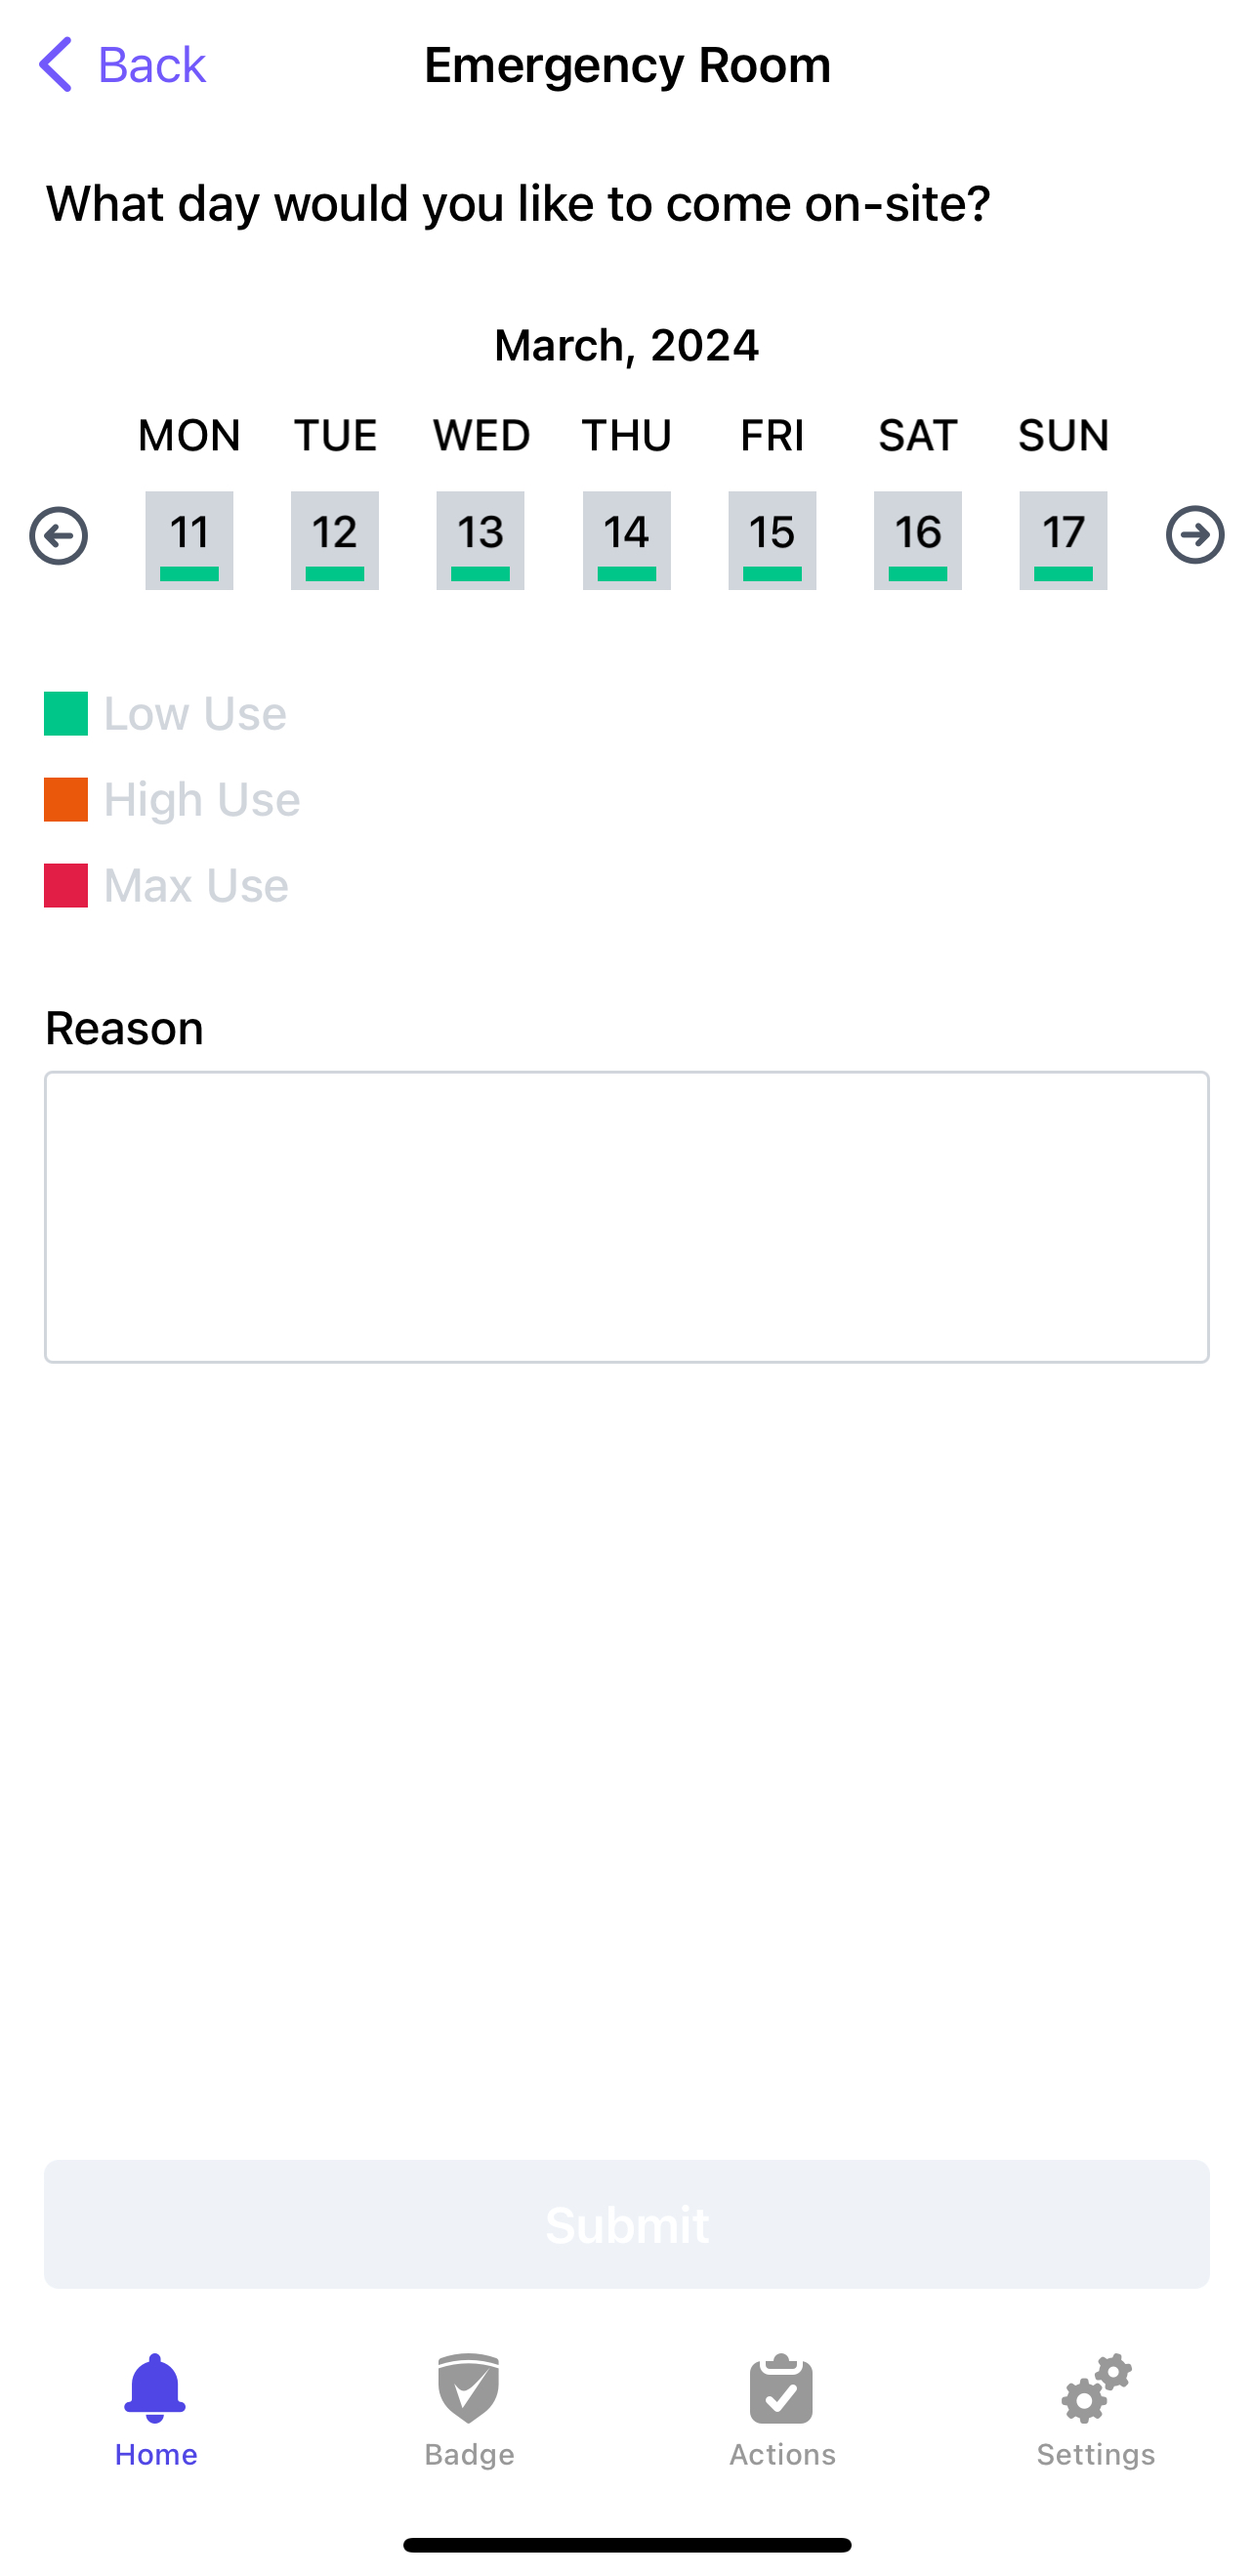
Next, you can select the location you would like to make a reservation for and select the date you would like to come on-site, as well as a short description of the reason you are making this reservation.
As indicated by the colored bar under the date number, you will be able to see what days are expecting low/high/max numbers of people.
** **
**
The reservation can then be accepted or rejected, and the user will be notified.
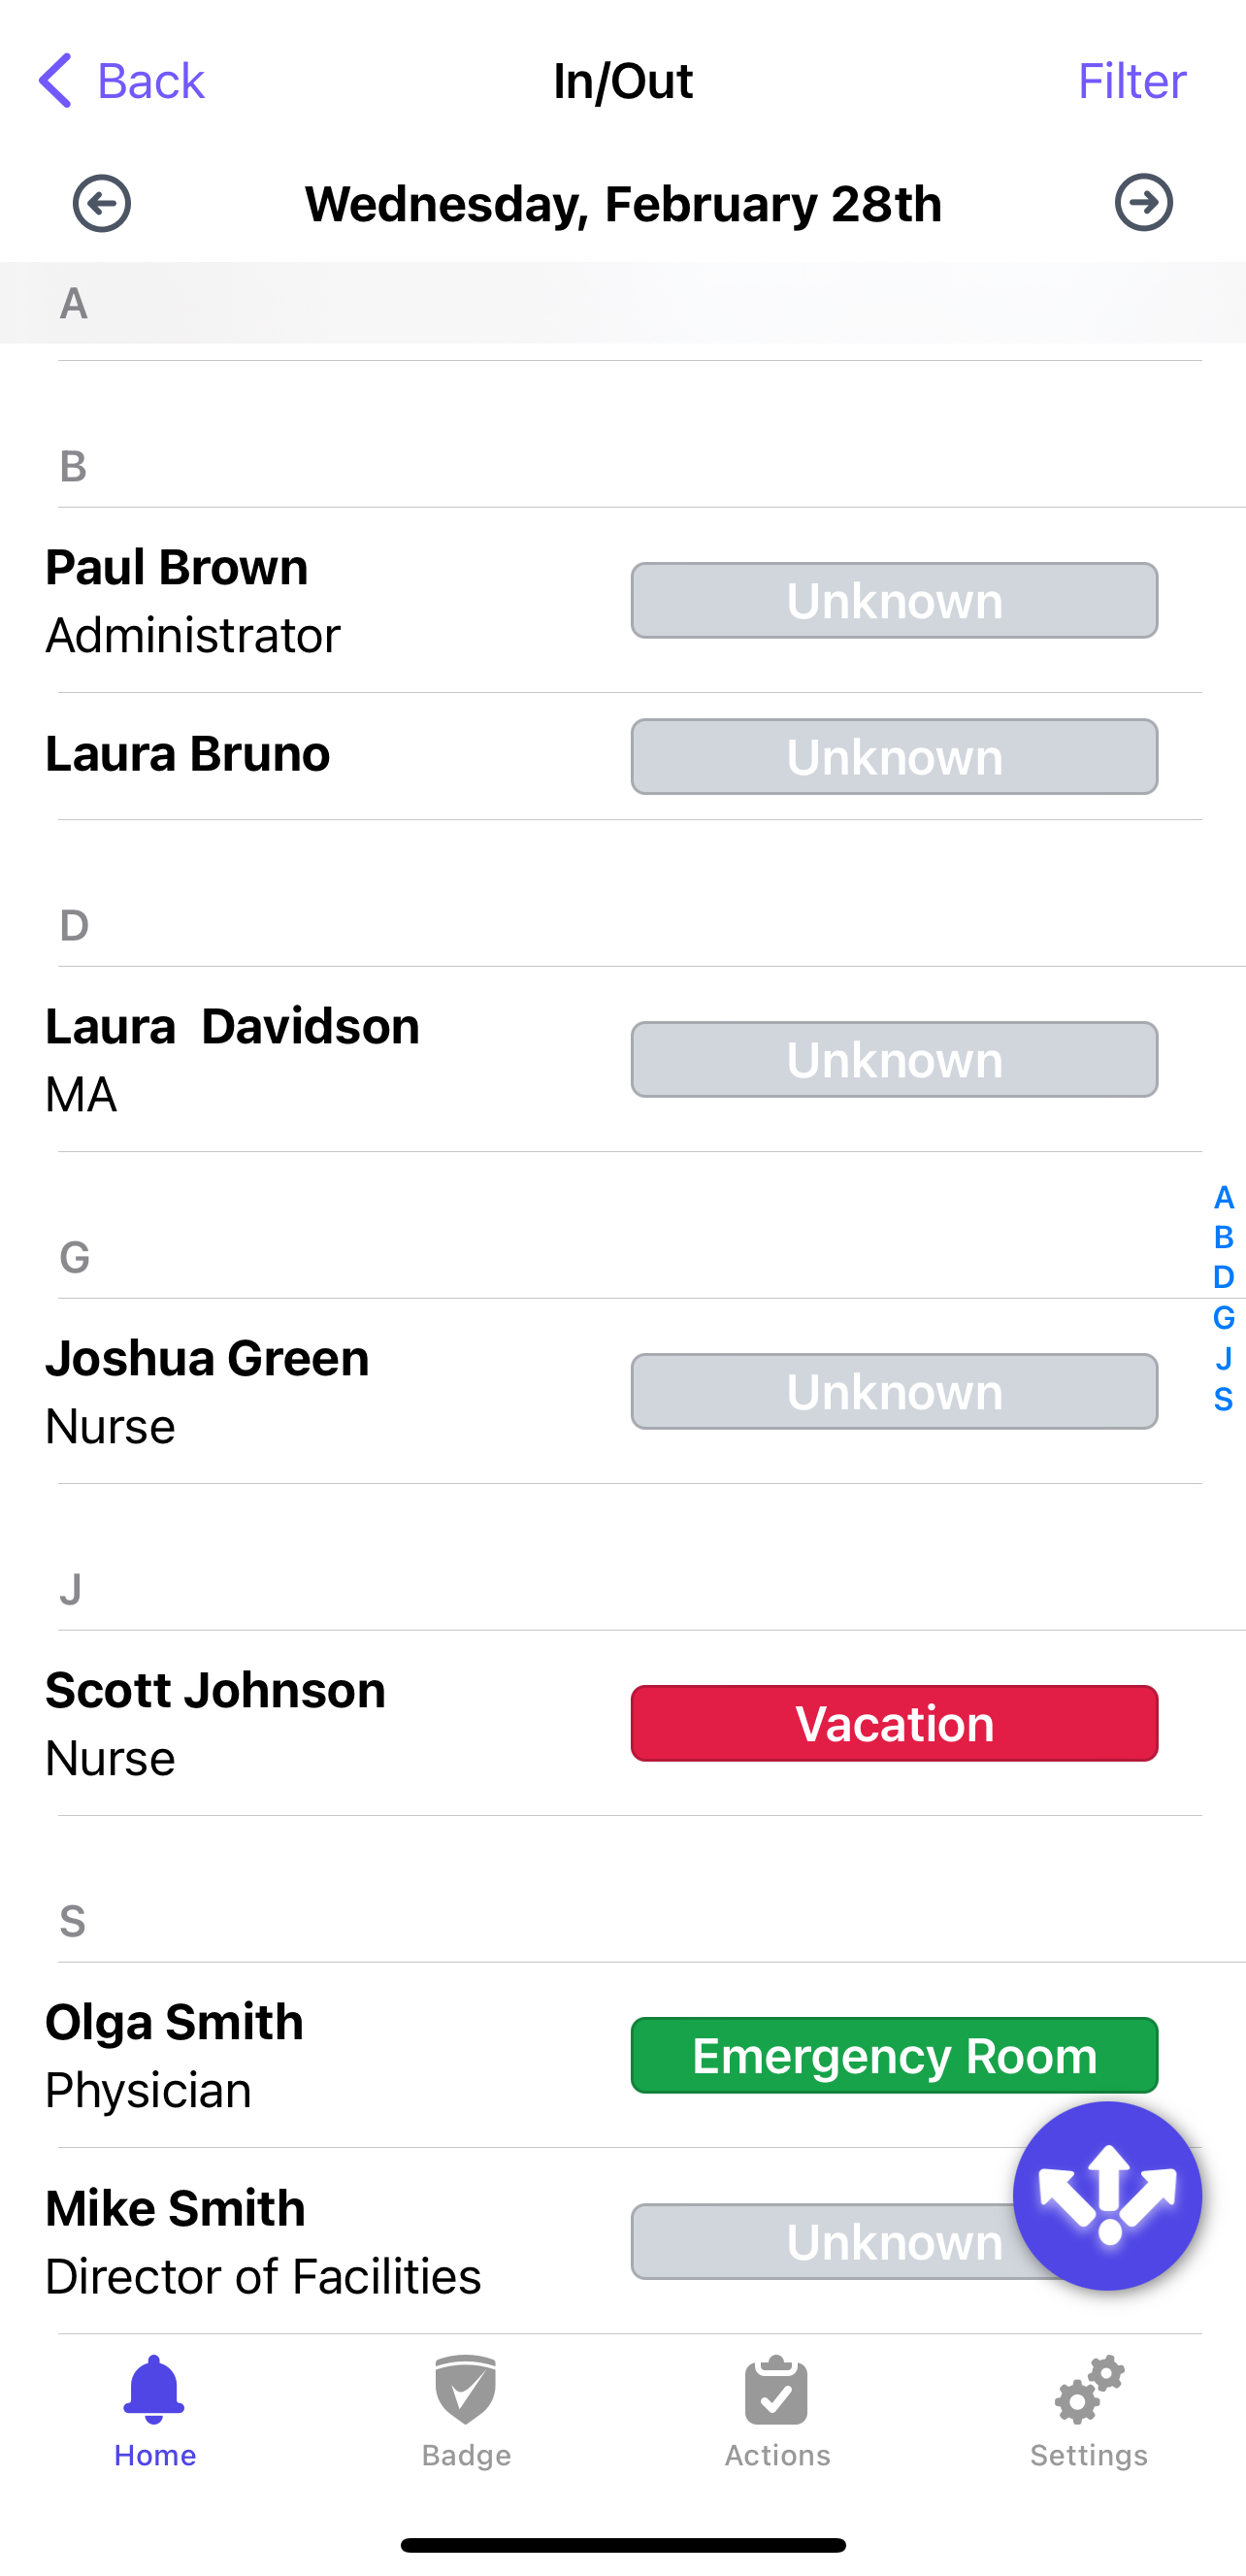
6. Set your work intent with Who's In/Out?
Use the Who's In/Out feature to let your team know if you'll be on-site, working remotely, or off work. You can also see their intended work schedule.
By pressing the purple icon with three arrows, you can submit your locality for a specific day.
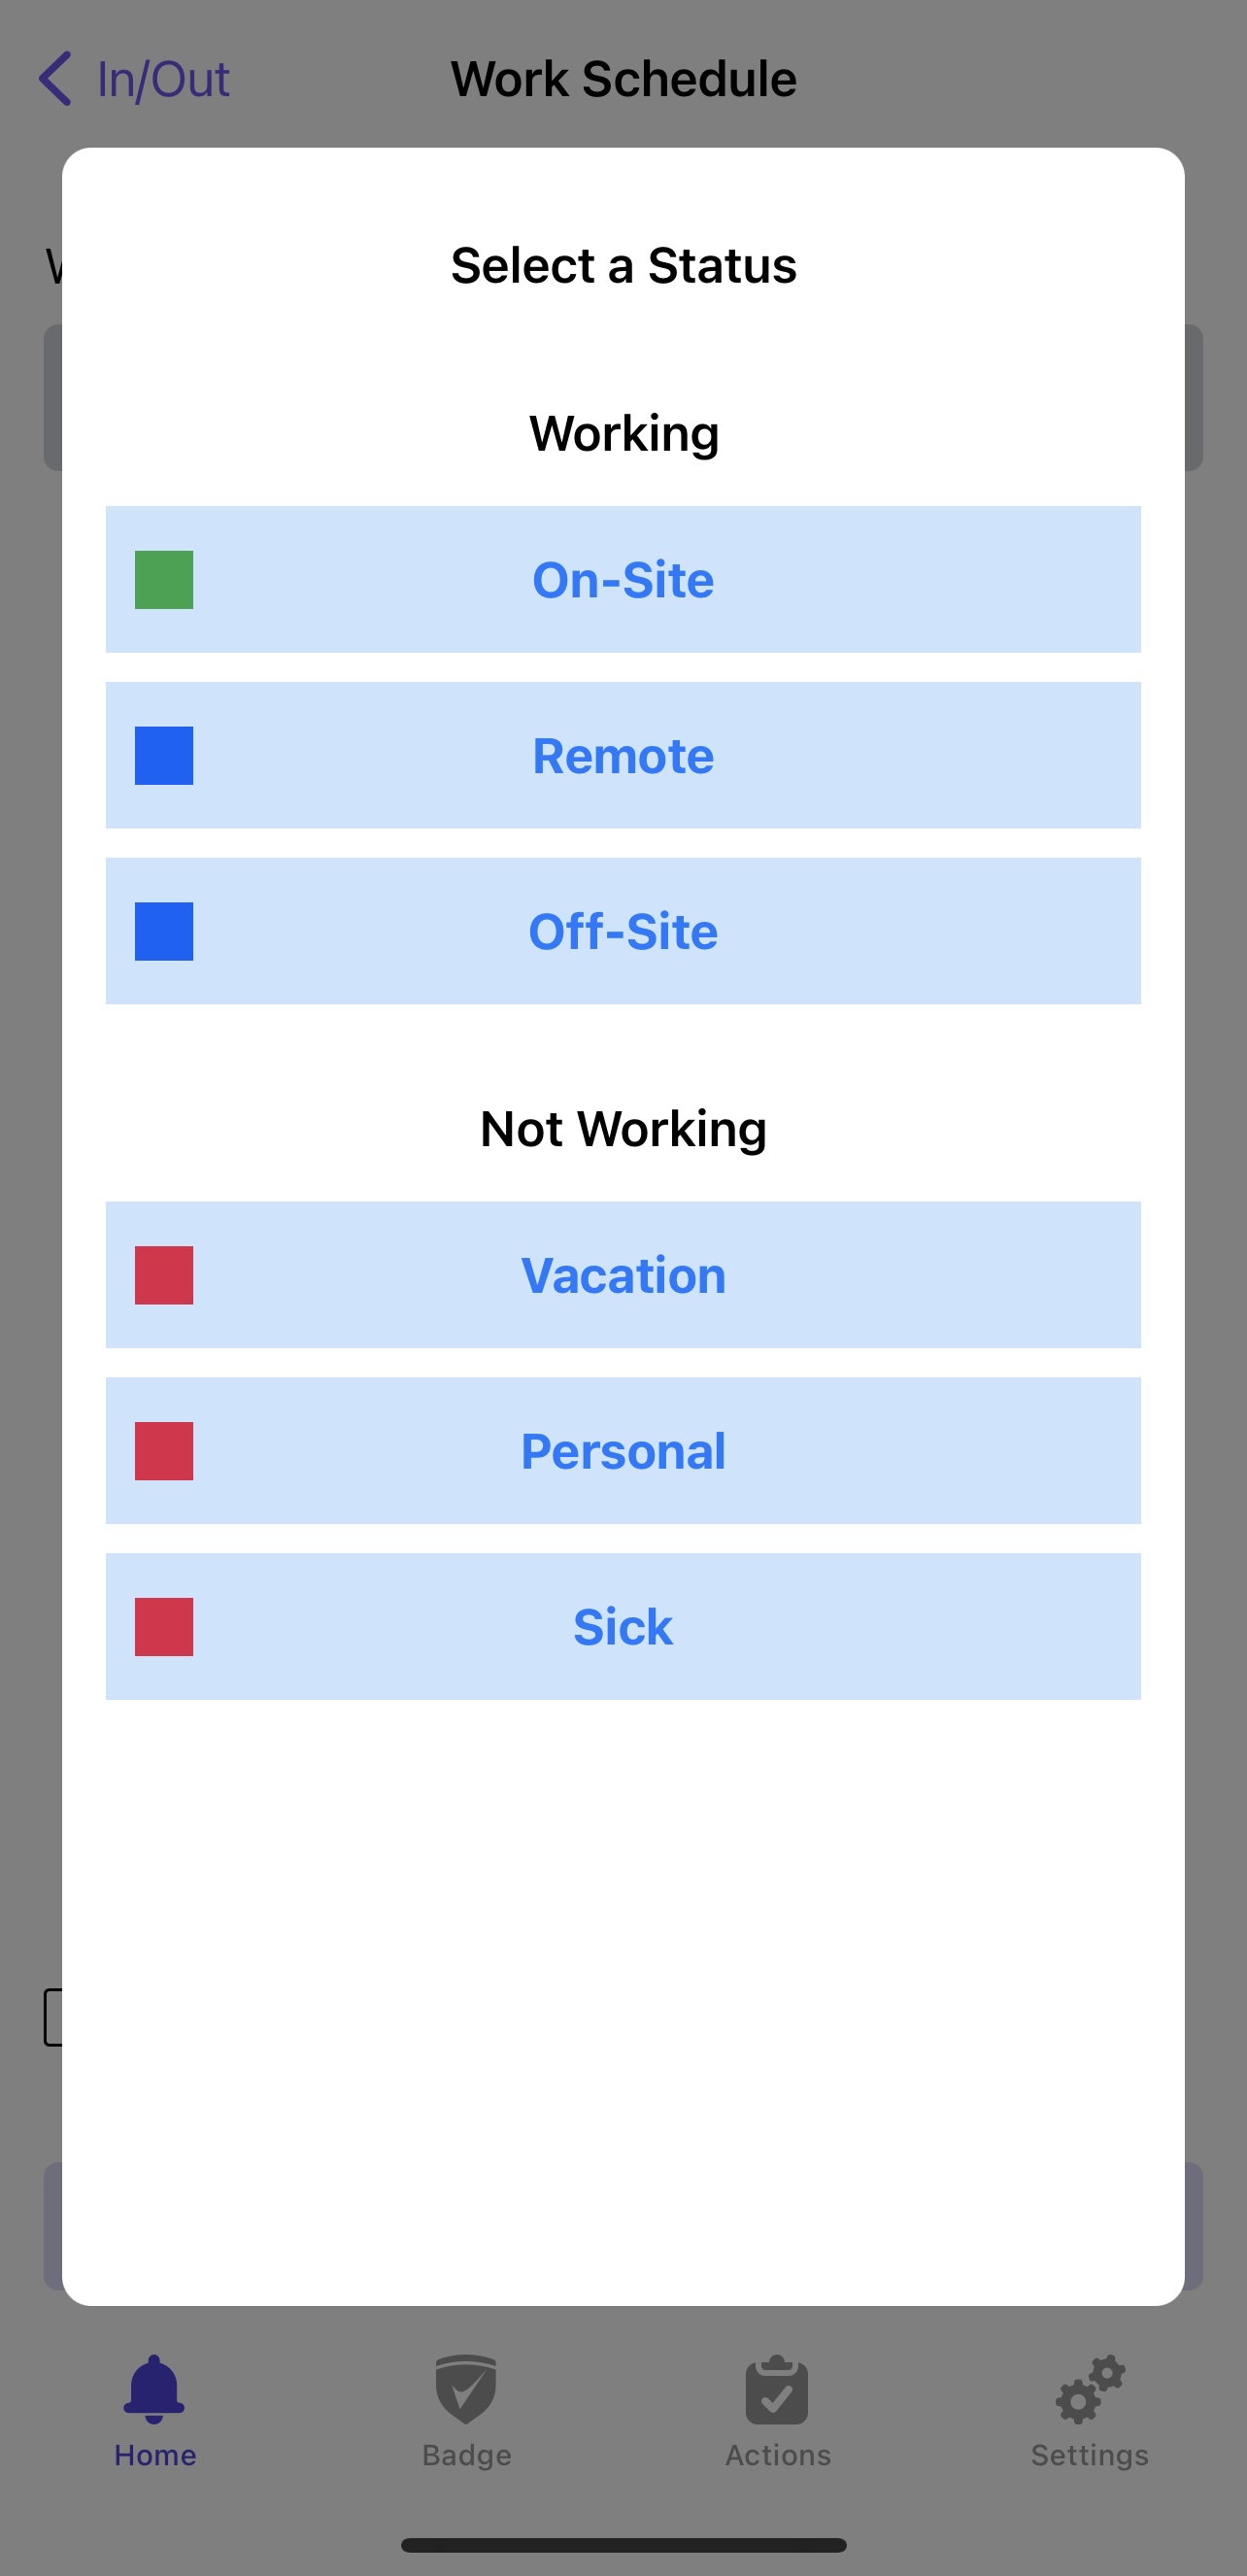
First, you will be asked how and where you will be working, and by pressing "Select," you can choose from Working and Not Working options.
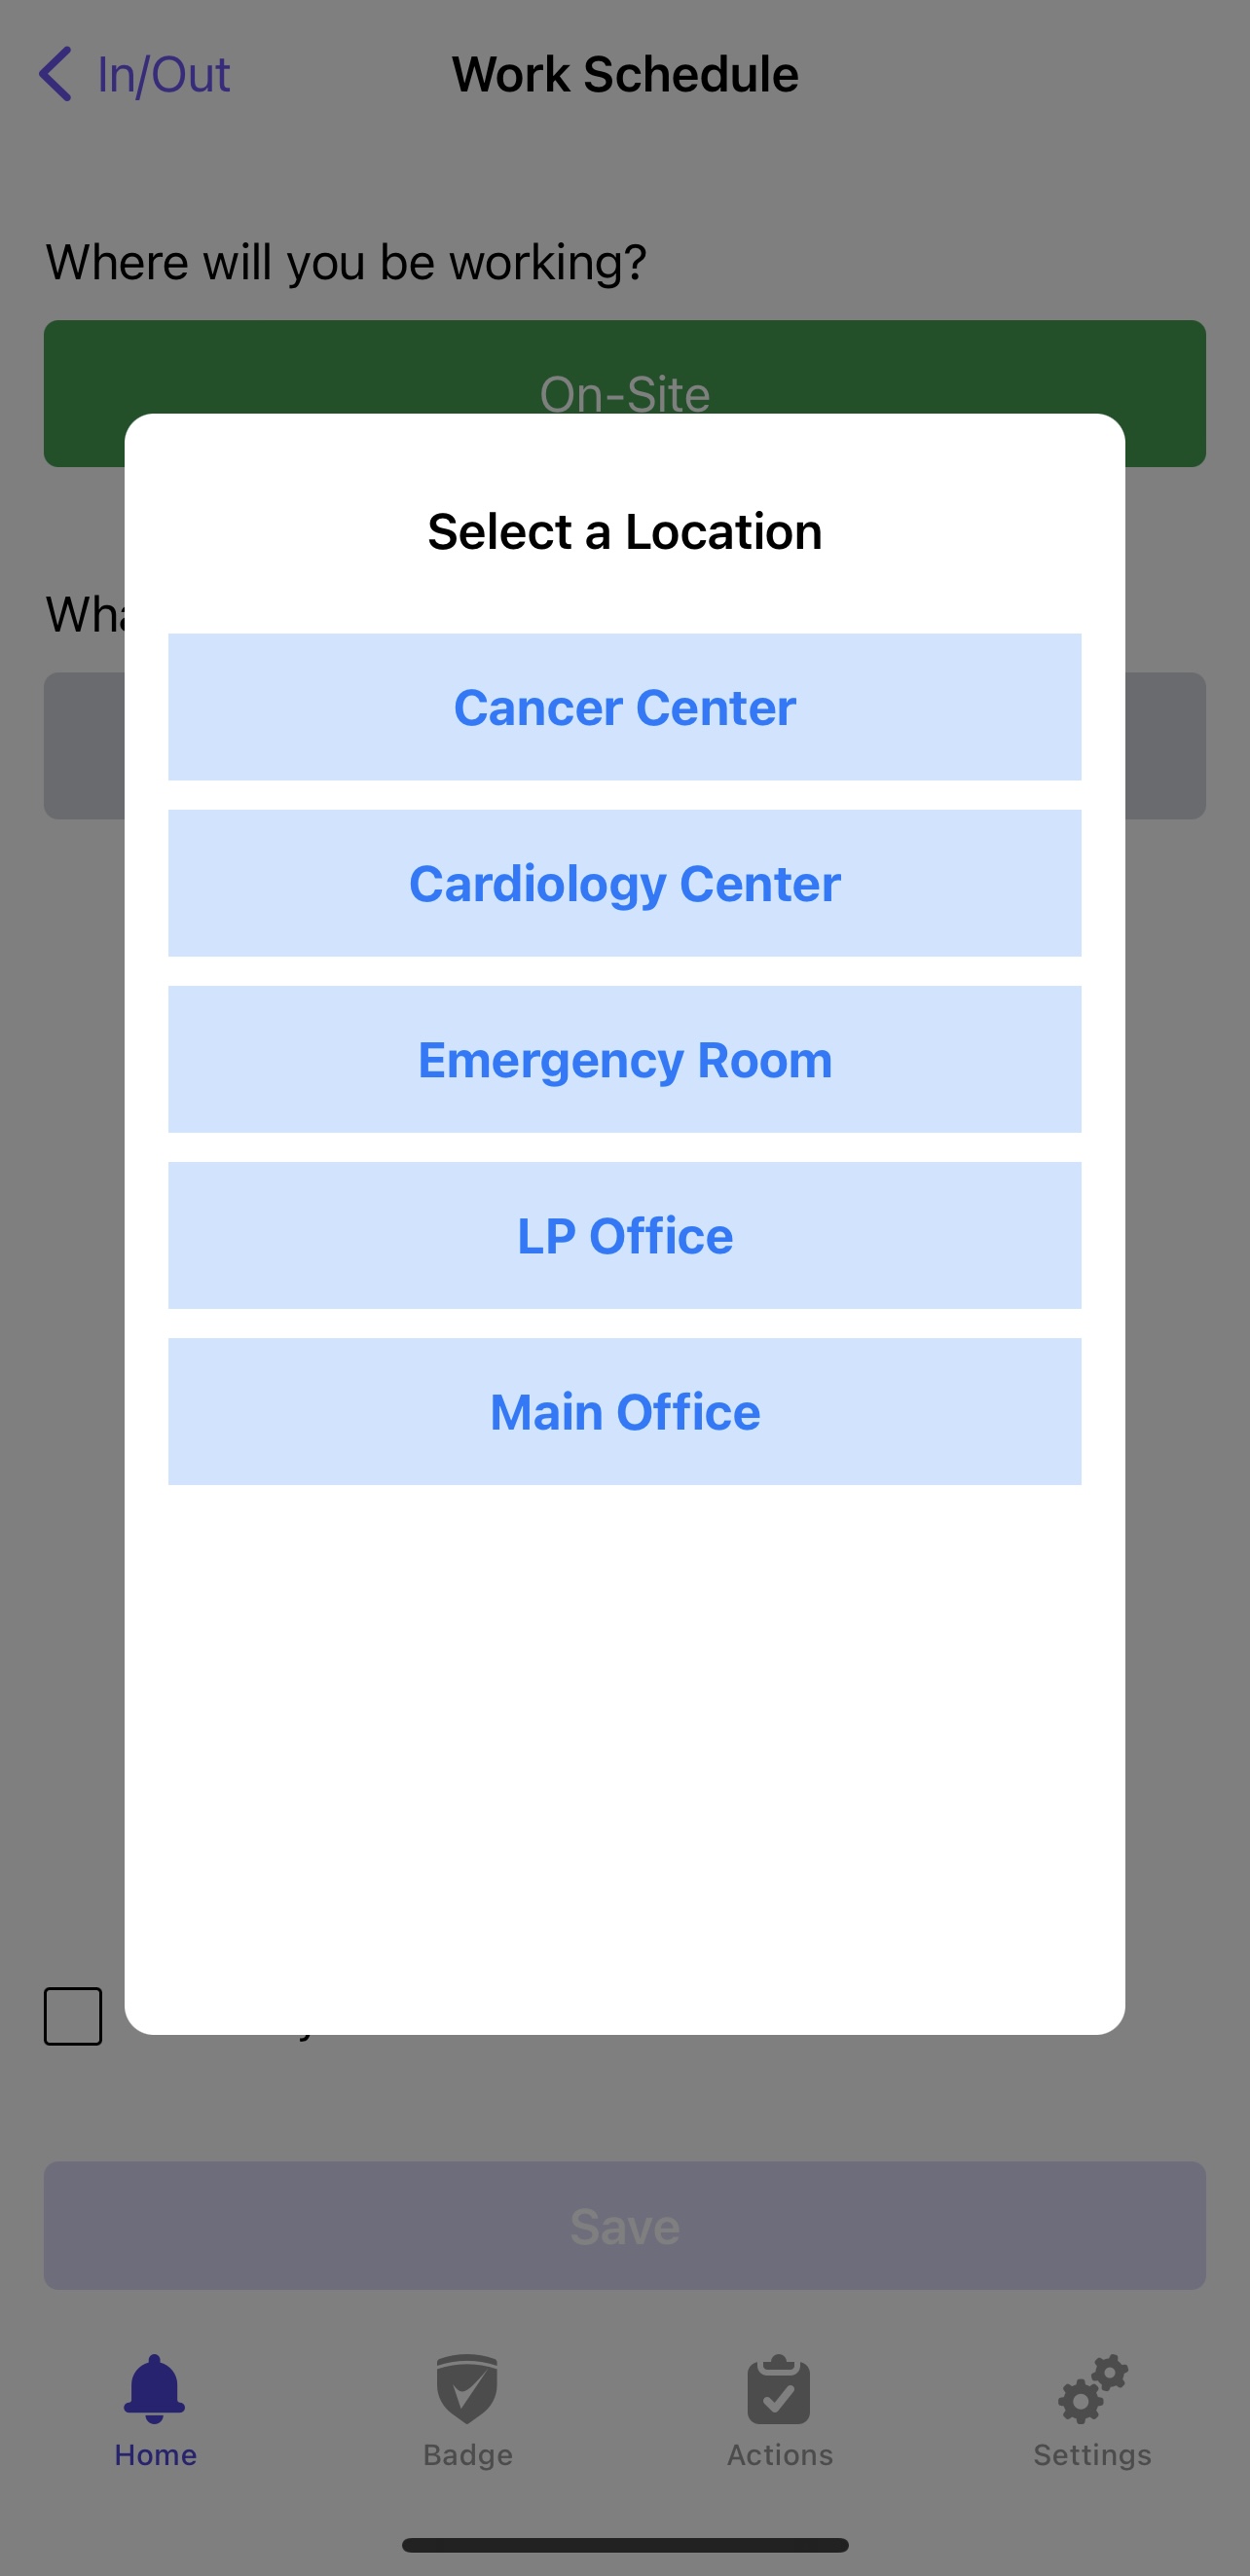
Then, you can select the day you are reporting your locality for.
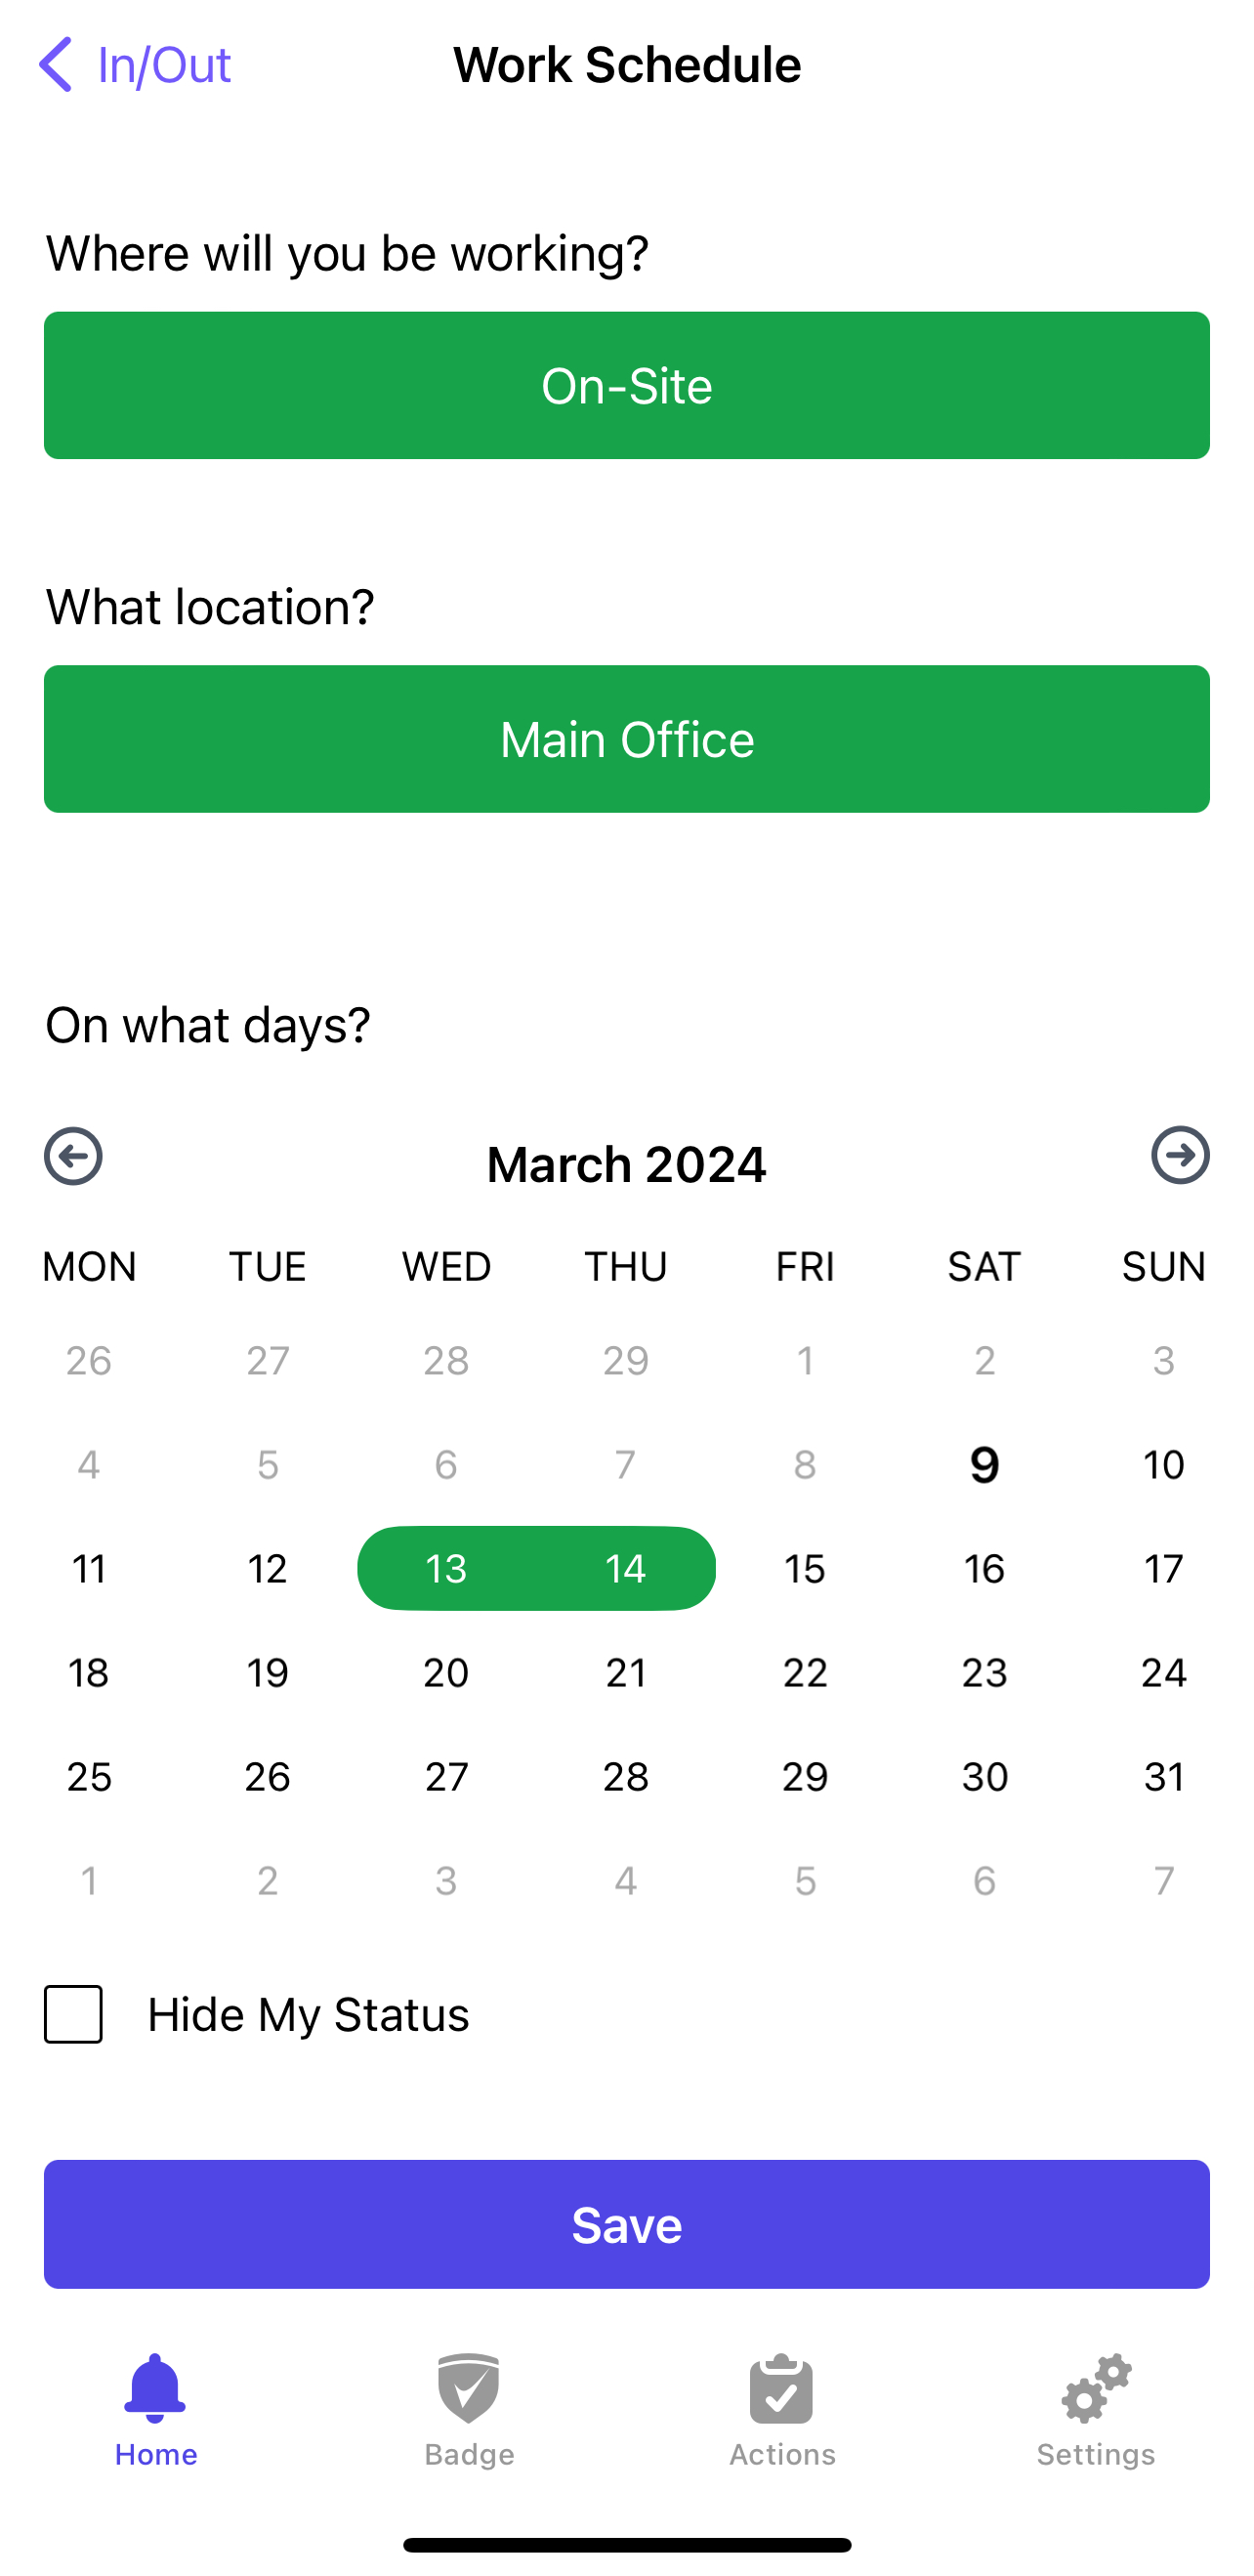
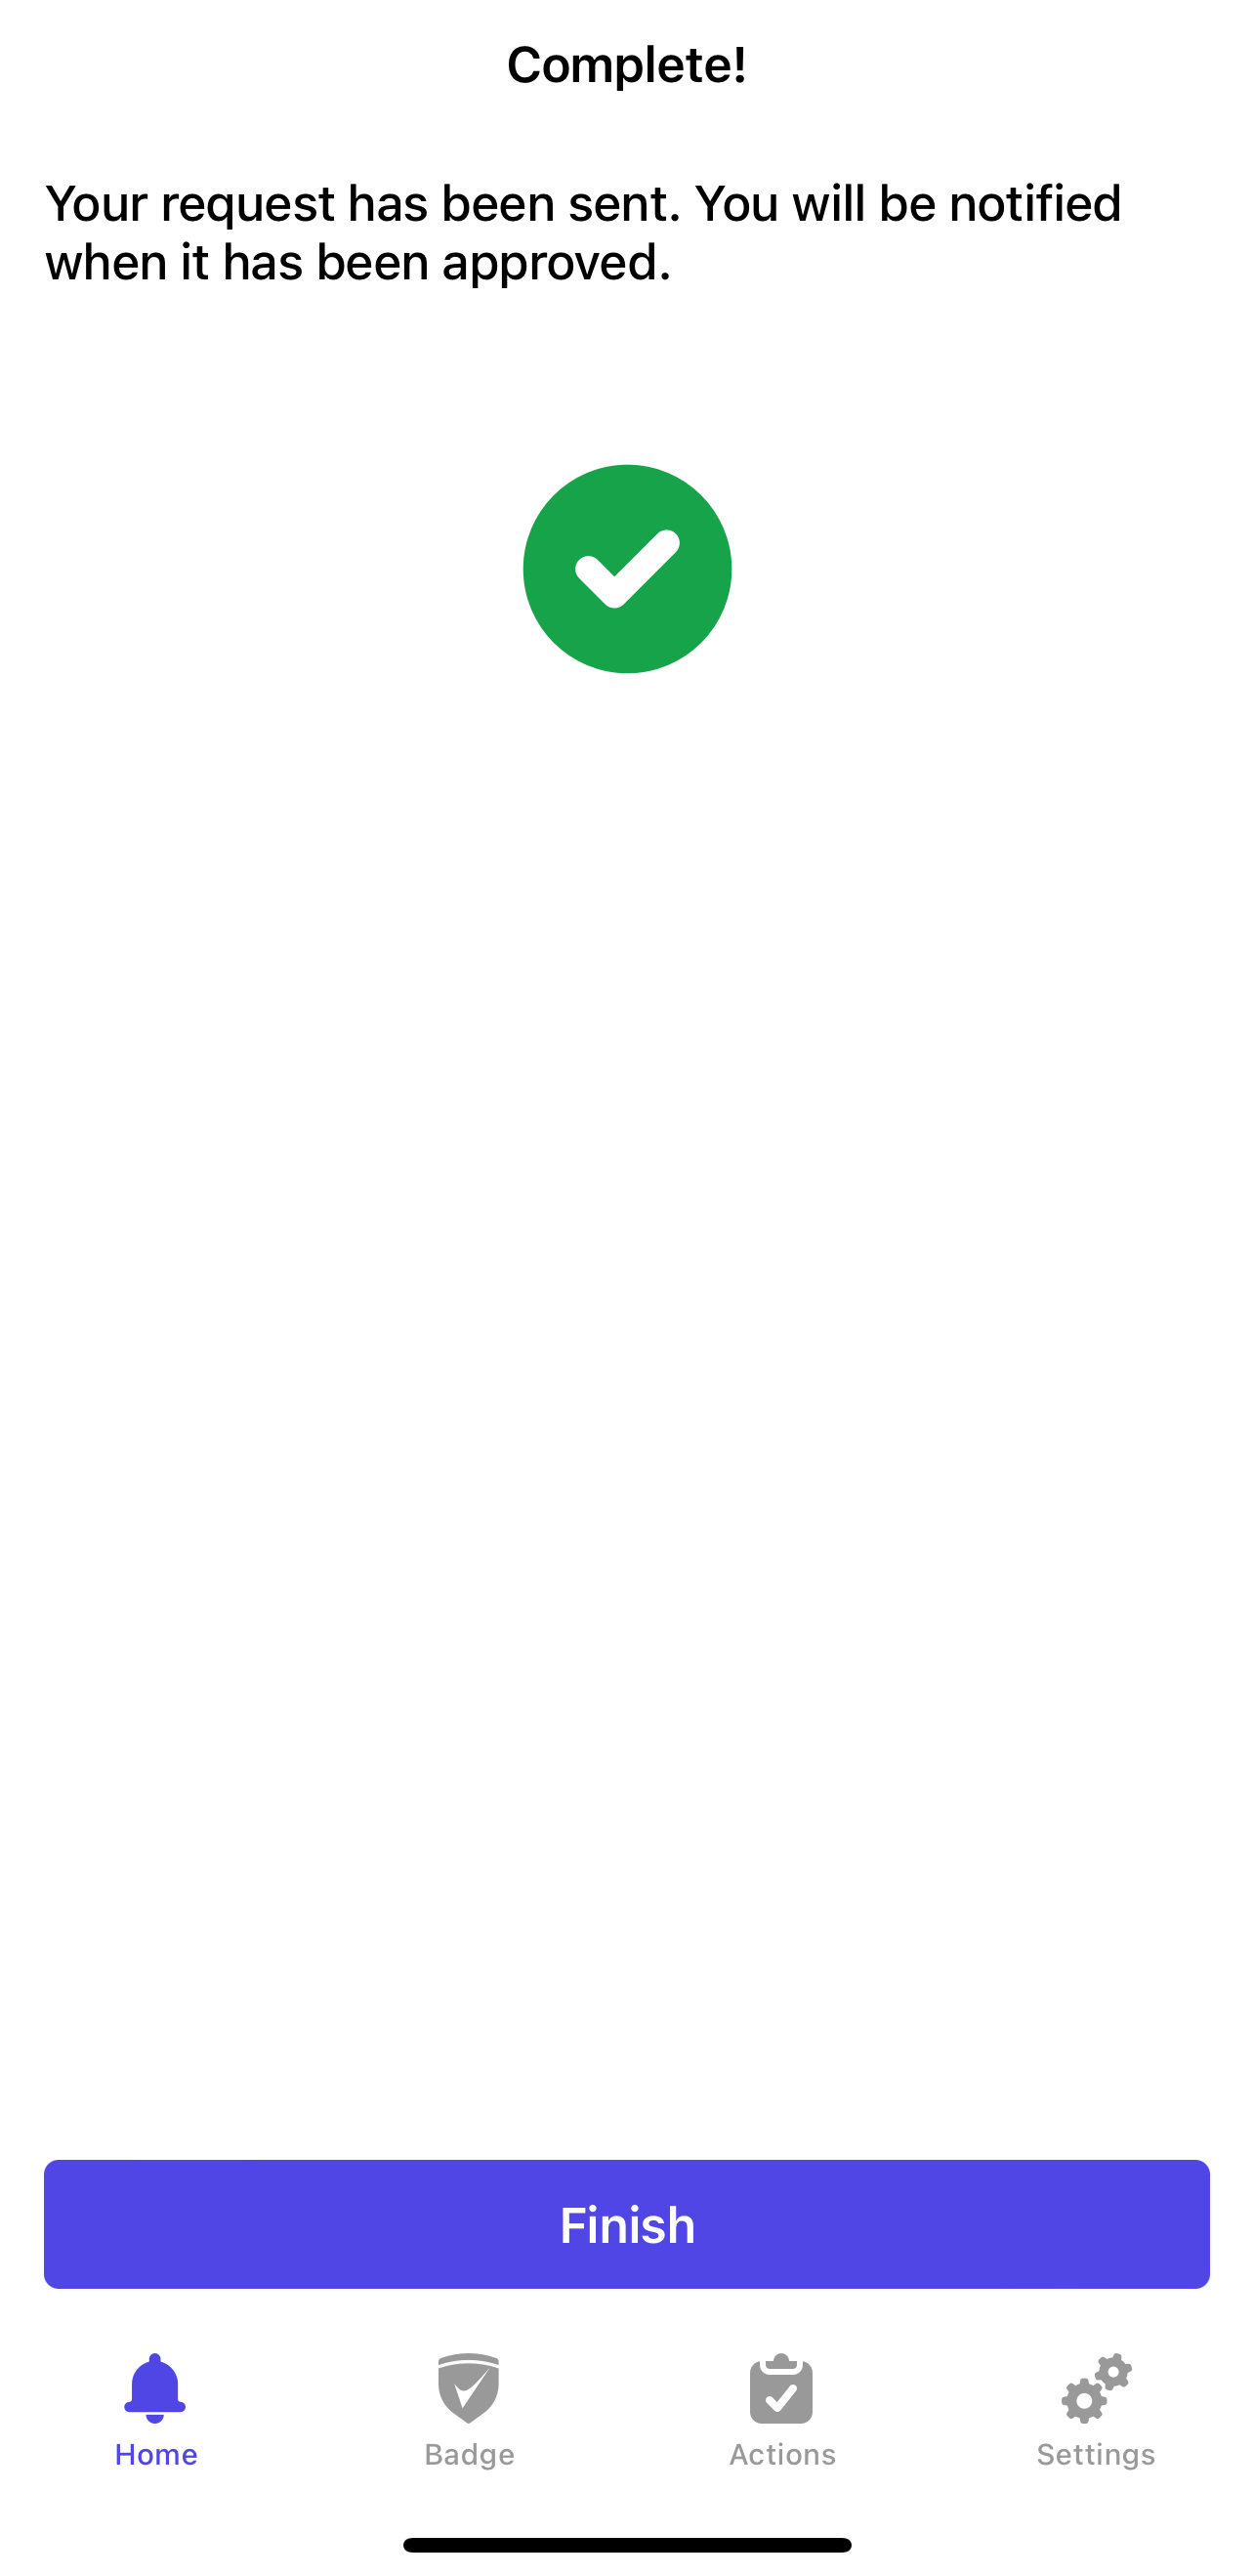
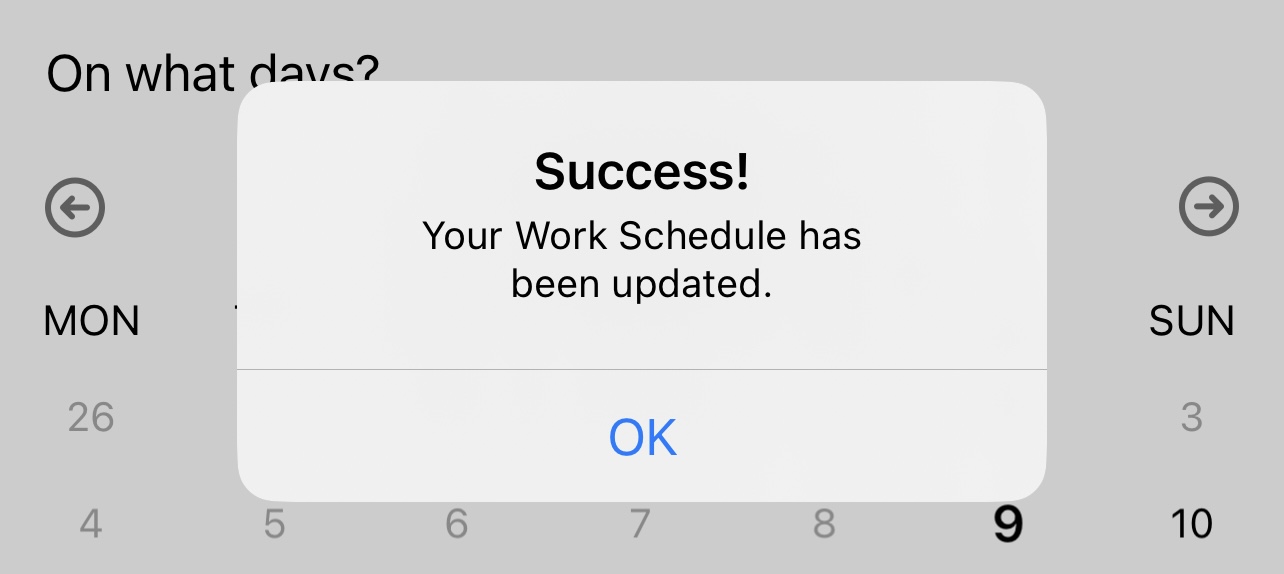
Finally, click "Save," and this message will appear, indicating that the submission has been finalized:
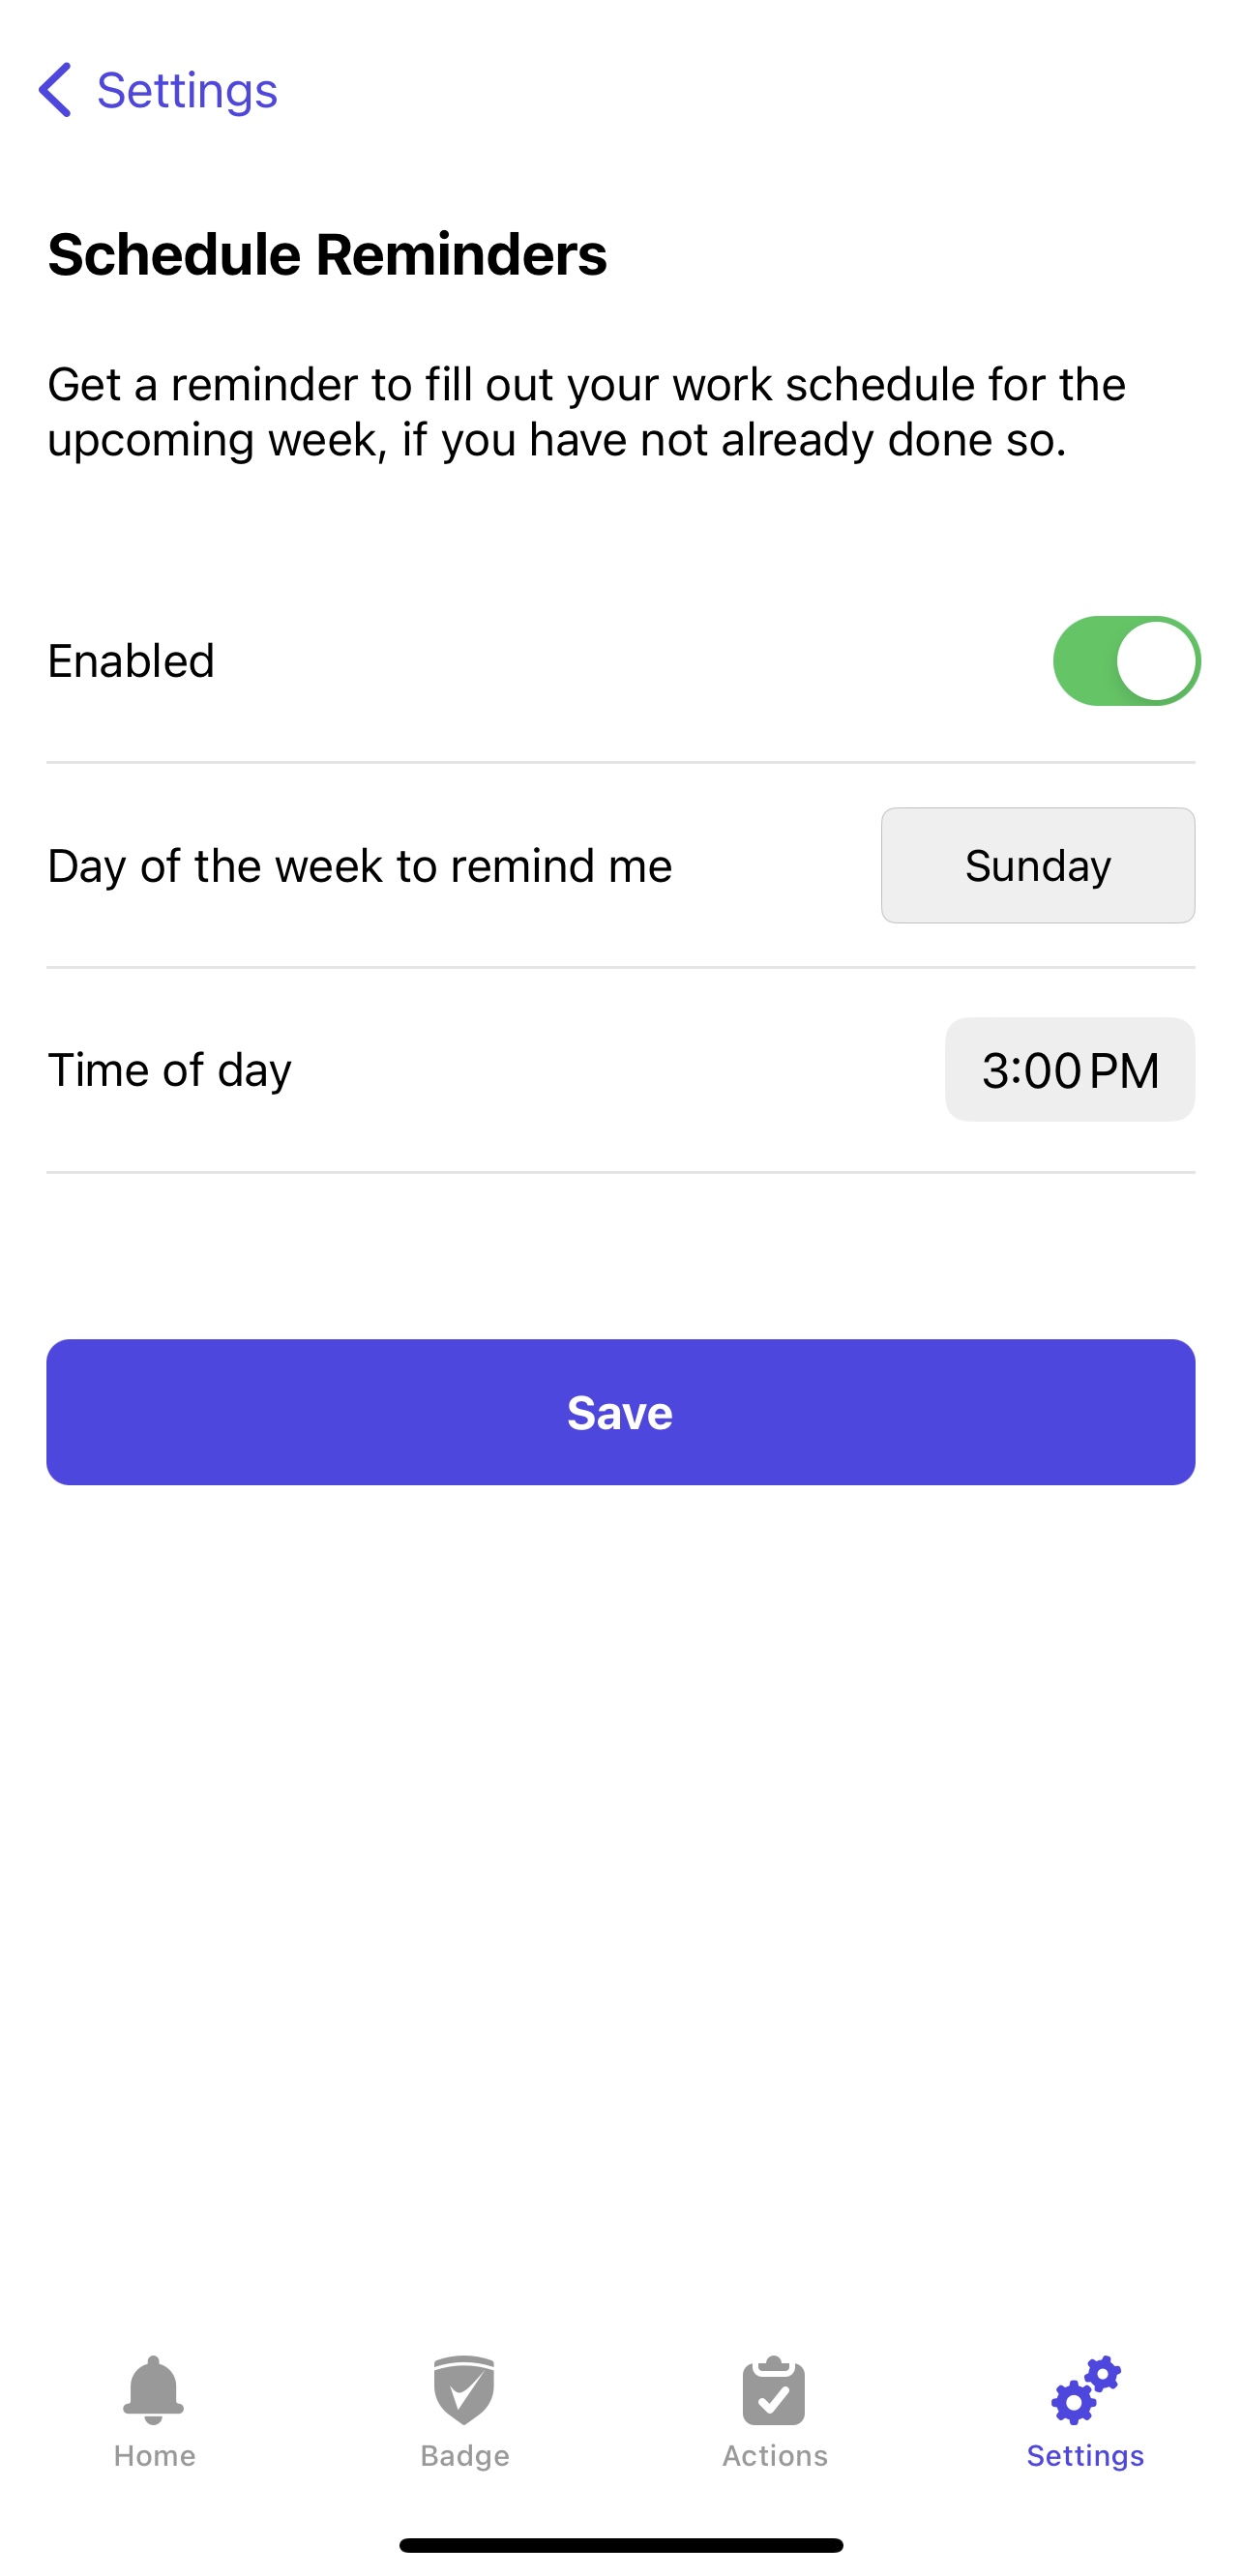
With the app's default settings, you will receive weekly reminders to submit your work schedule feedback on Sunday at 3 PM local time. Navigate to Settings > Schedule to adjust these settings.
Badge
If your organization is checking-in employees you will need your badge.
**A kiosk setup provided by the organization is required!**
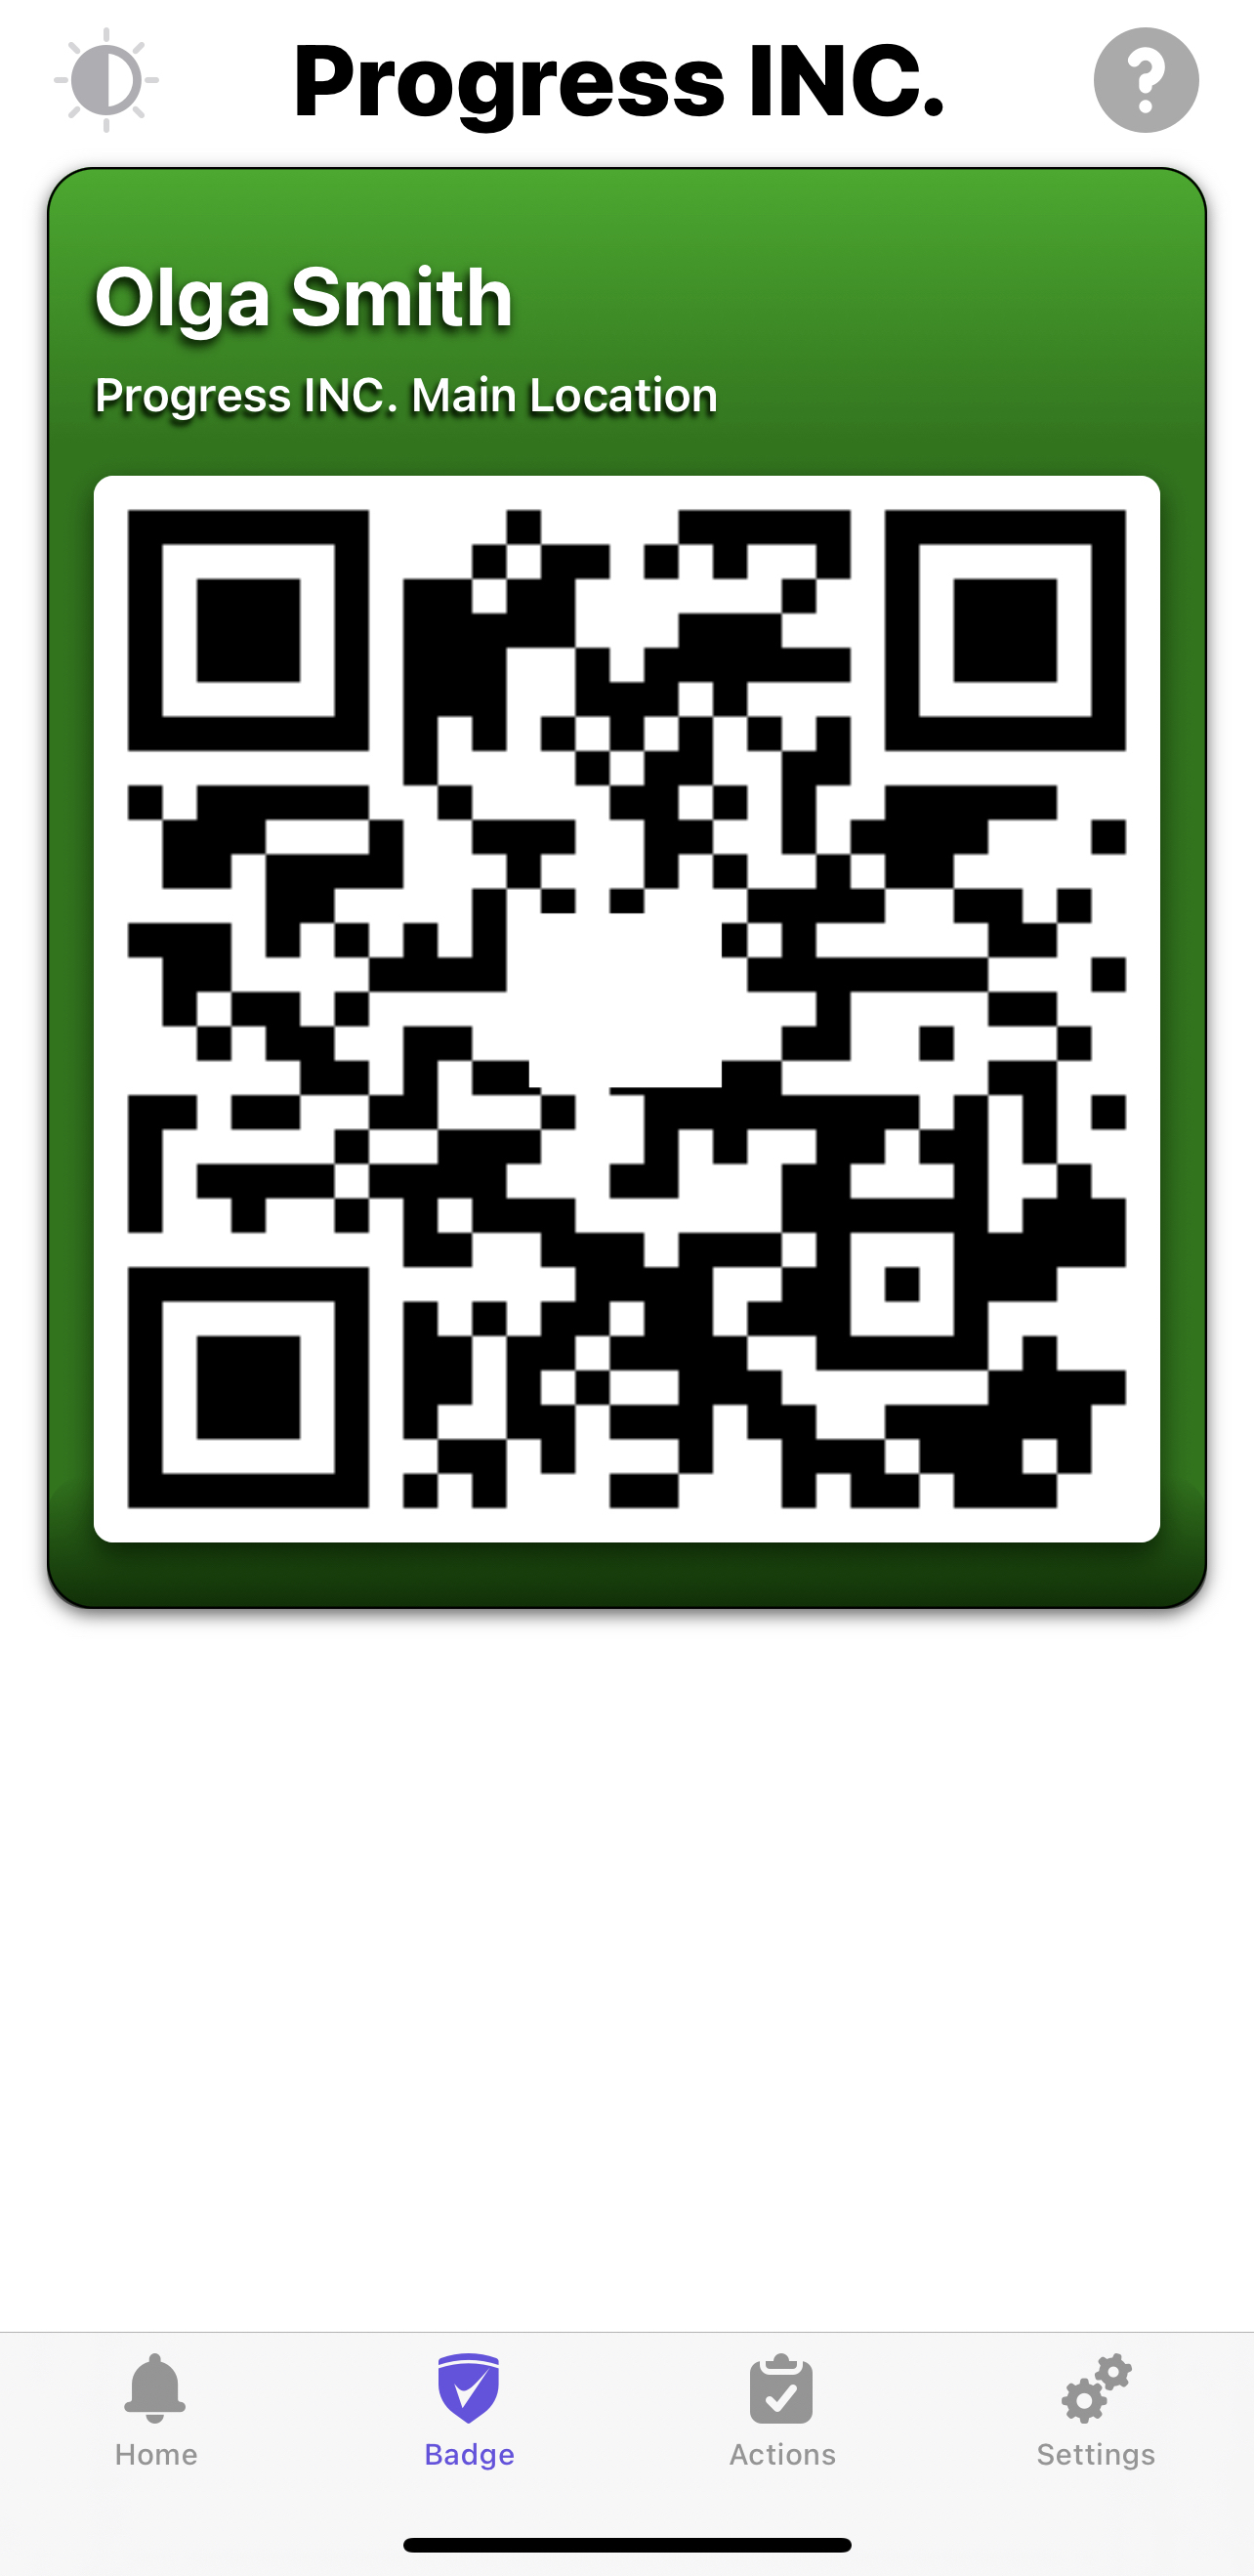
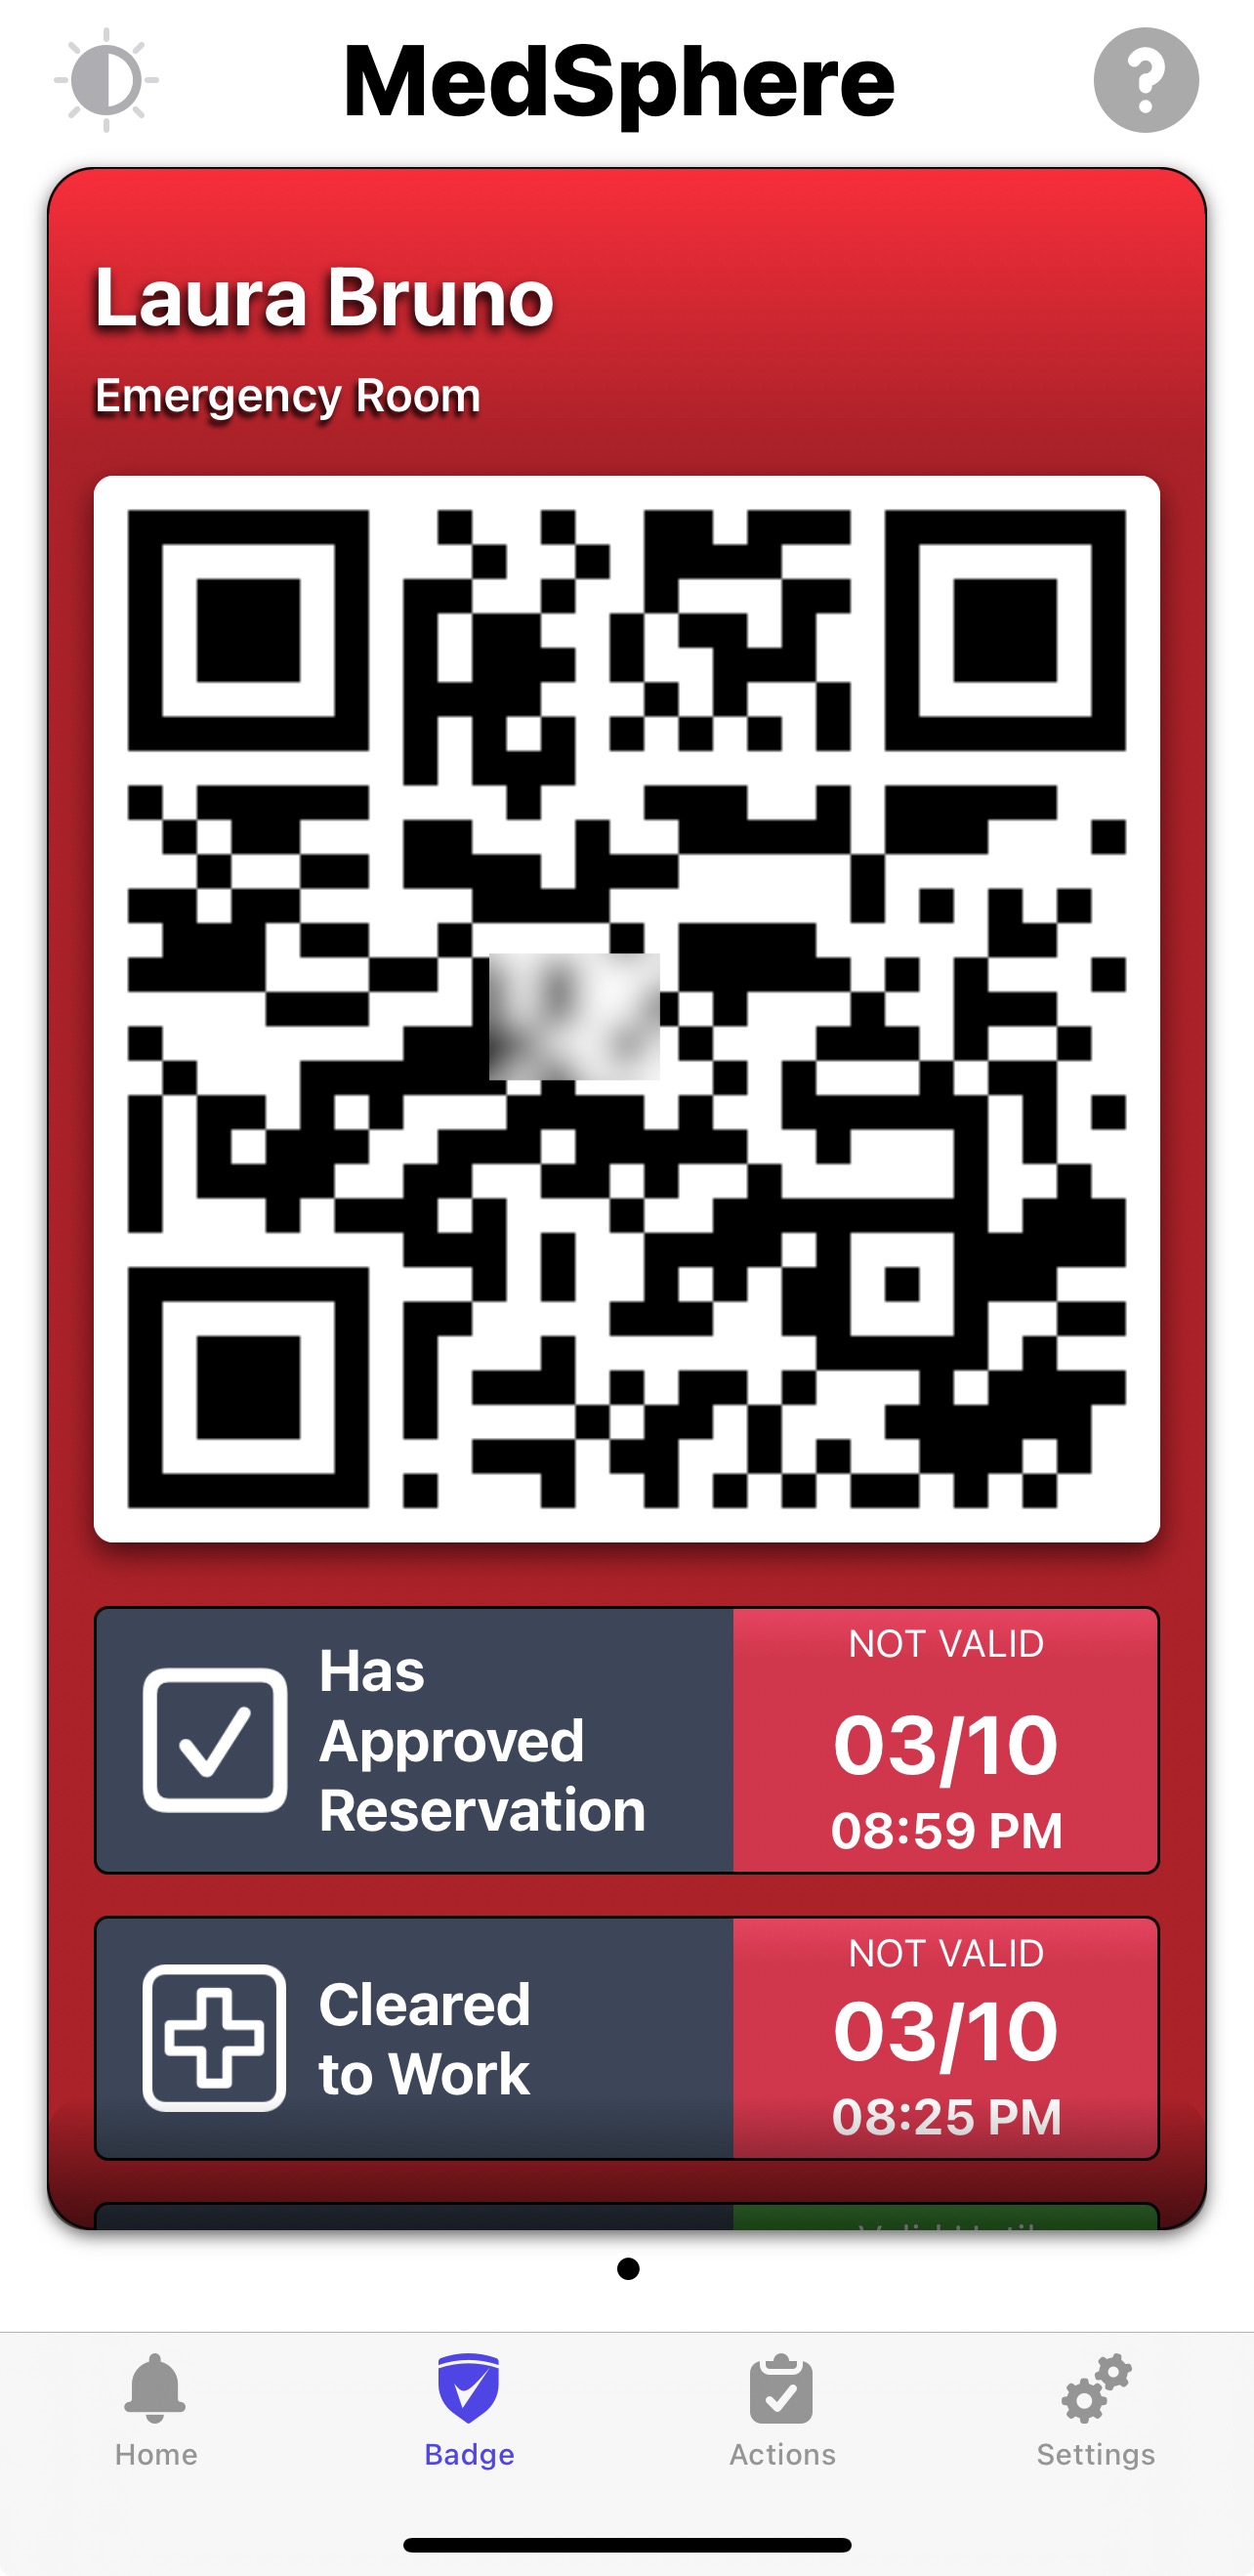
The Badge is green when all the compliance requirements set by your organization have been met.
** **
**
If your Badge is red it means that you have not fulfilled compliance requirements set by your organization.
1. Screening questions
Your organization might require users to answer screening questions on a daily basis.
To Screen on Your App:
- Select "Screen"
- Answer the screening questionnaire
- Review and confirm your answers
- Select "Submit"
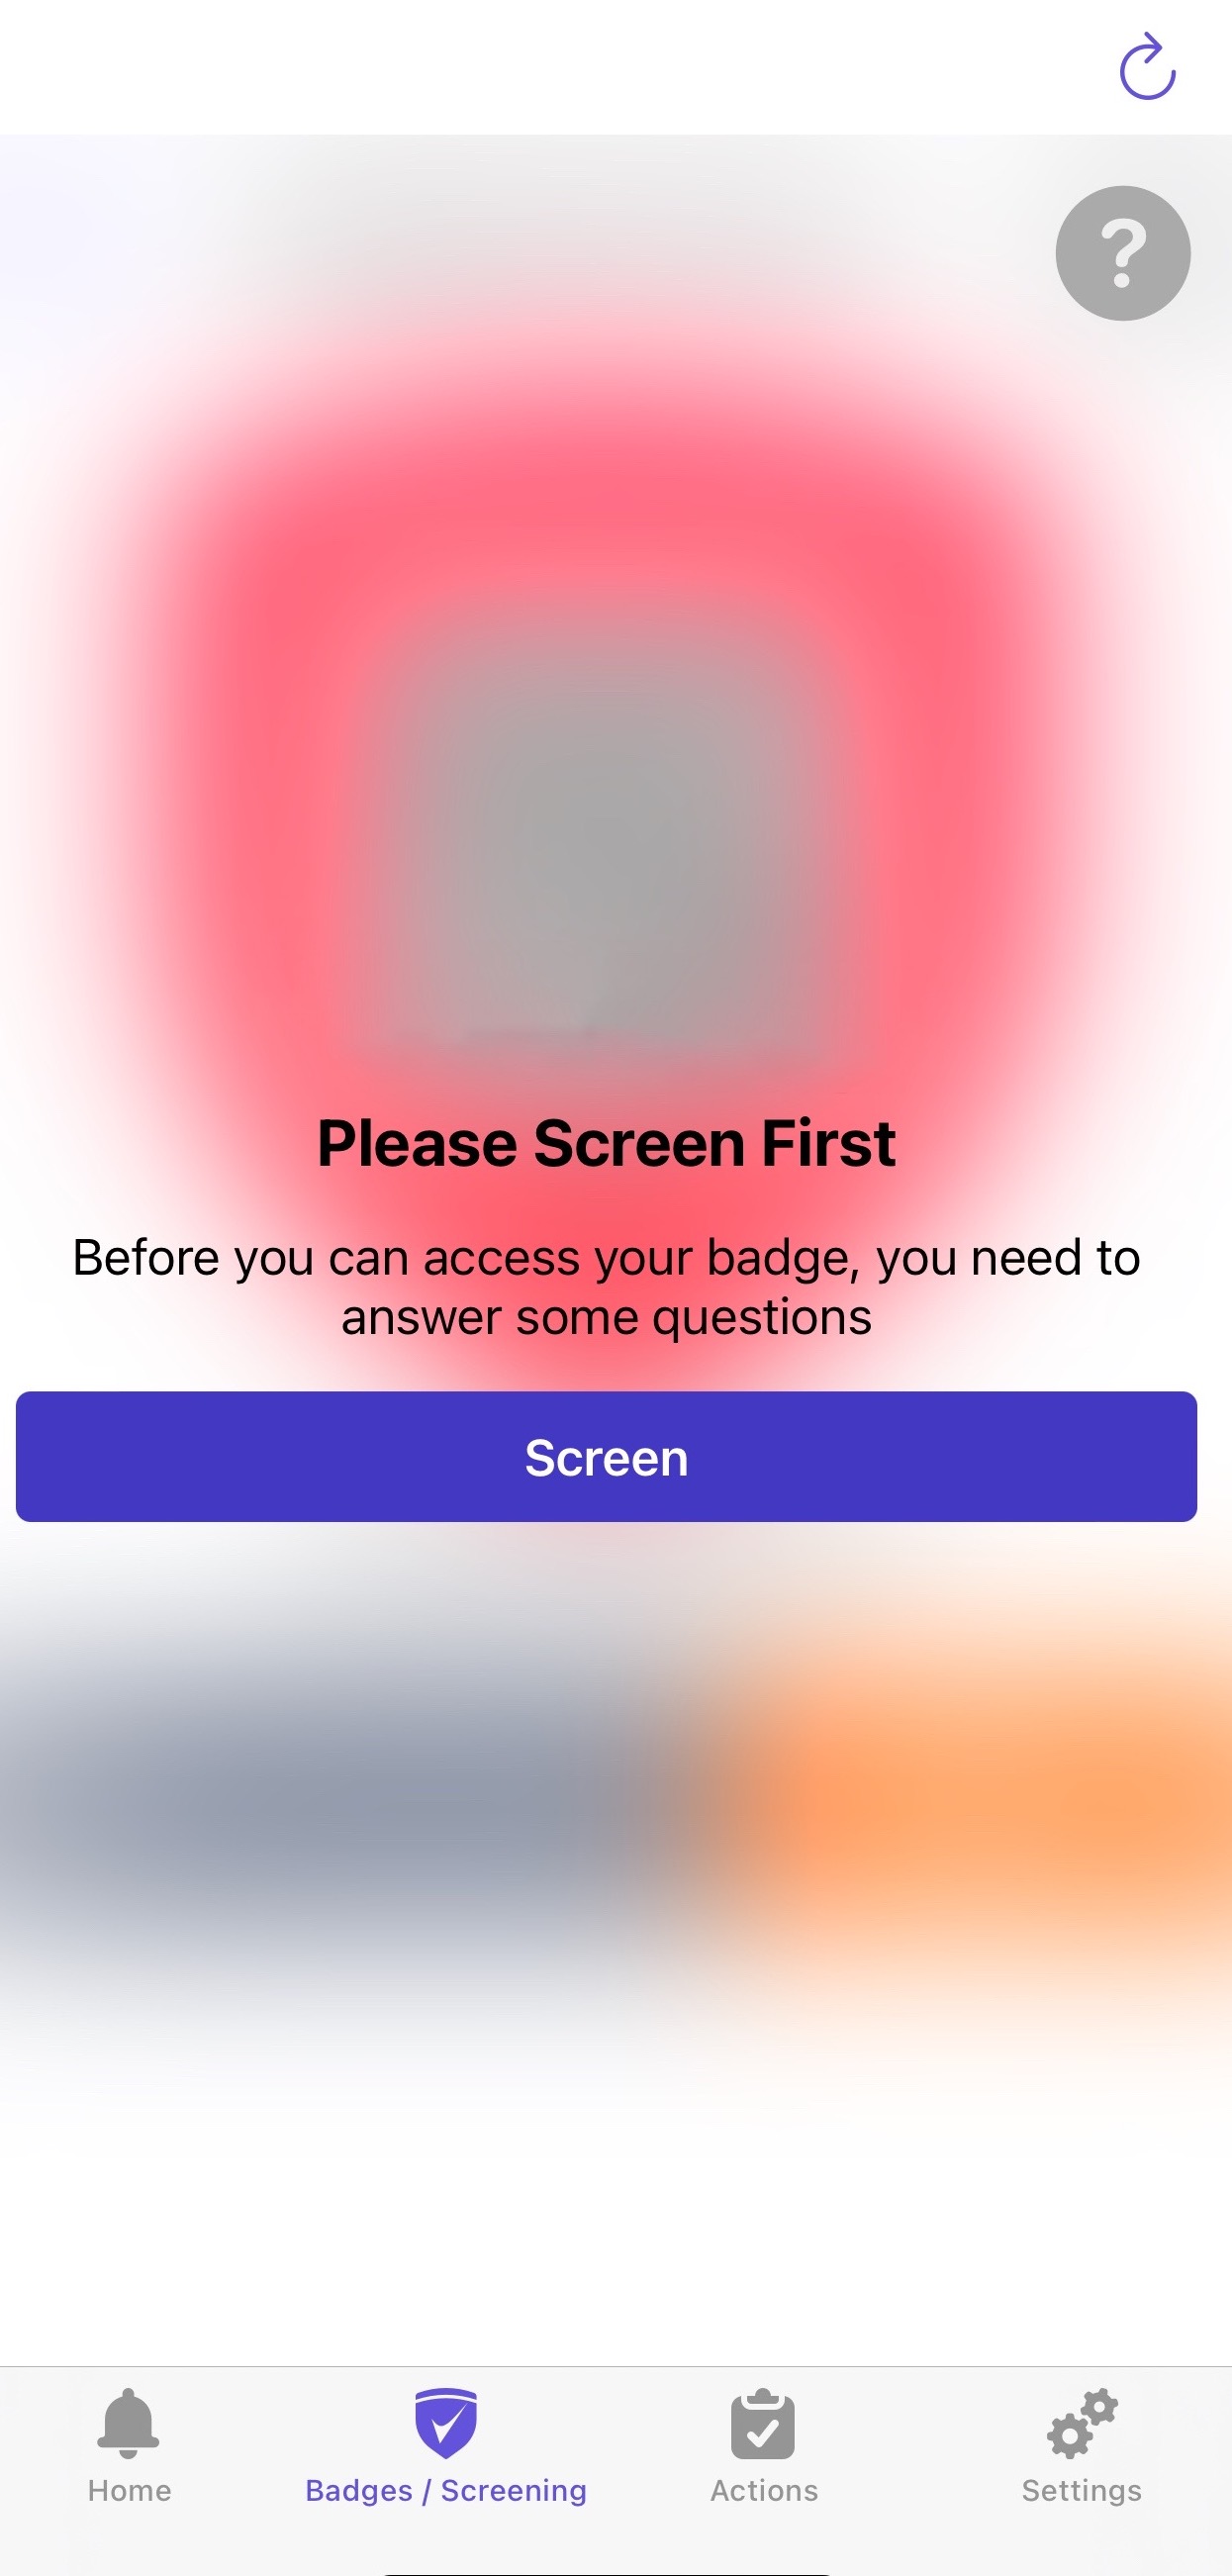
Note: If you've made an error in your screening answers, select "Revise" and you can re-answer your questionnaire.
| If you've passed your questionnaire, you should see a green badge, indicating that you have passed. This badge can be shown to personnel upon your arrival if verification is needed. |
On the badge, you will see a QR code. This can be used to scan in/out if your organization is using this feature. You will also see a lightbulb in the top left corner; if you tap this, therefore uncrossing the lightbulb icon, your screen will brighten and can be used if your scanner is having issues registering your badge. | If you fail the screening, the system will show further instructions and open a failed screening case that can be tracked via the app Home tab. | | IMG_0BE92D51418F-1.jpeg | Screenshot 2024-03-10 at 8.25.55 PM.jpeg |
Actions
Please Note: This a general guide for the Actions tab functionality, additional or modified case types can be set by your organization admins.
Use the Actions tab to:
1. Submit an absence
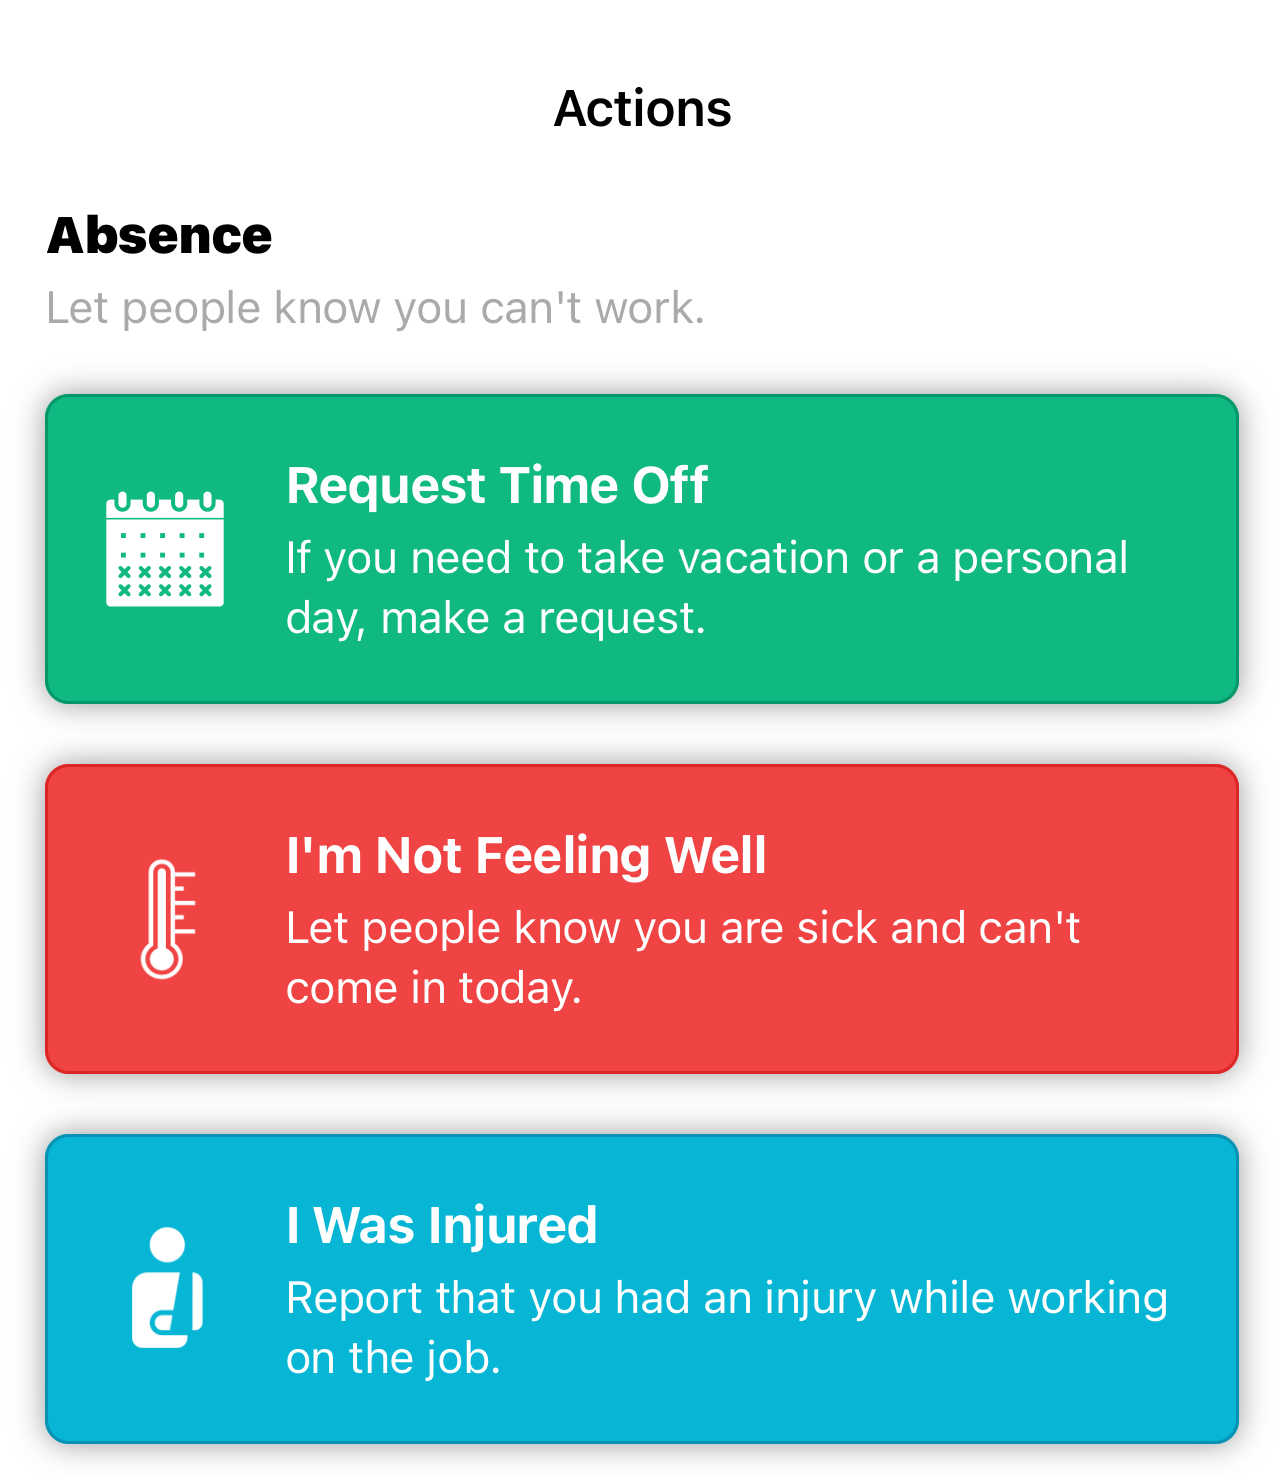
Submit an absence for various case types set by your organization, such as reporting an illness, requesting time off, reporting an injury absence, etc.
2. Time off request
To request time off select the time off request type and dates and send the request. Your organization managers will review the request and approve or reject it.
You can review your request approval status under the Home tab Submission Status.
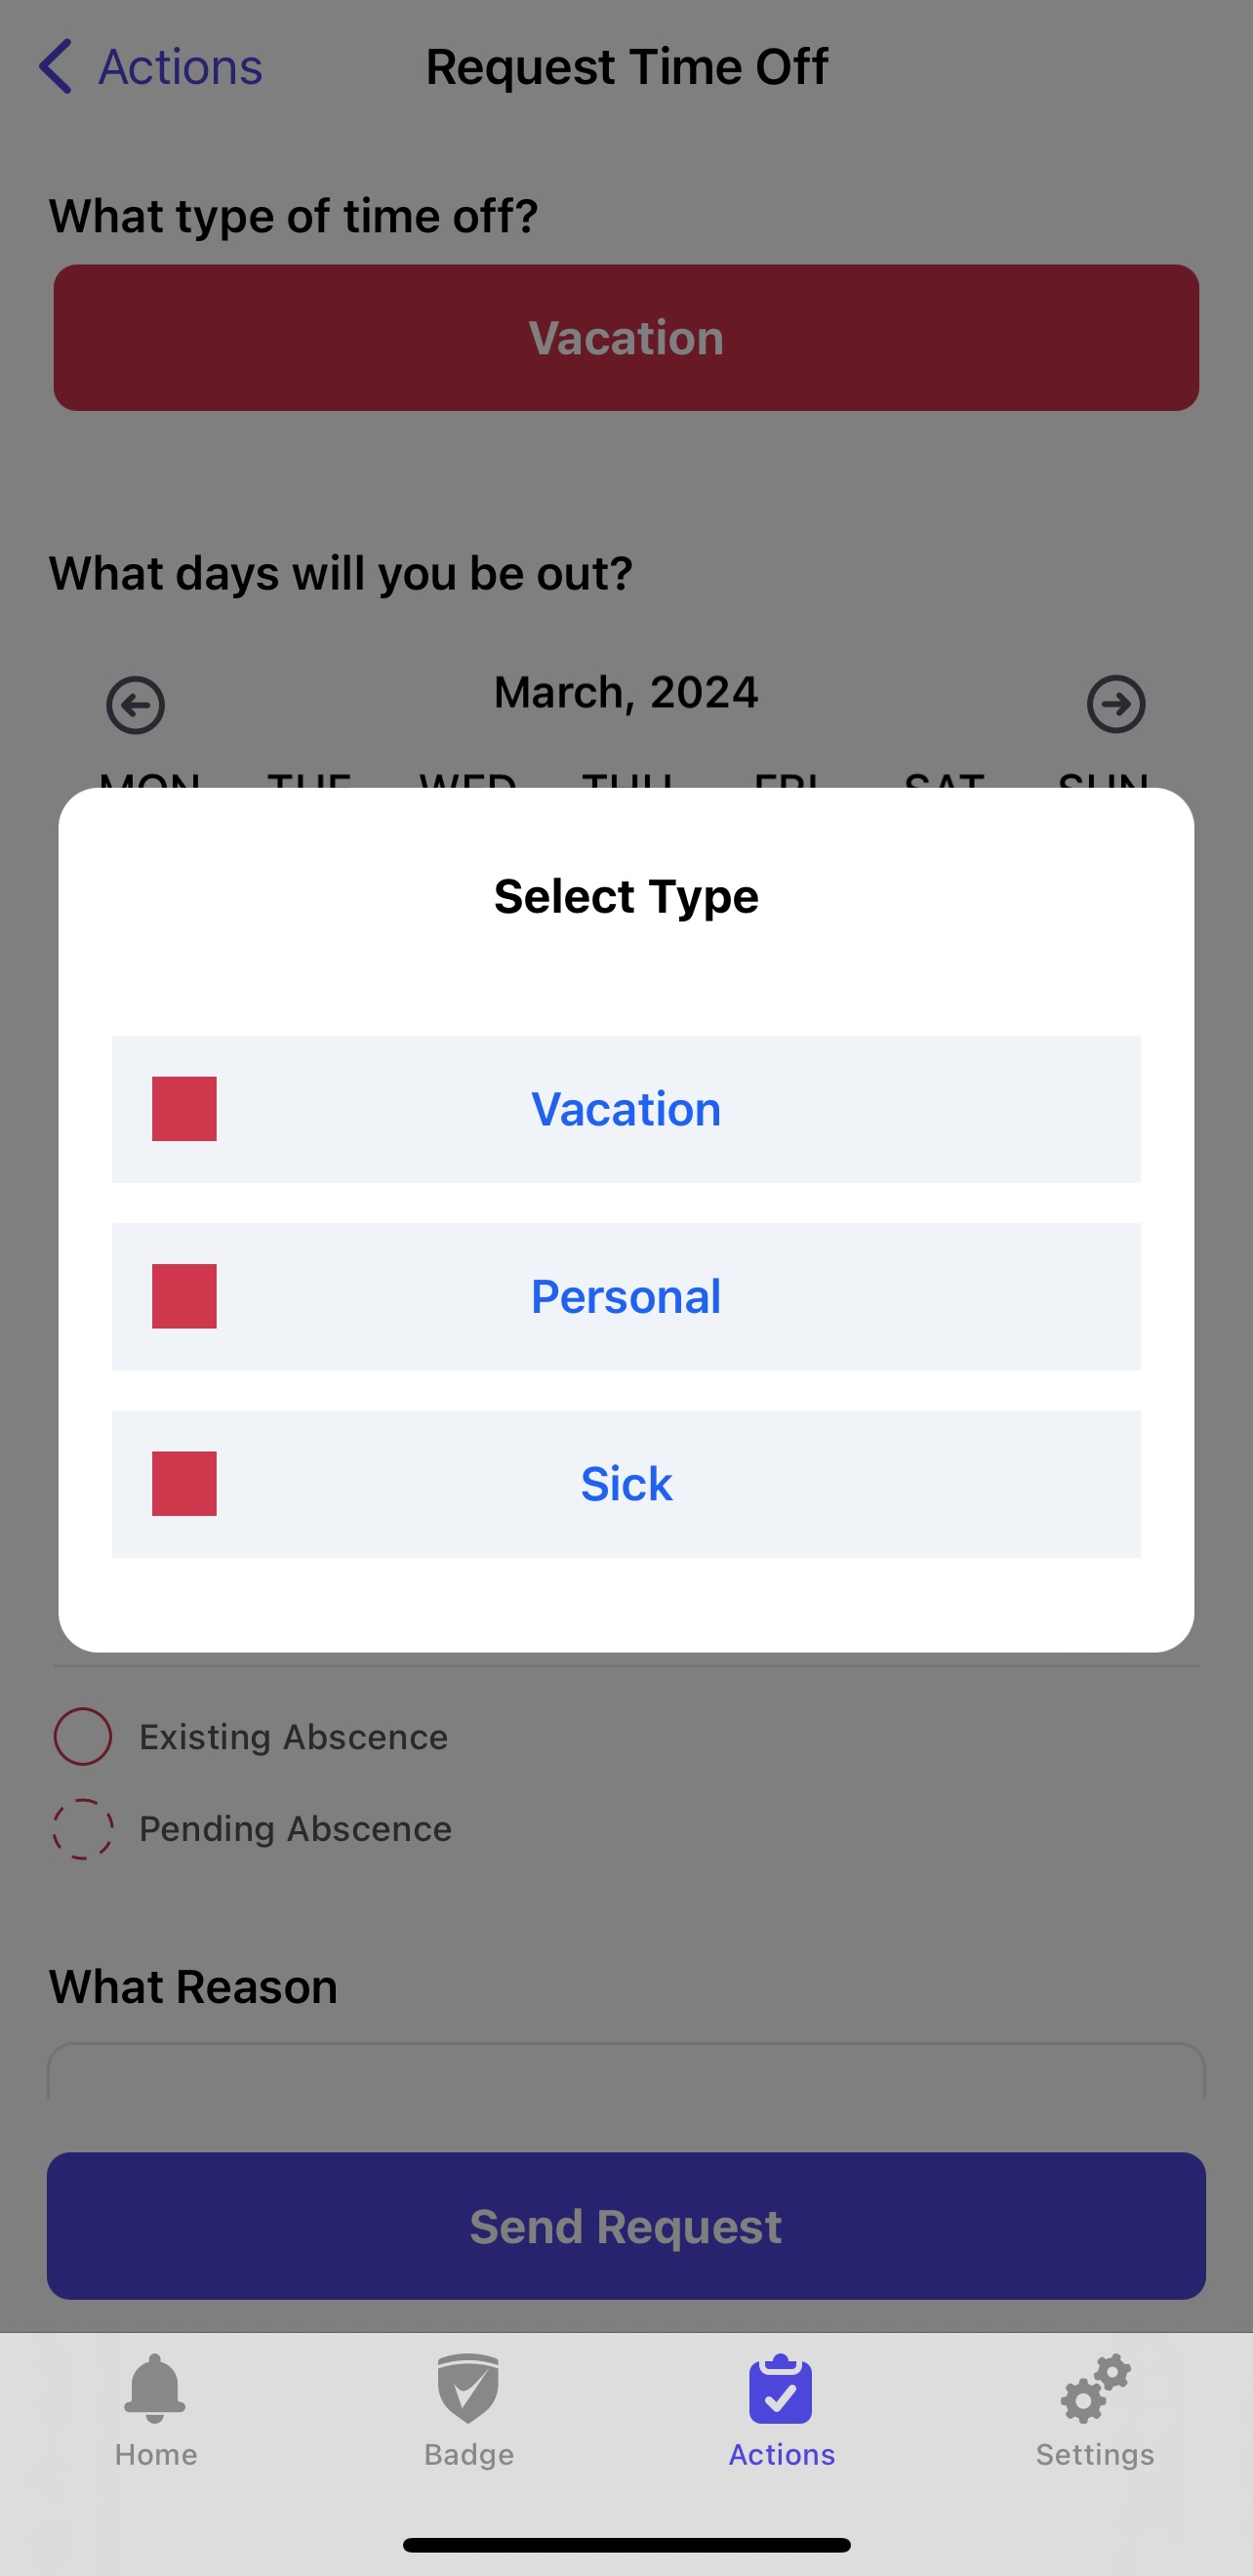
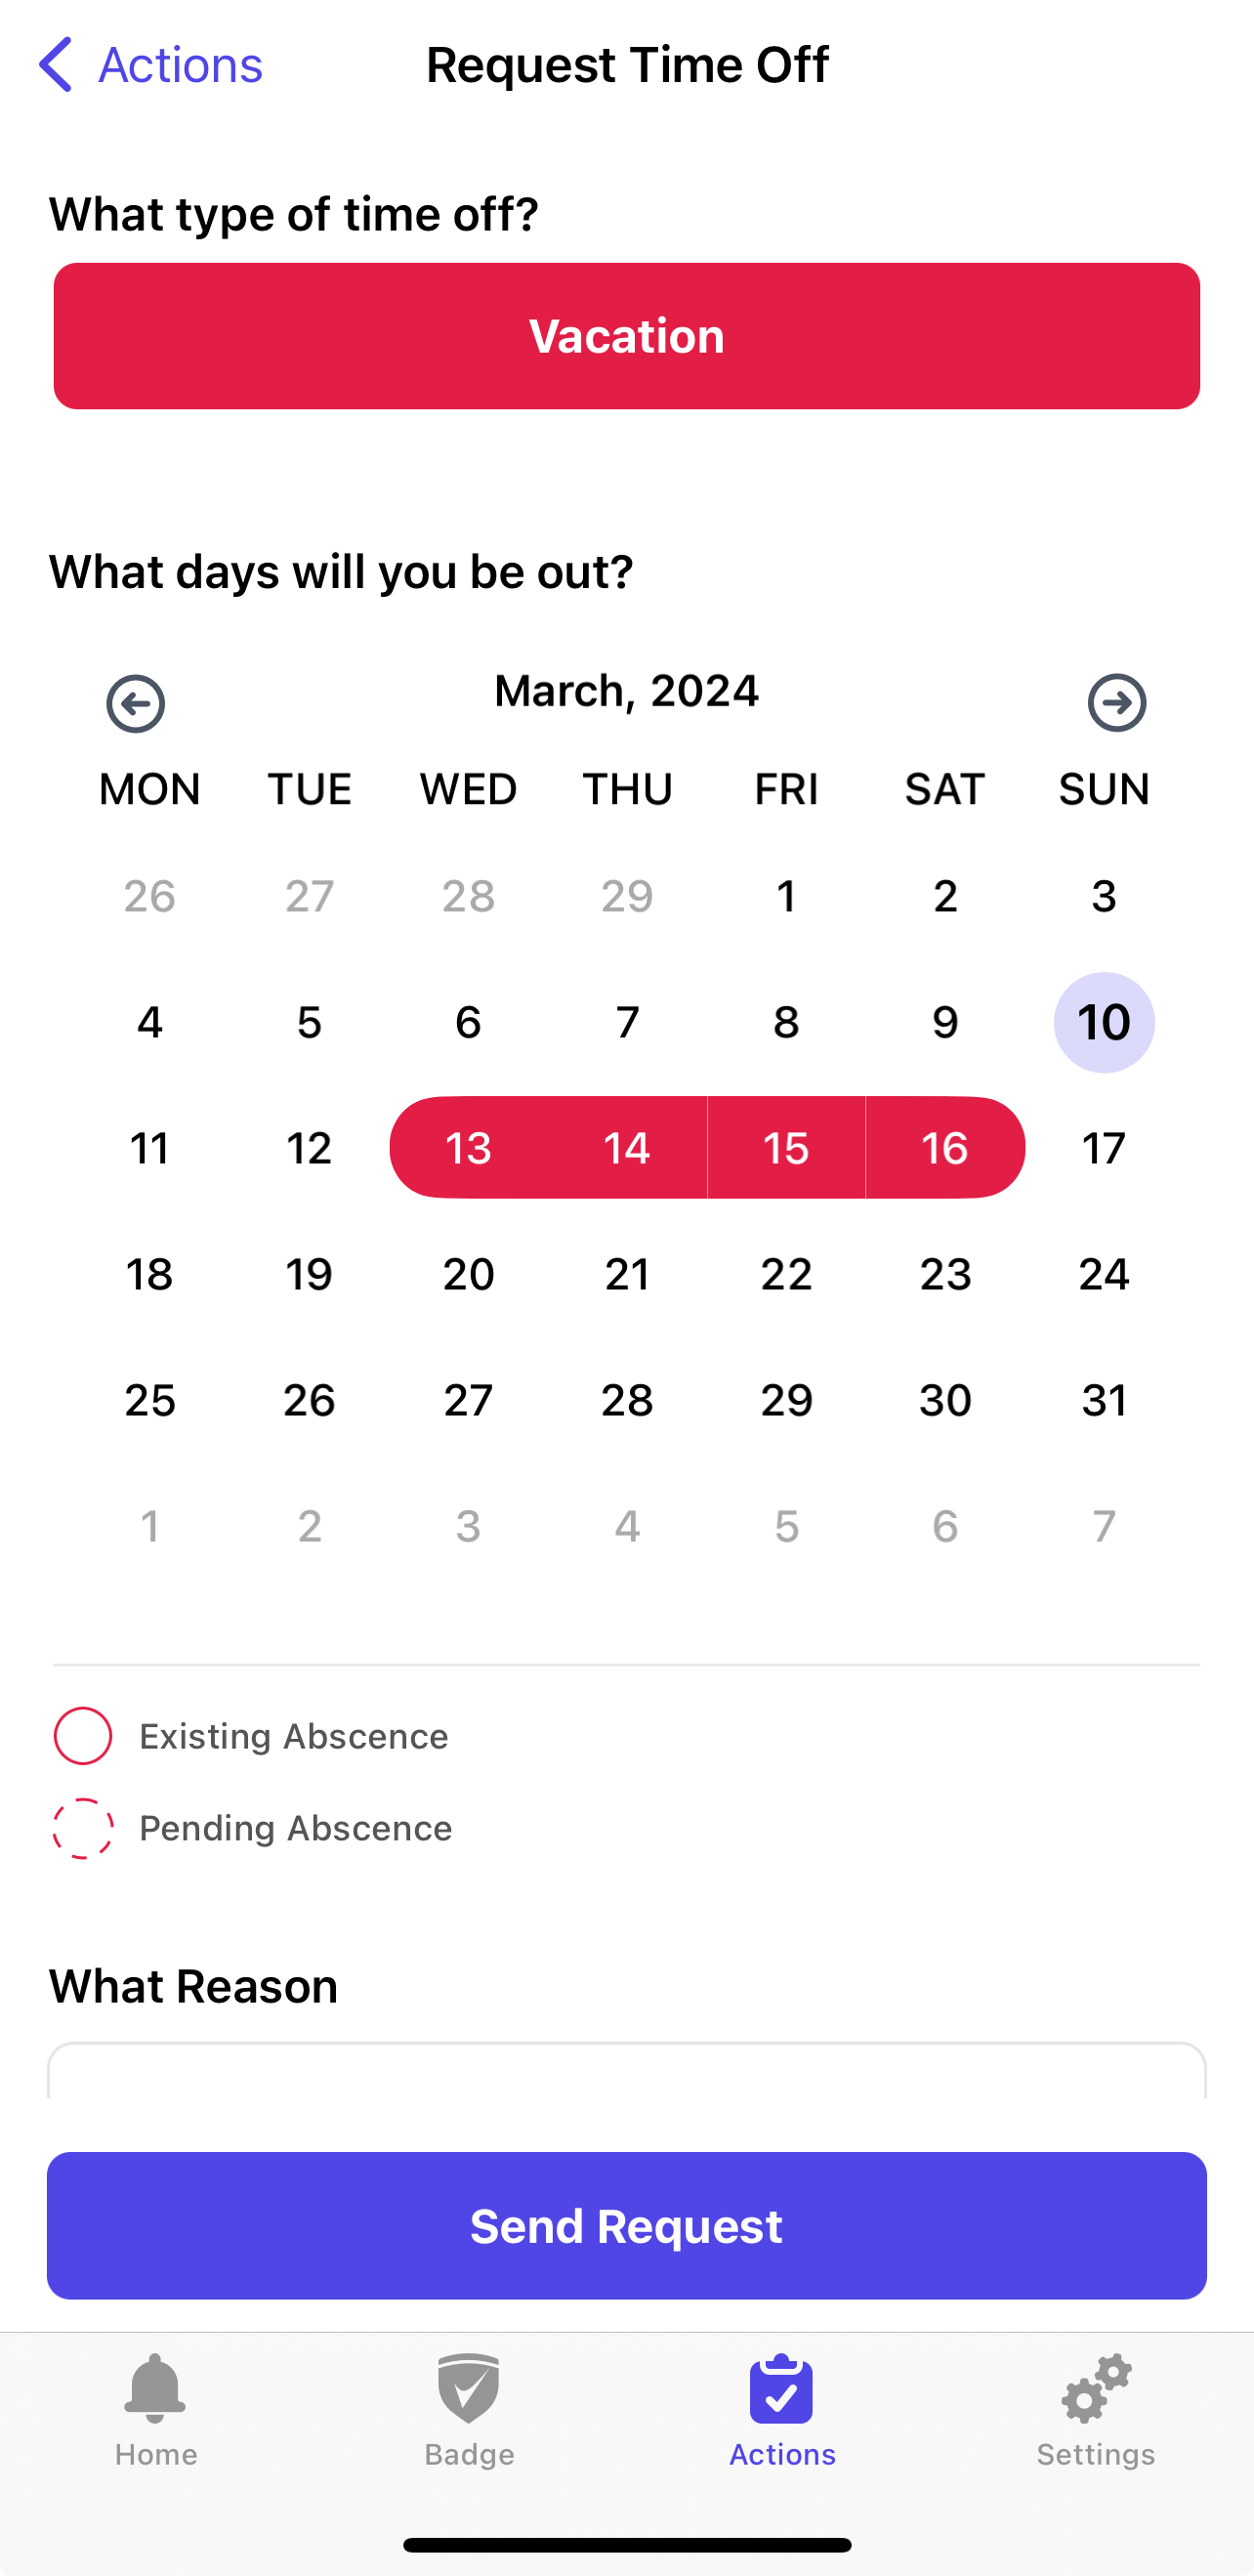
You can also request time off via one of the other available case types.
The process varies depending on the setup provided by your organization.
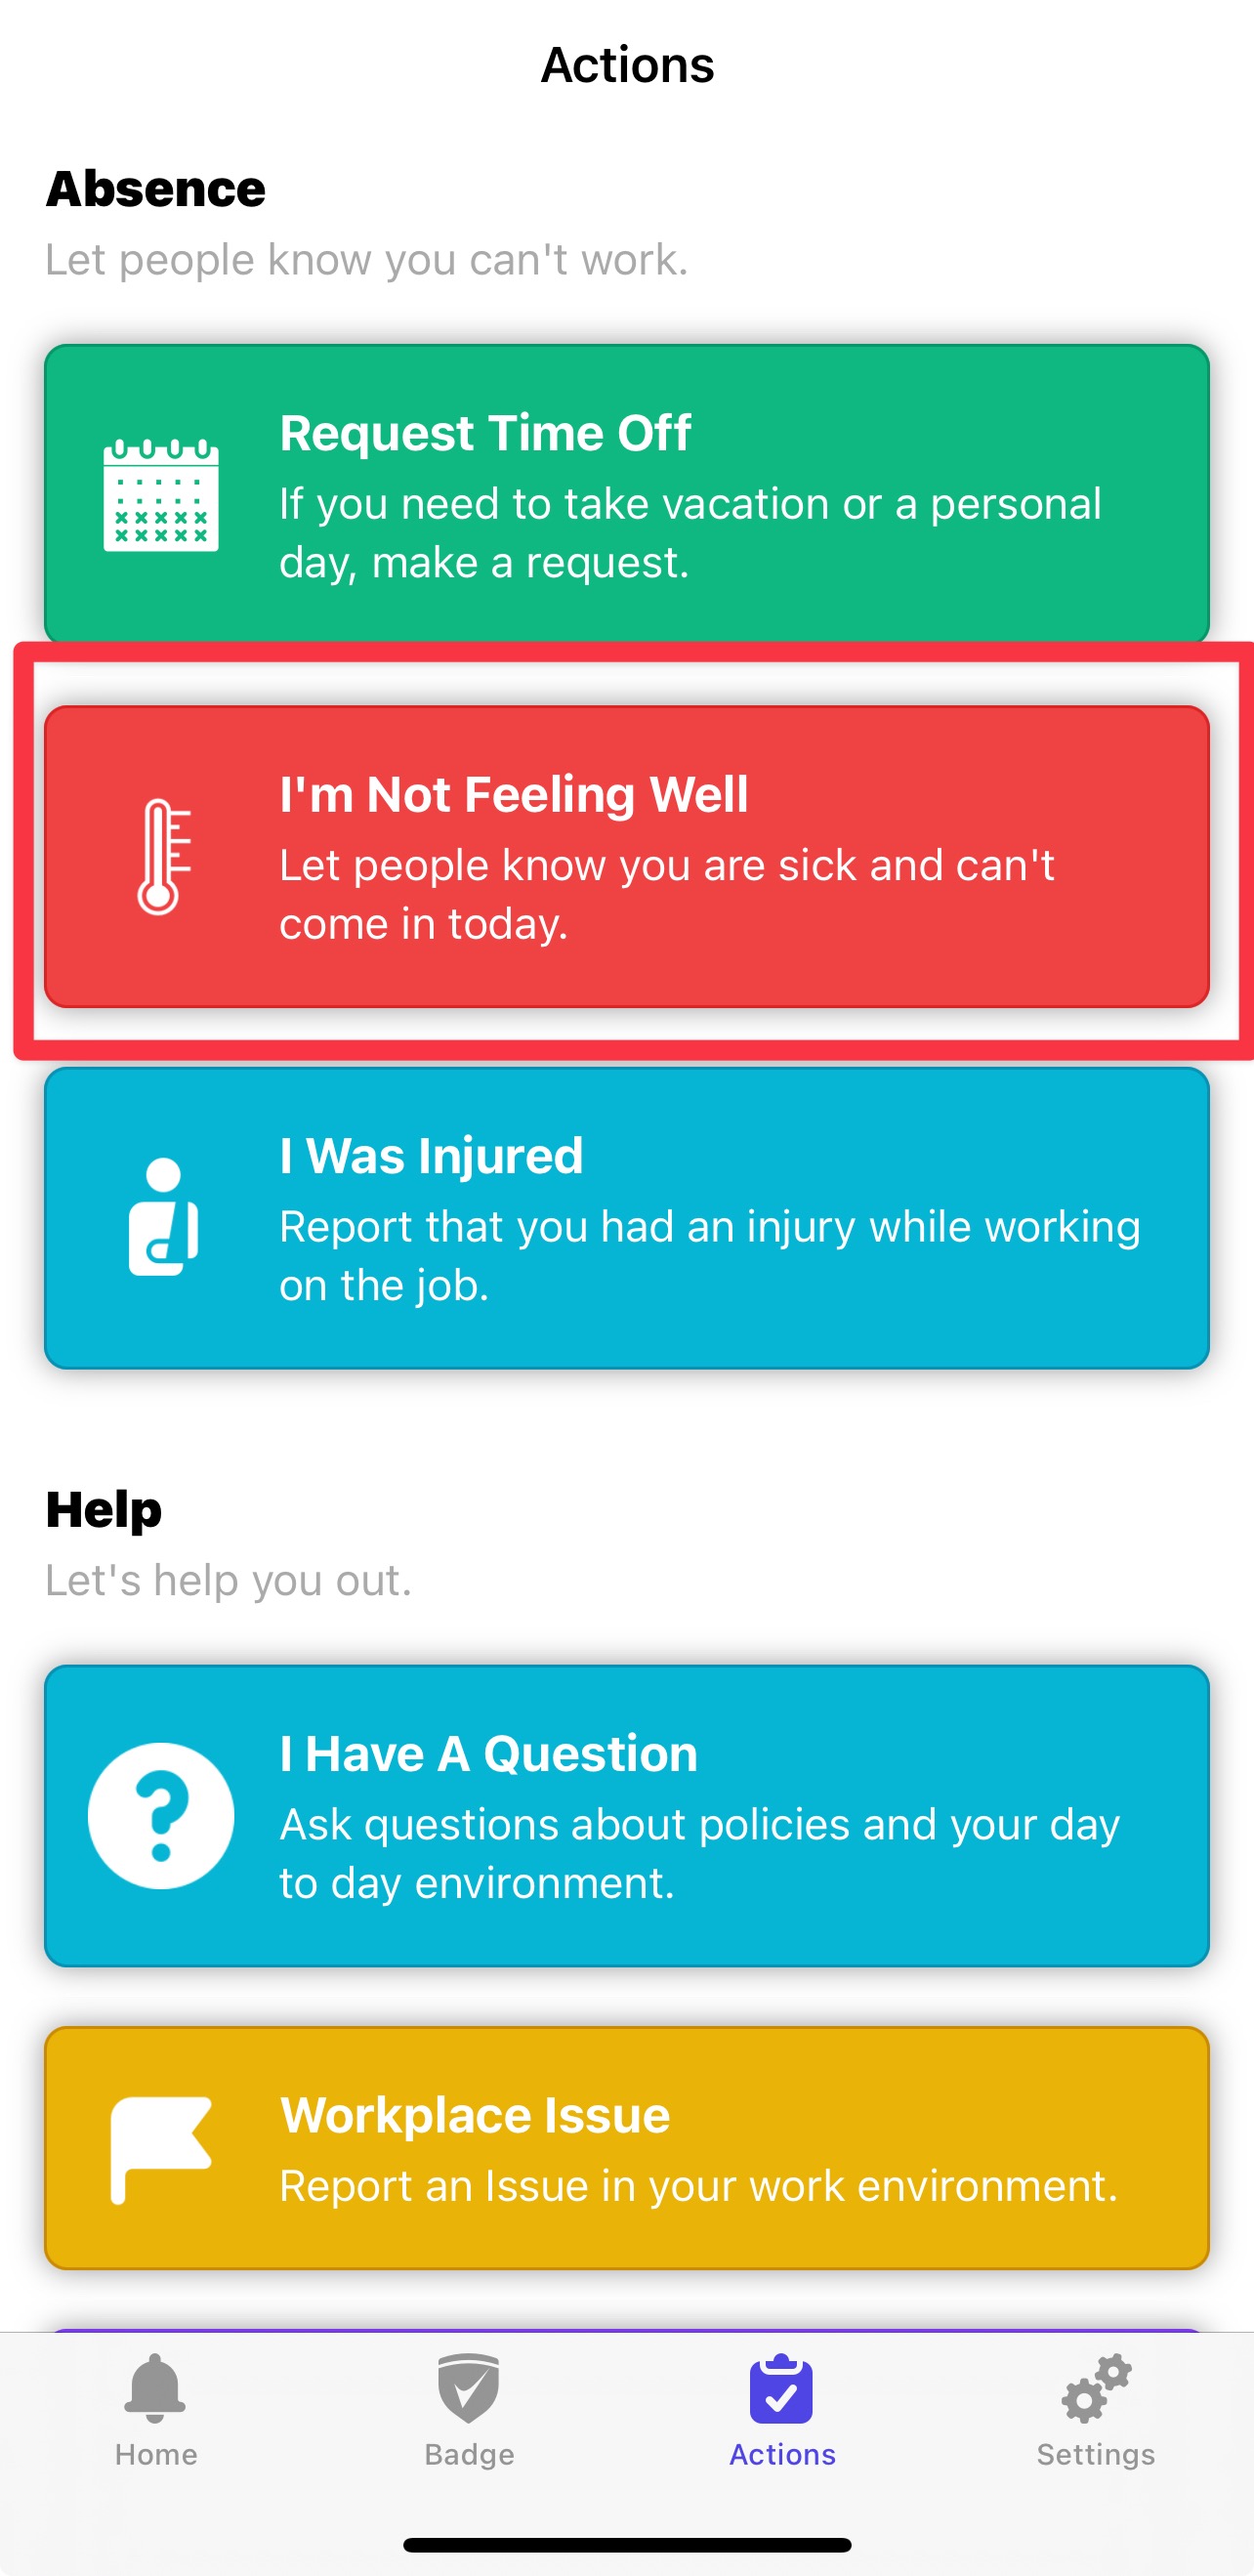
Below is an example of illness reporting via one of the preset case types.
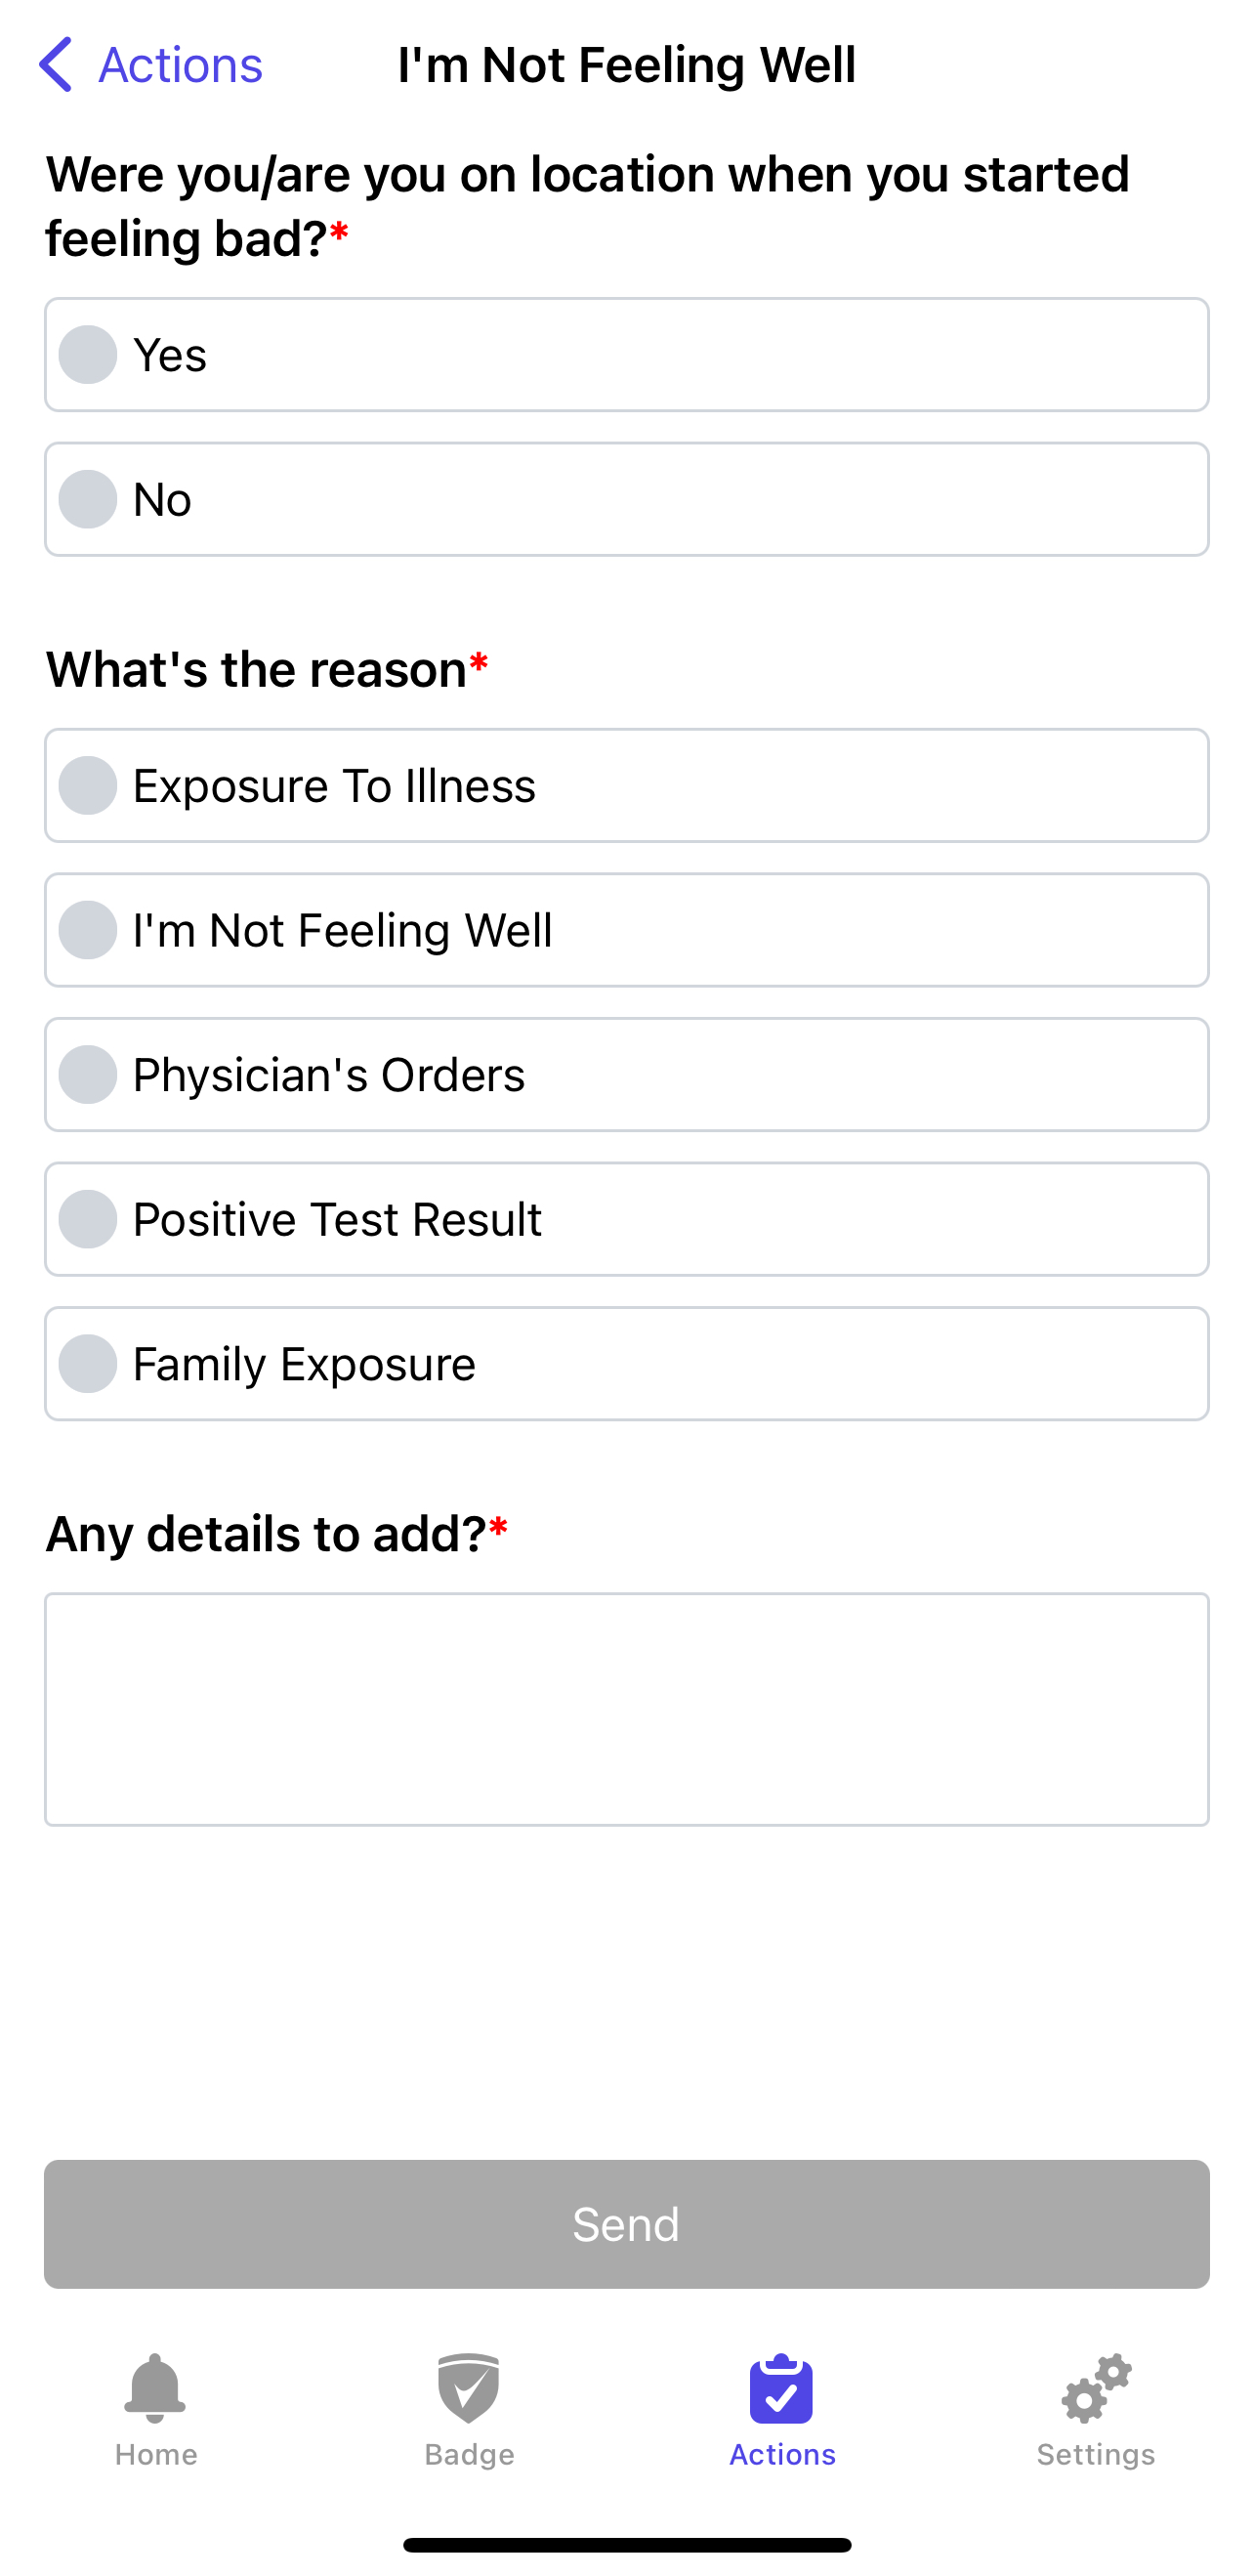
Click on the "I'm Not Feeling Well" button", select the appropriate details, and a case will be created upon submission. A line of communication is also opened automatically.
Fields shown in the example below can be customized:

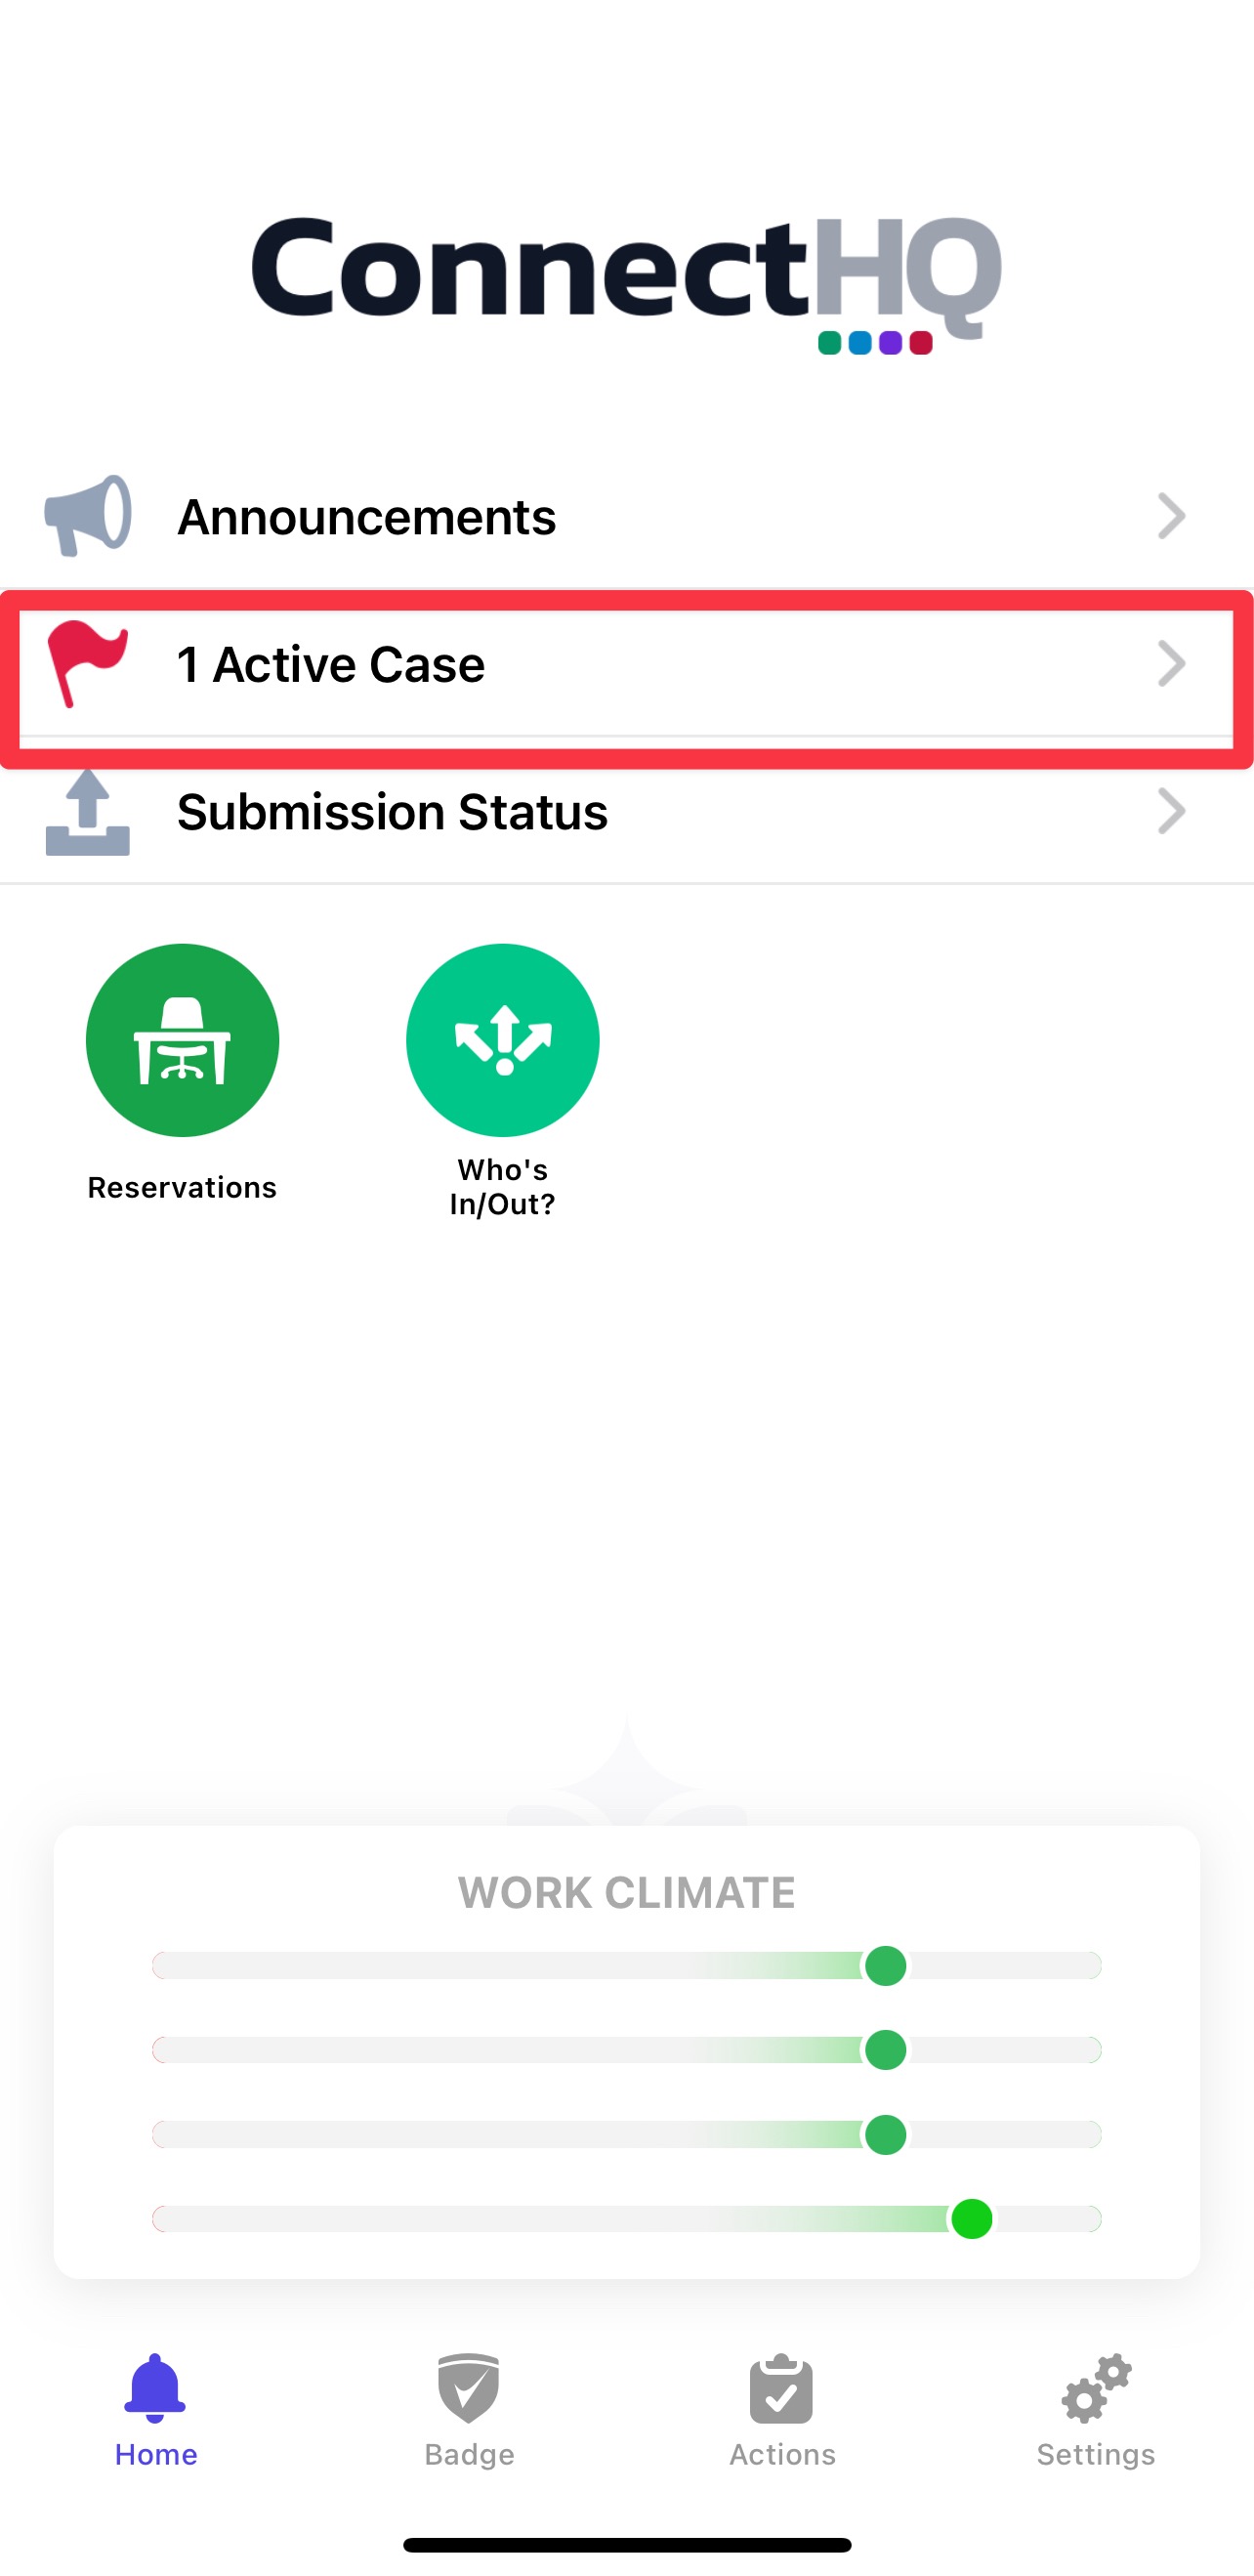
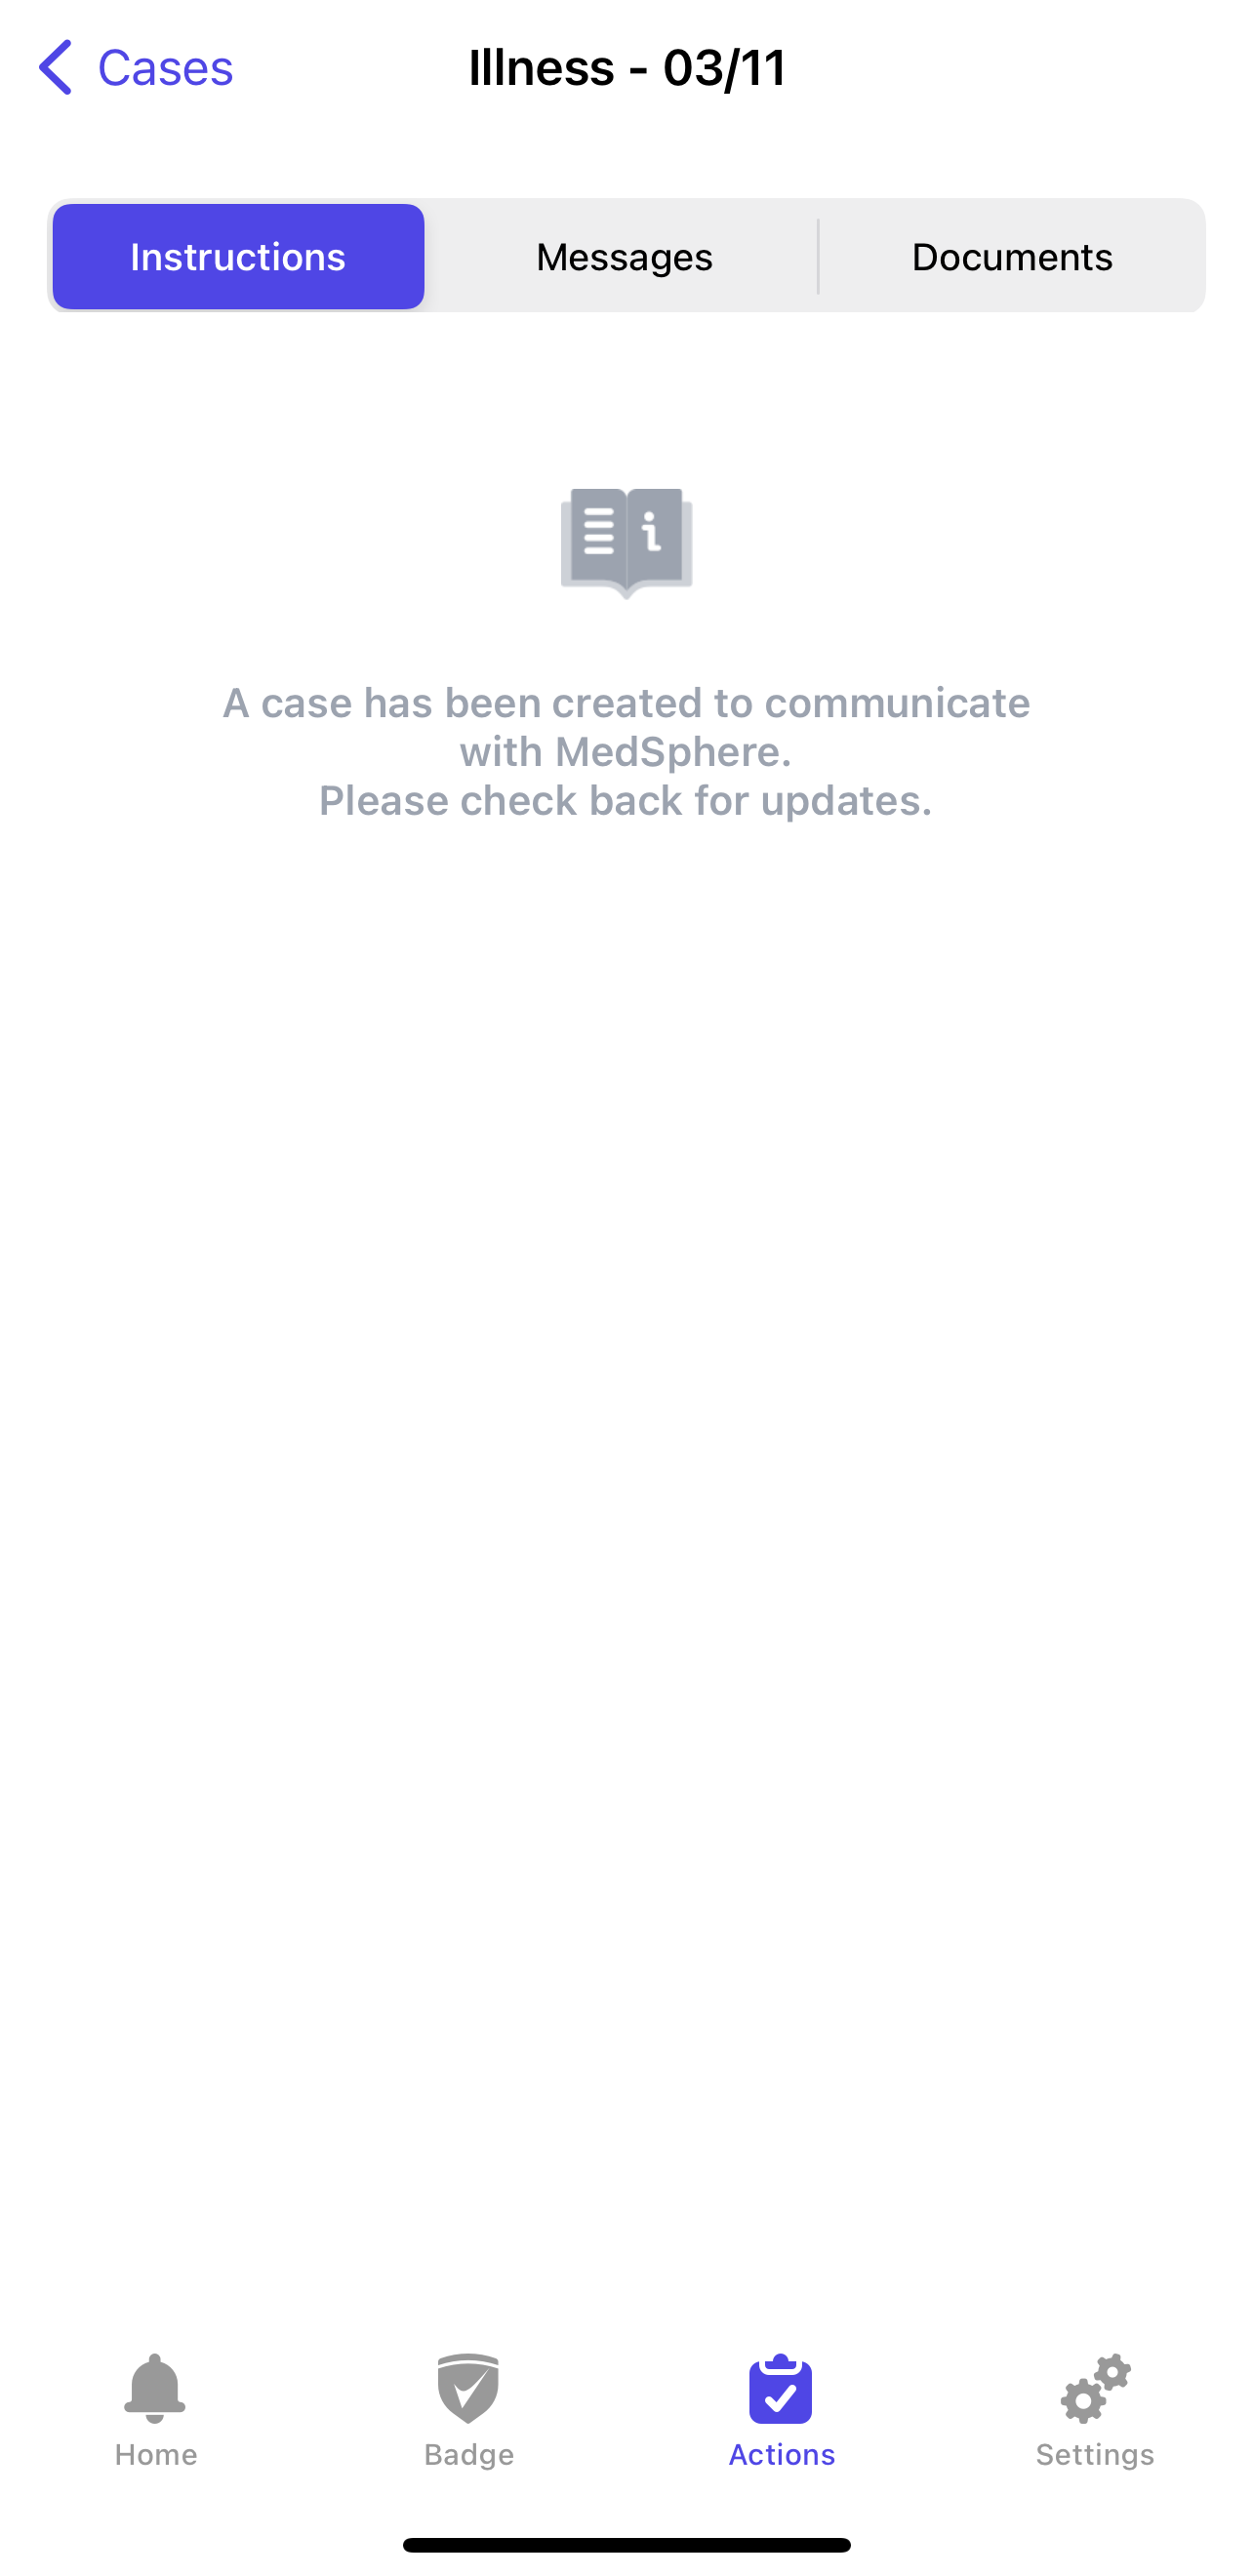
Click the "x Active Case" button on the home page of the app to track cases in progress.
Here, you can review instructions, send messages to Case Managers, upload documents (i.e. test results, doctor's notes, etc.), and see case progress.

3. Request Help via the actions tab.
Here you will see various case types preset by your organization.
Disaster Relief
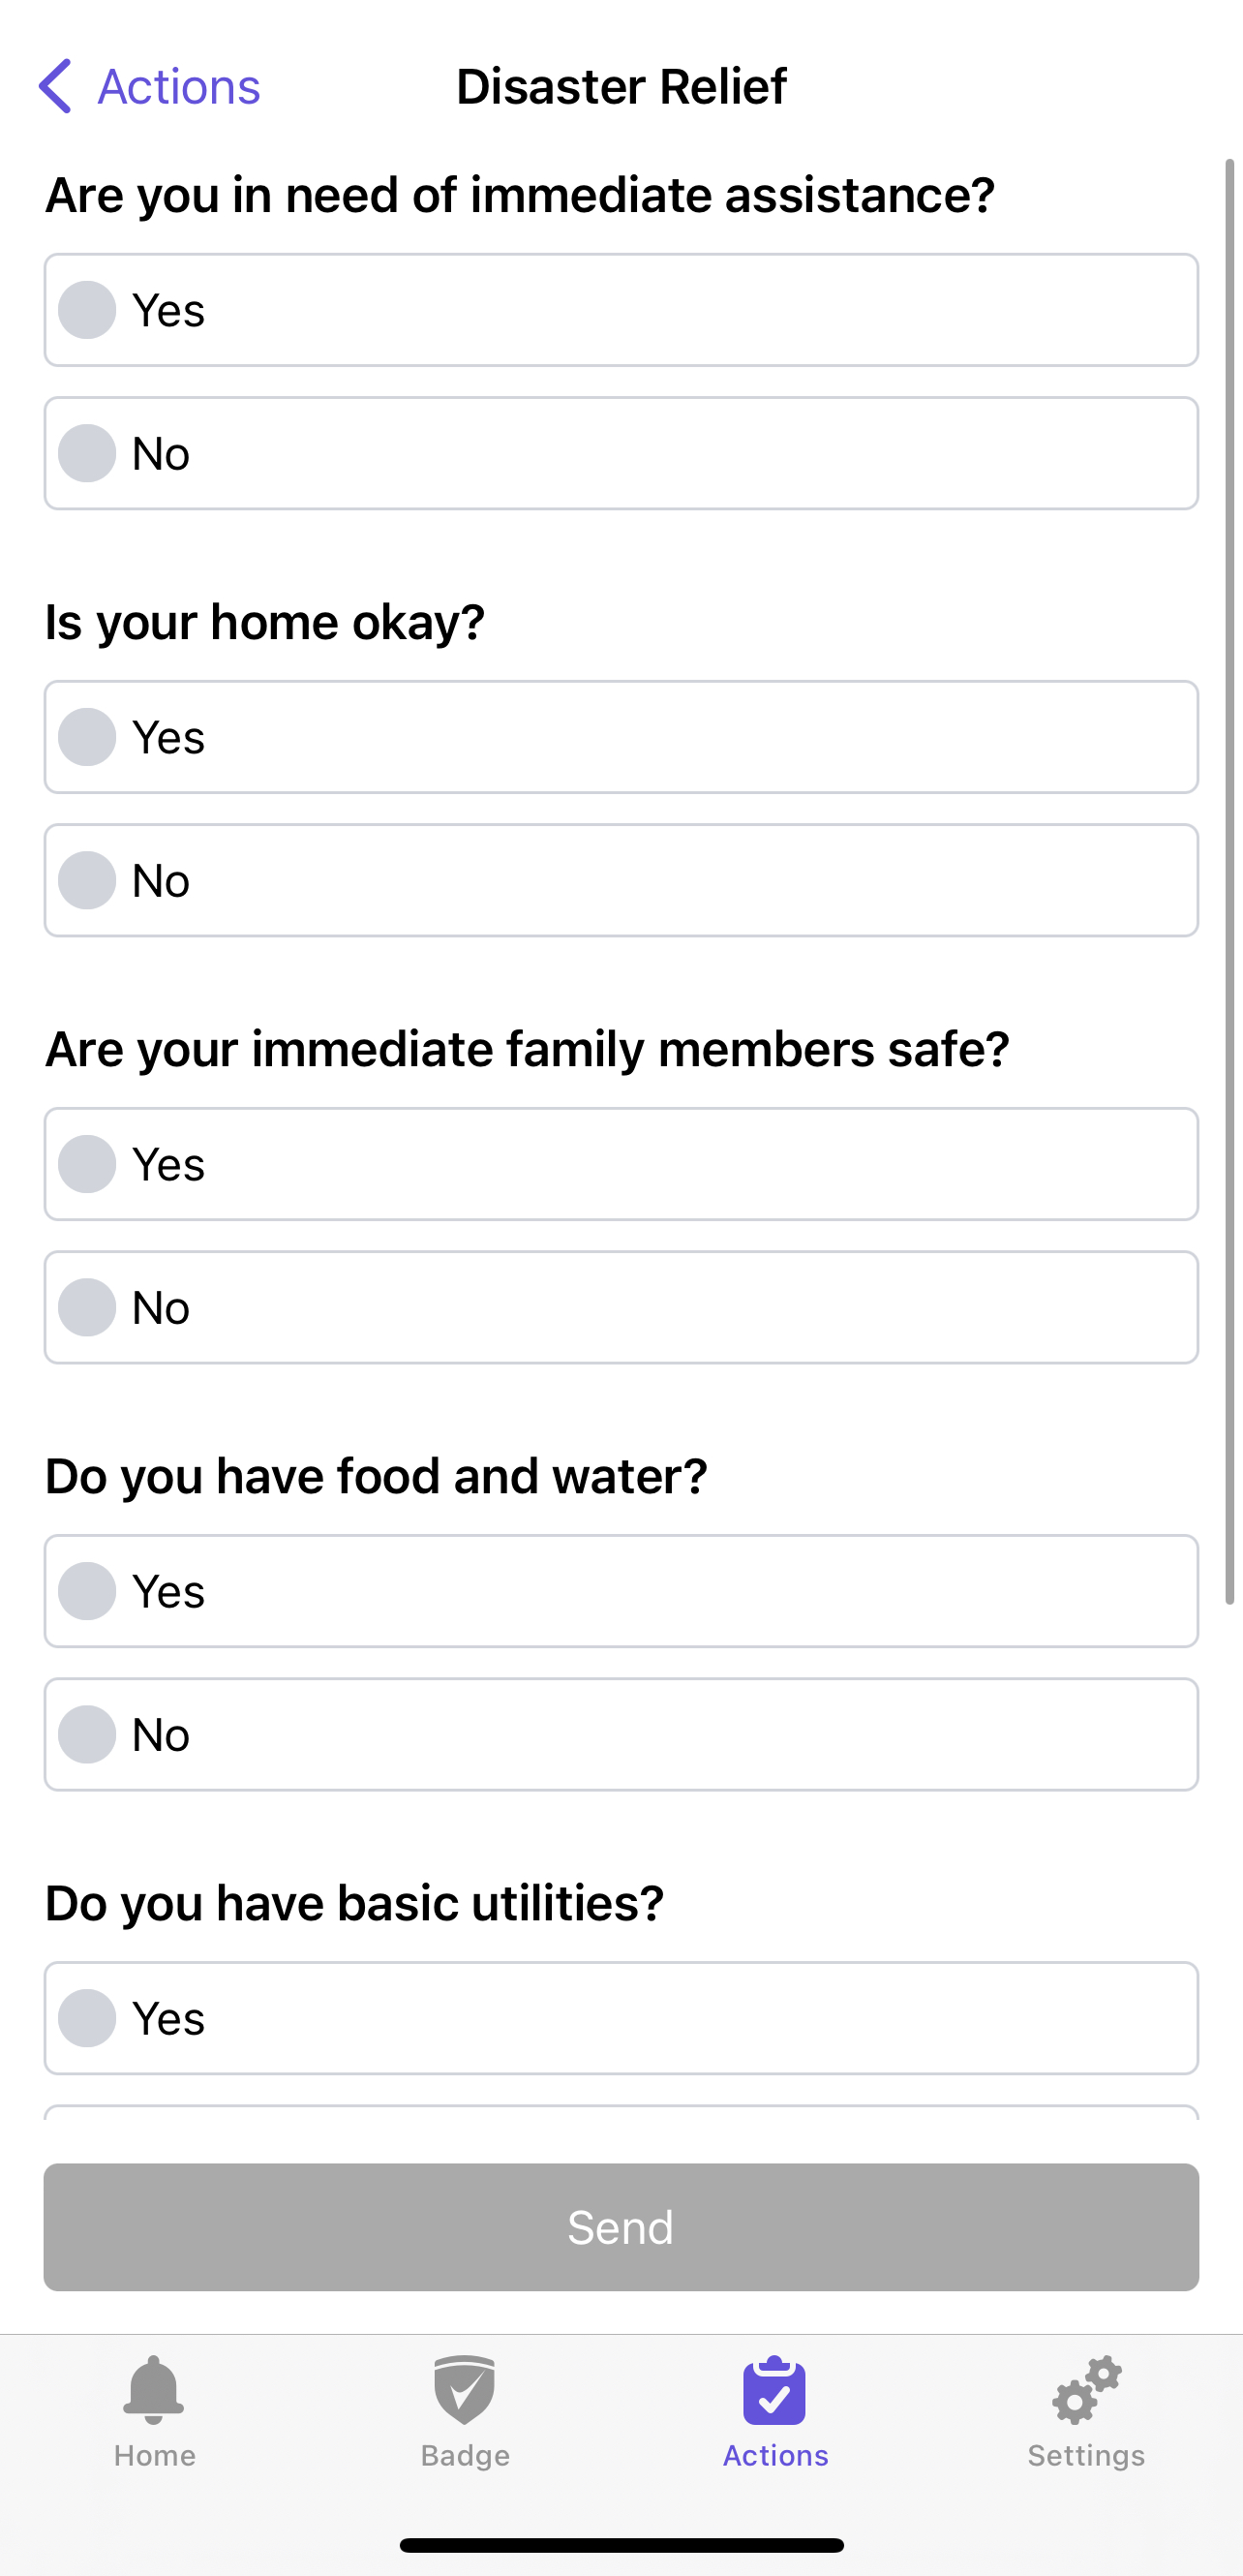
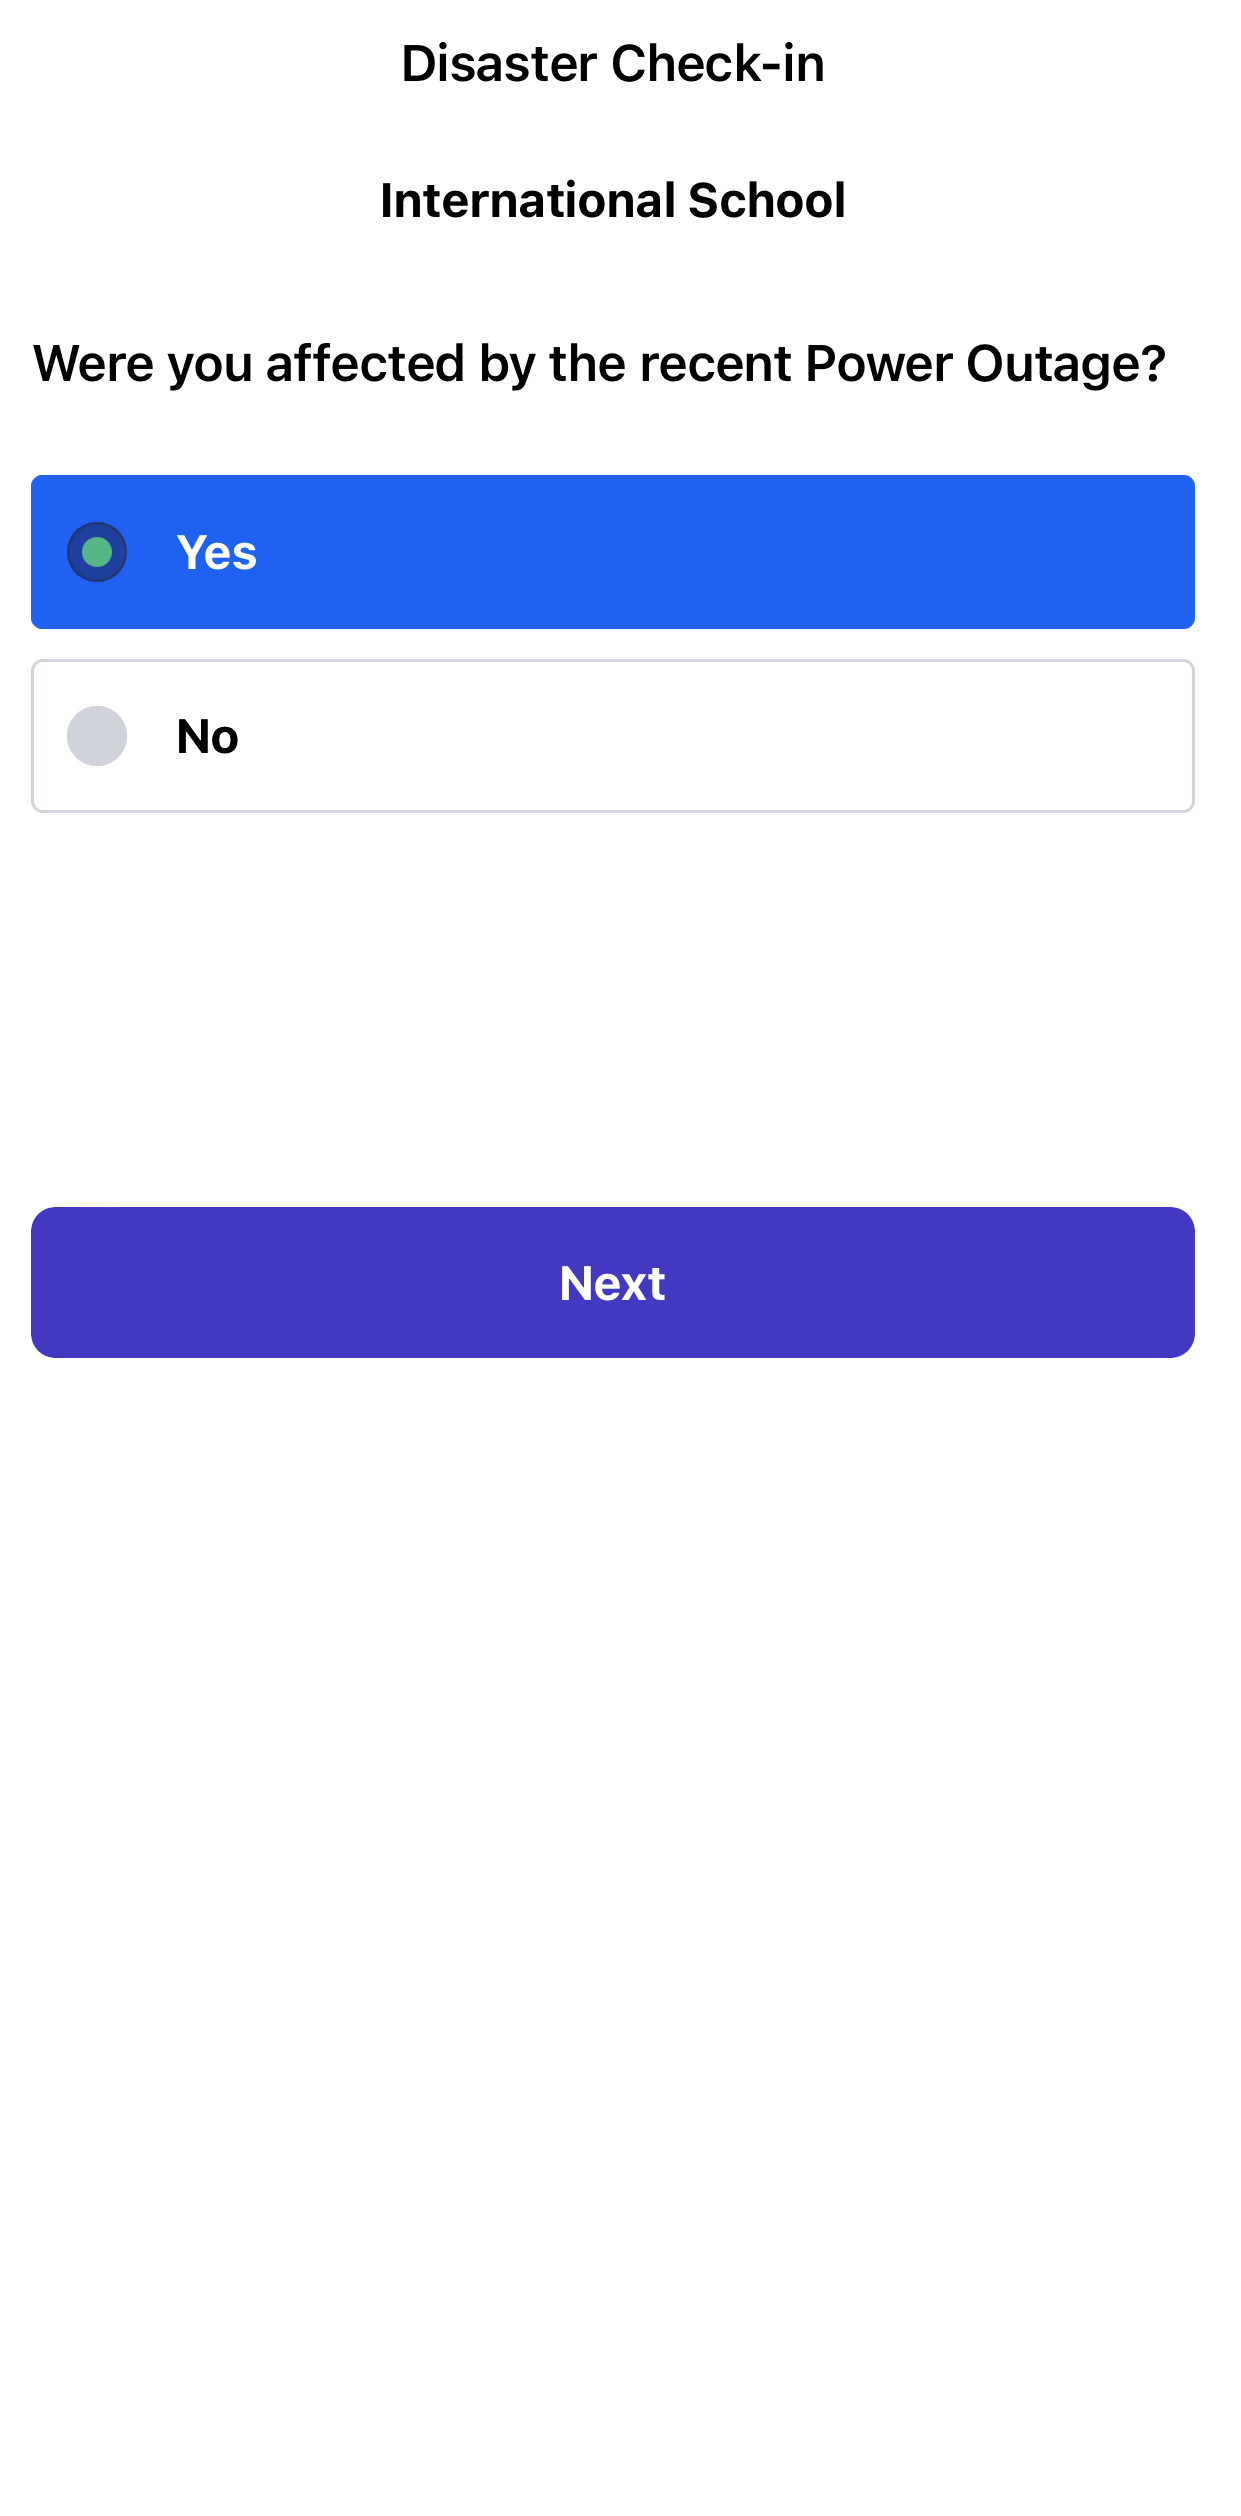
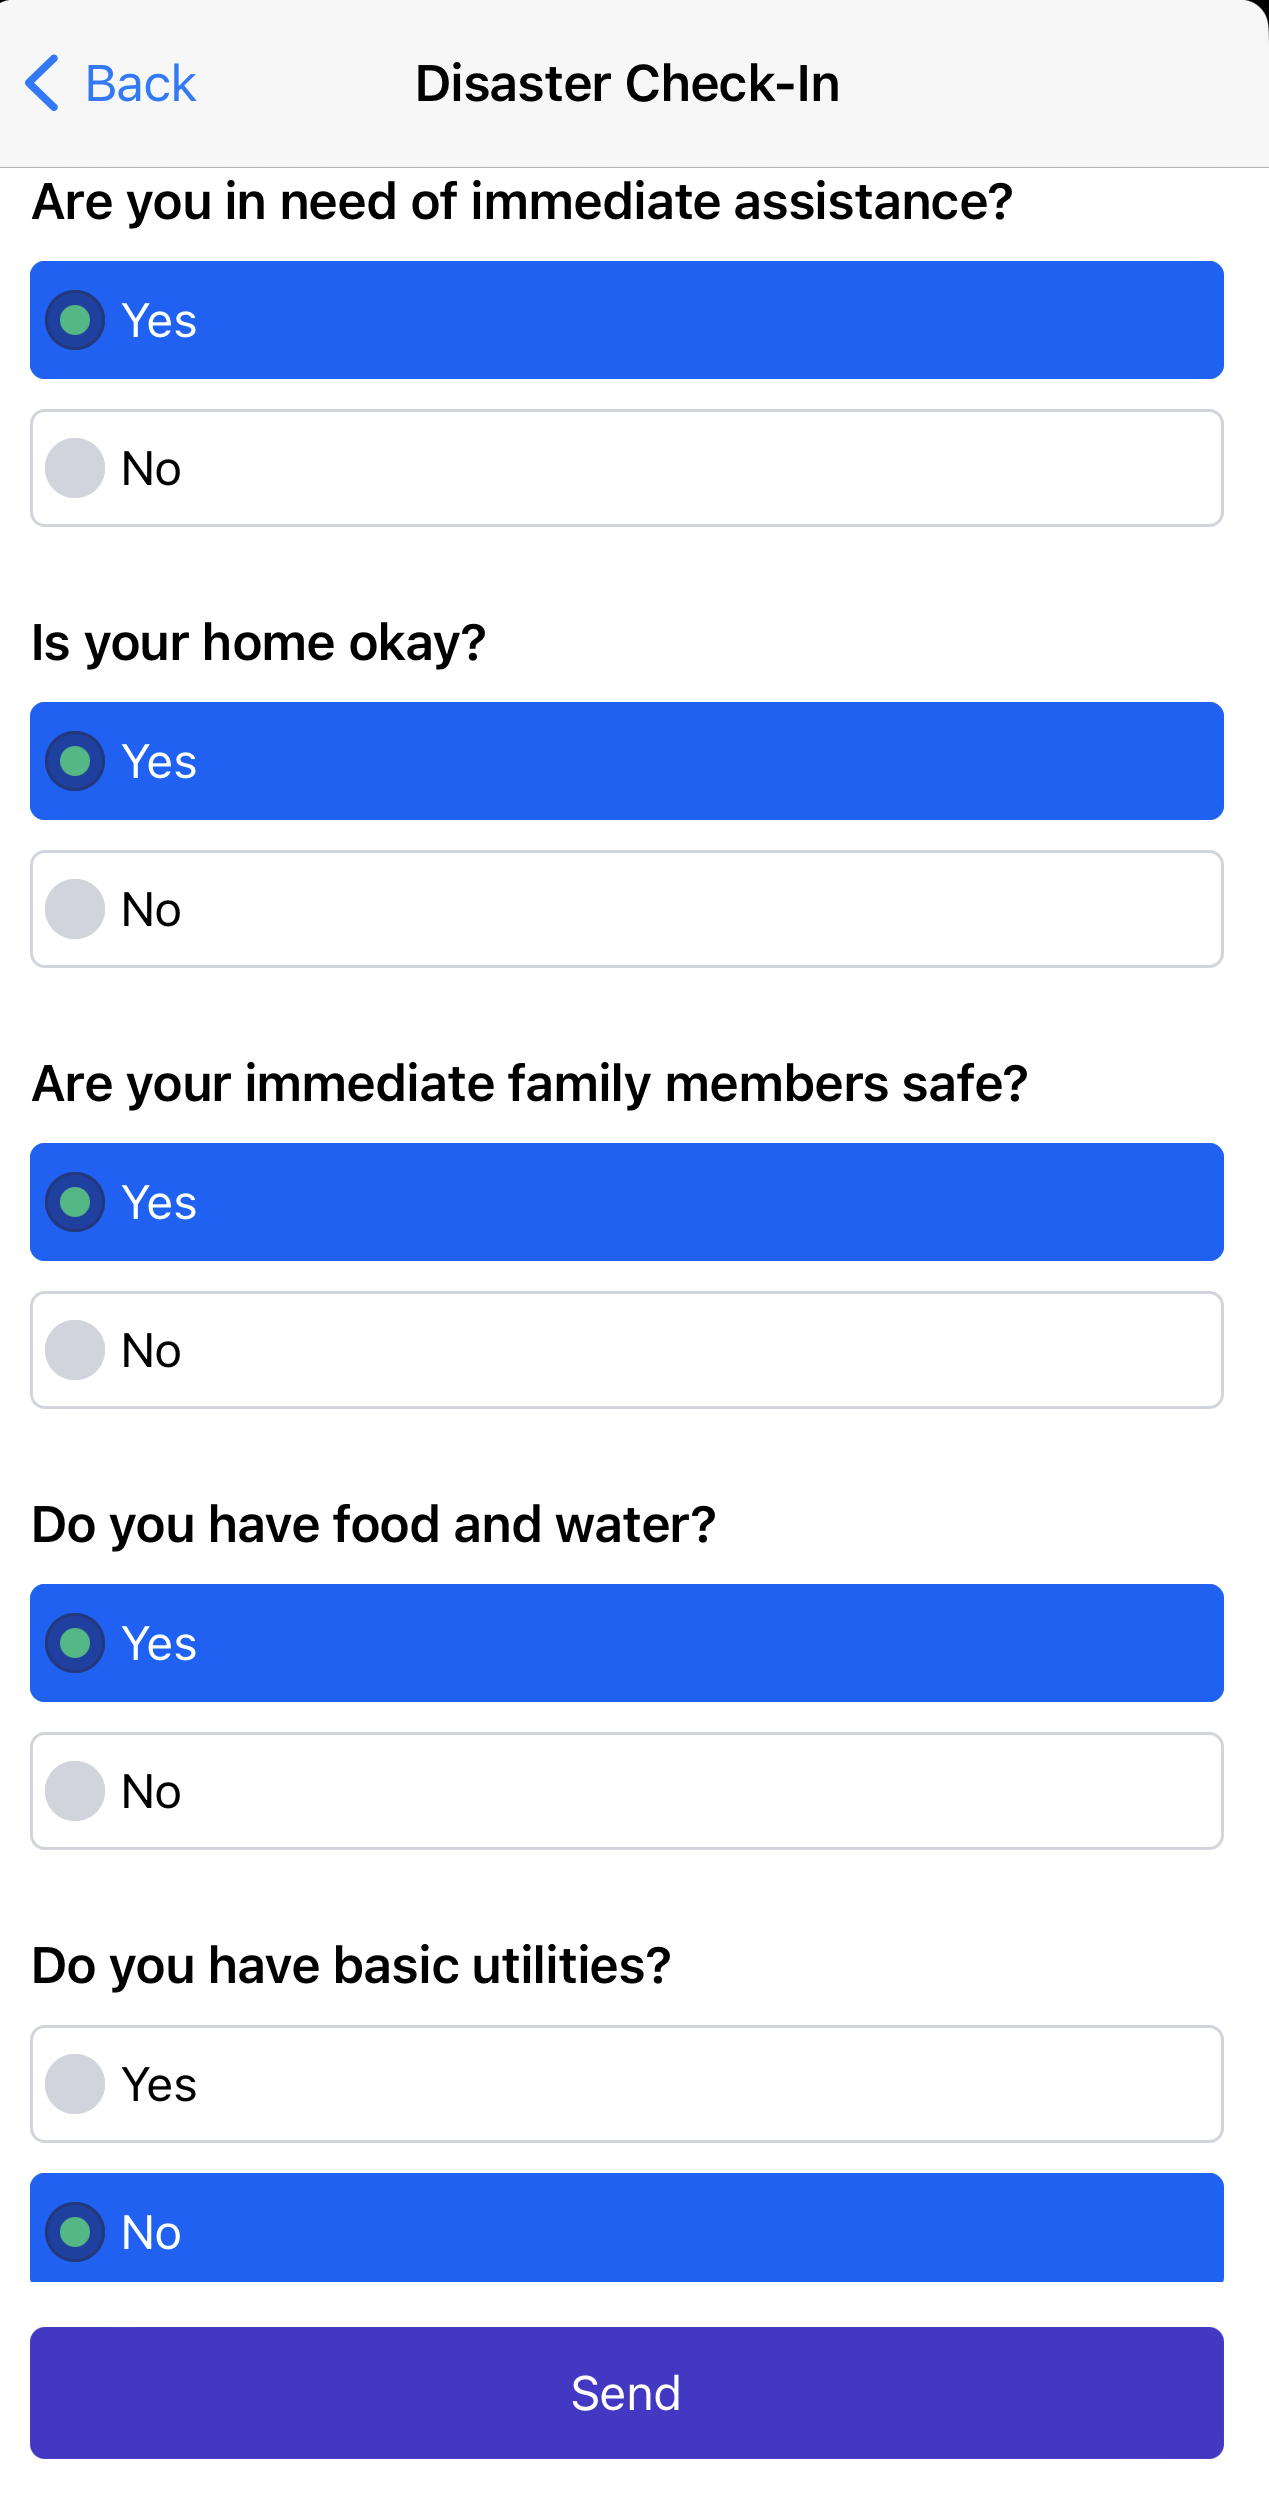
Below is an example of the preset Disaster Relief case type that can be used to report a disruption at your location.
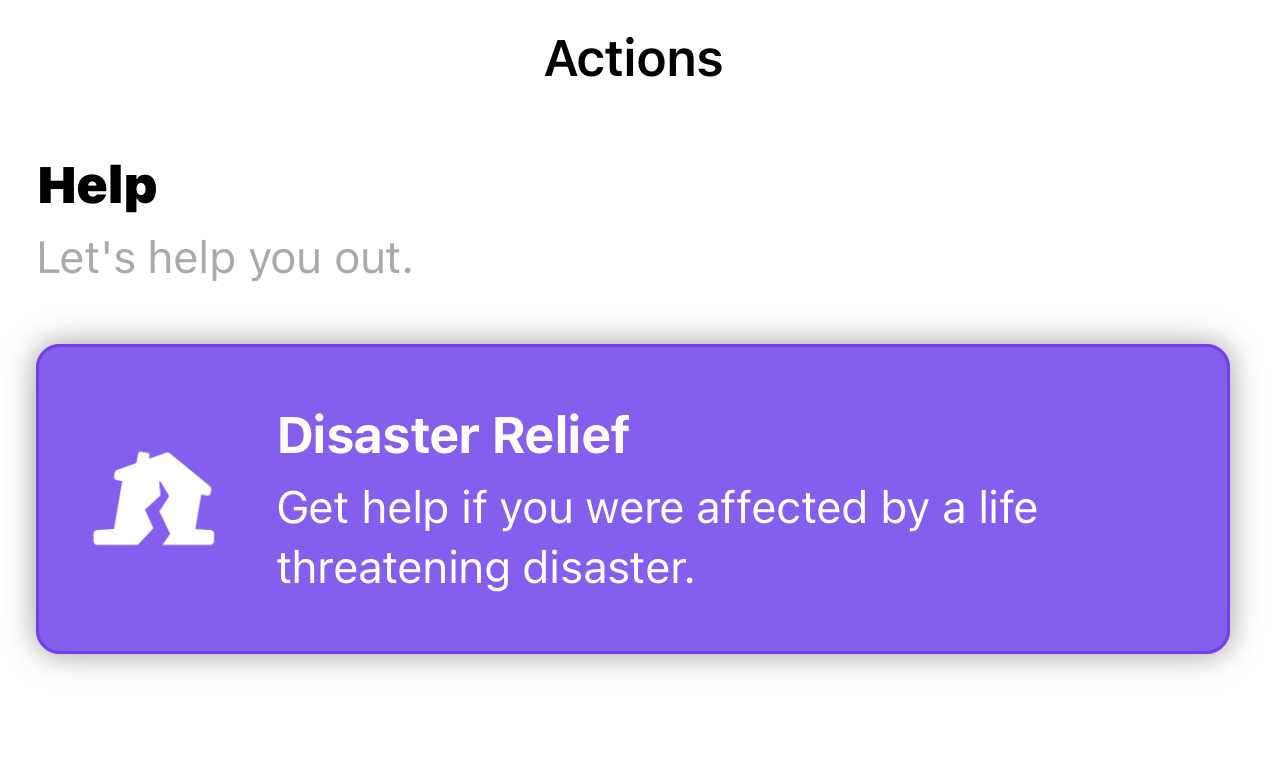
Answer the questions and the app will automatically create a case so your organization's response team can assist further.
4. Submitting required information
This section can be used to submit a form via any of the preset case types.
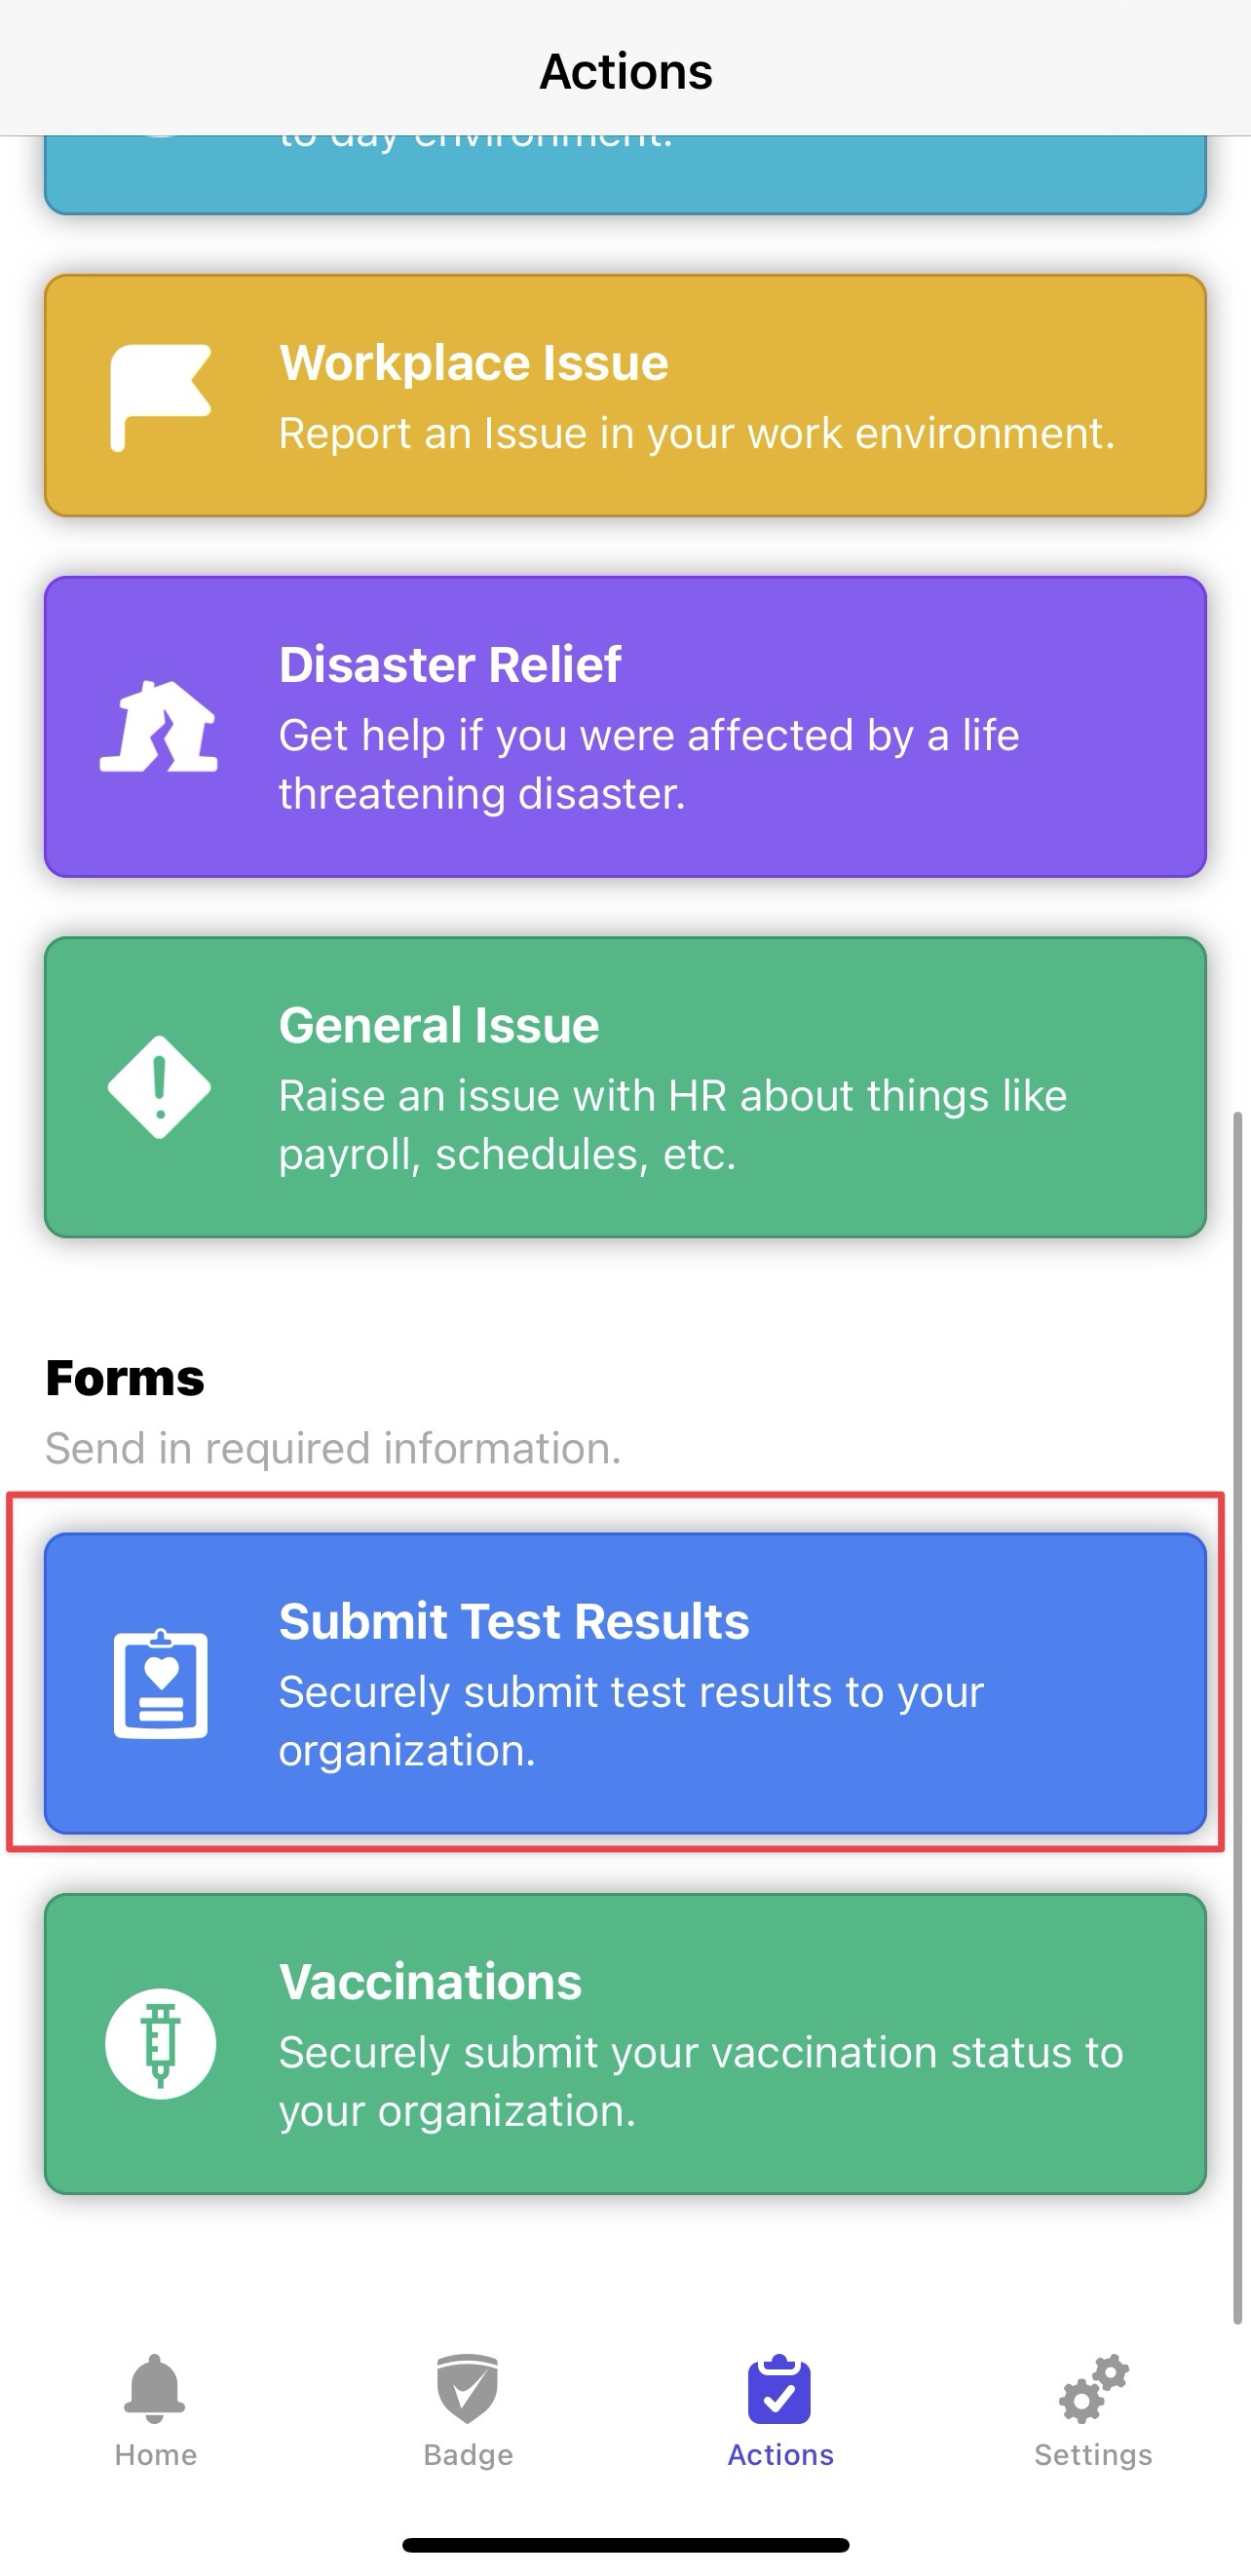
Below is an example of the preset Test Results and Vaccination submissions.
Submitting test results
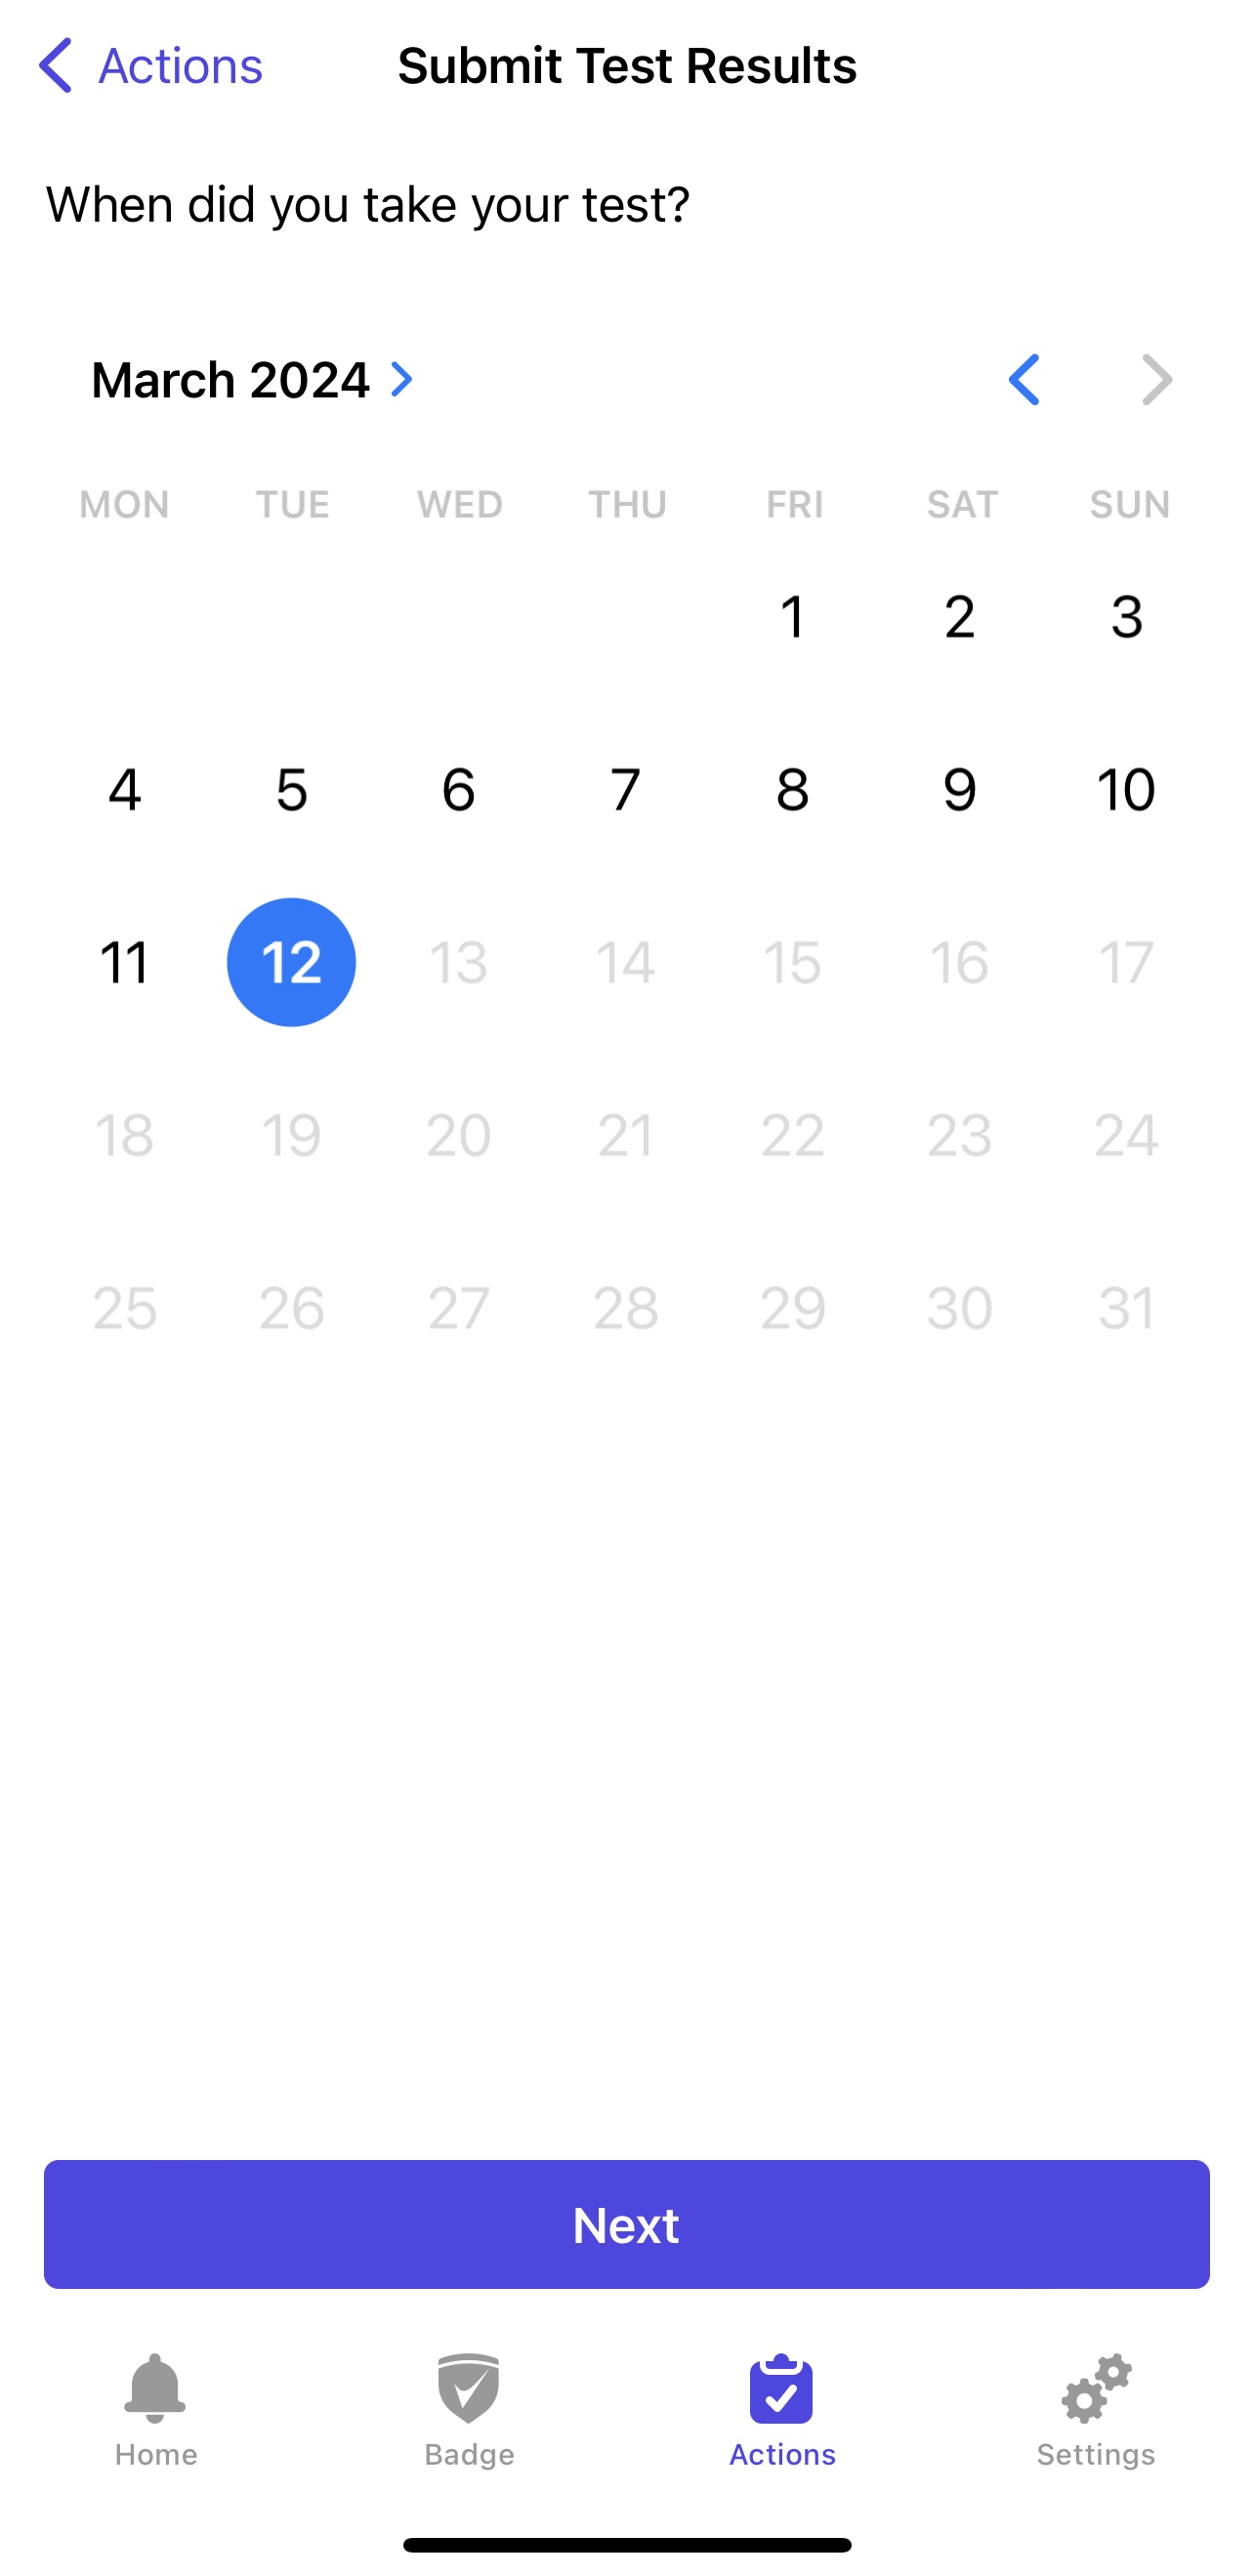
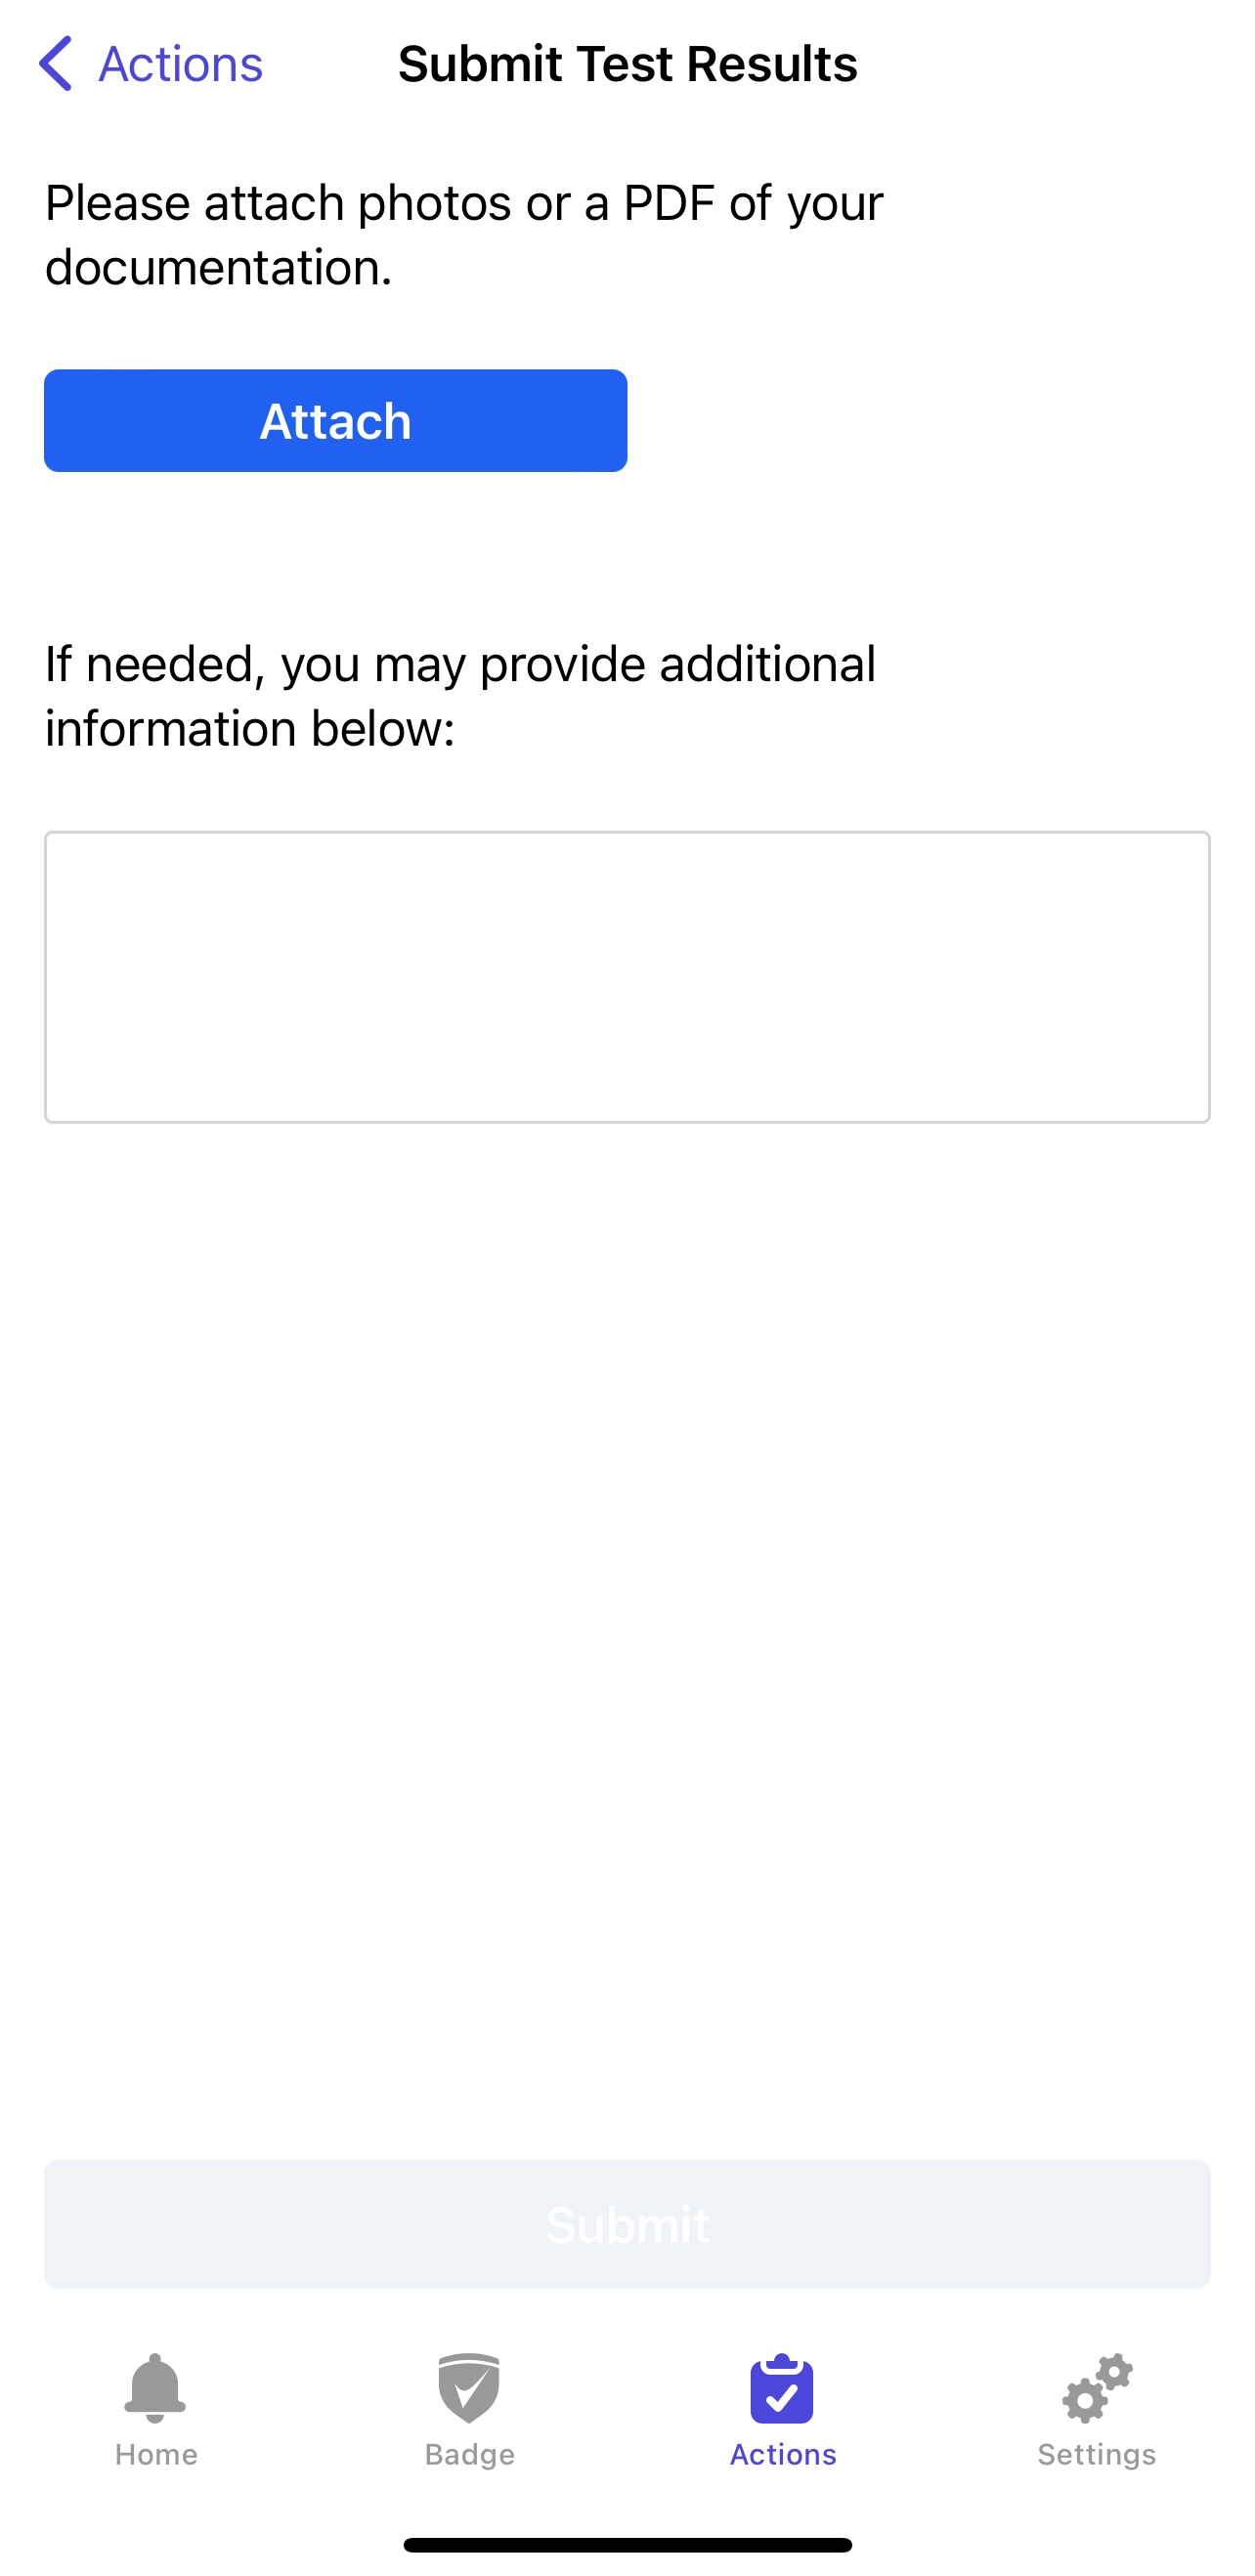
Clicking on the Blue "Submit Test Results" button, select the date the test was taken and attach documentation of the test result, and any additional information.
You should receive a notification stating that the submission has been sent, and then a notification based on whether the submission was accepted or rejected.
You can check the status of your submission under Submissions Status in the app.
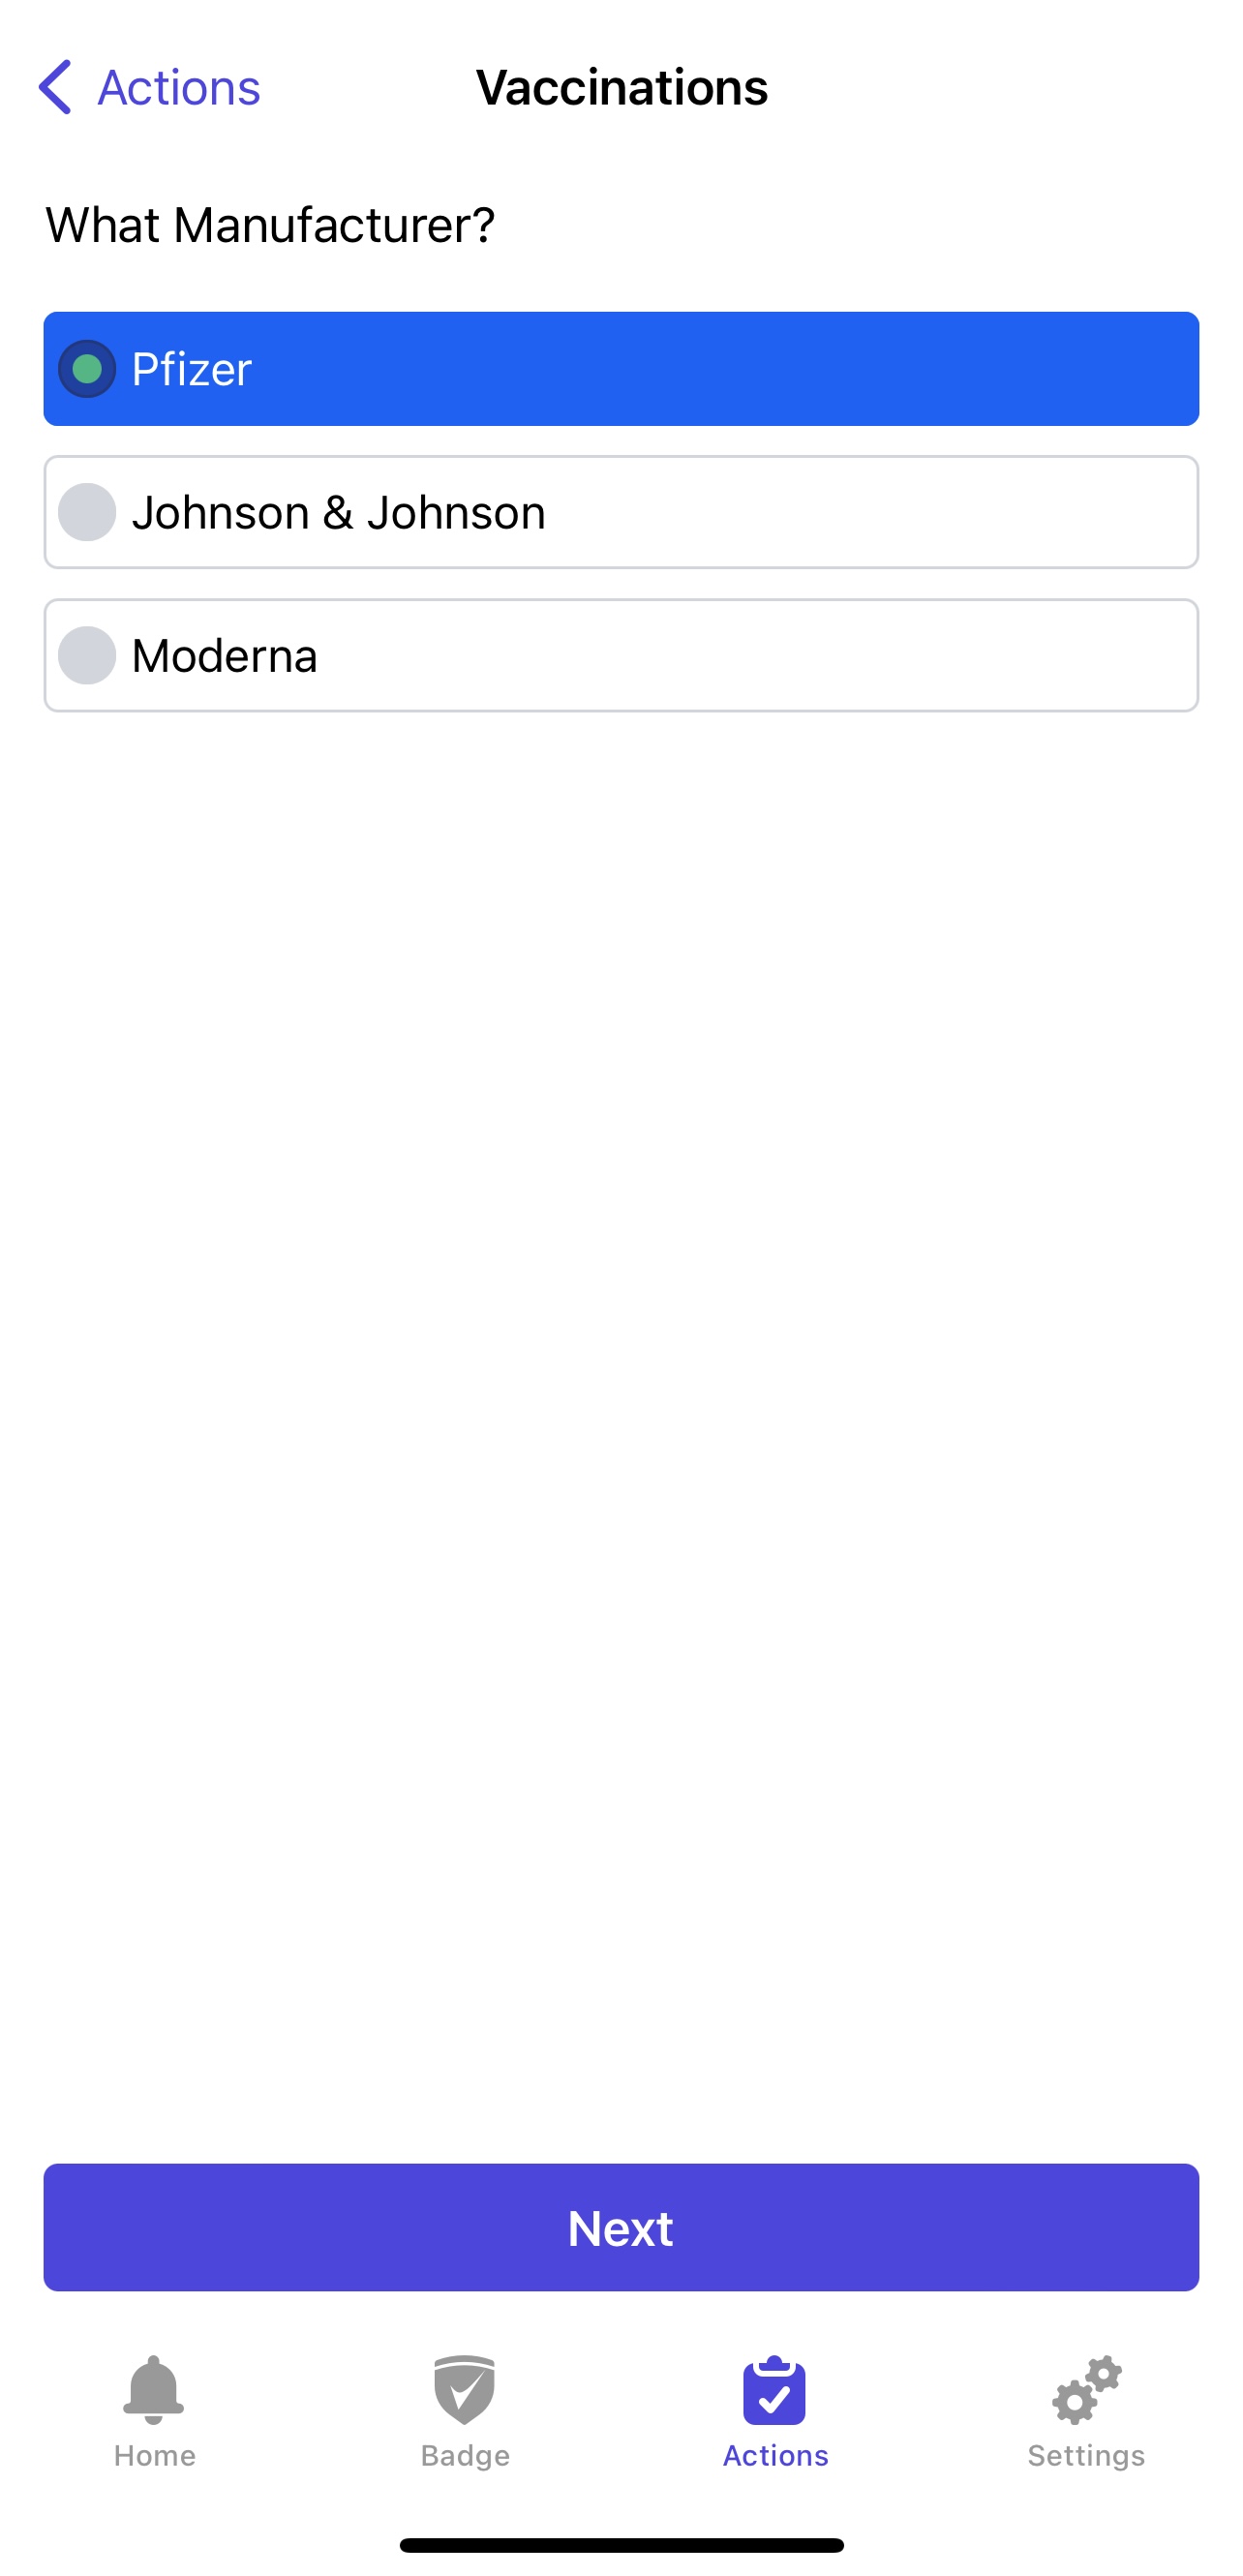
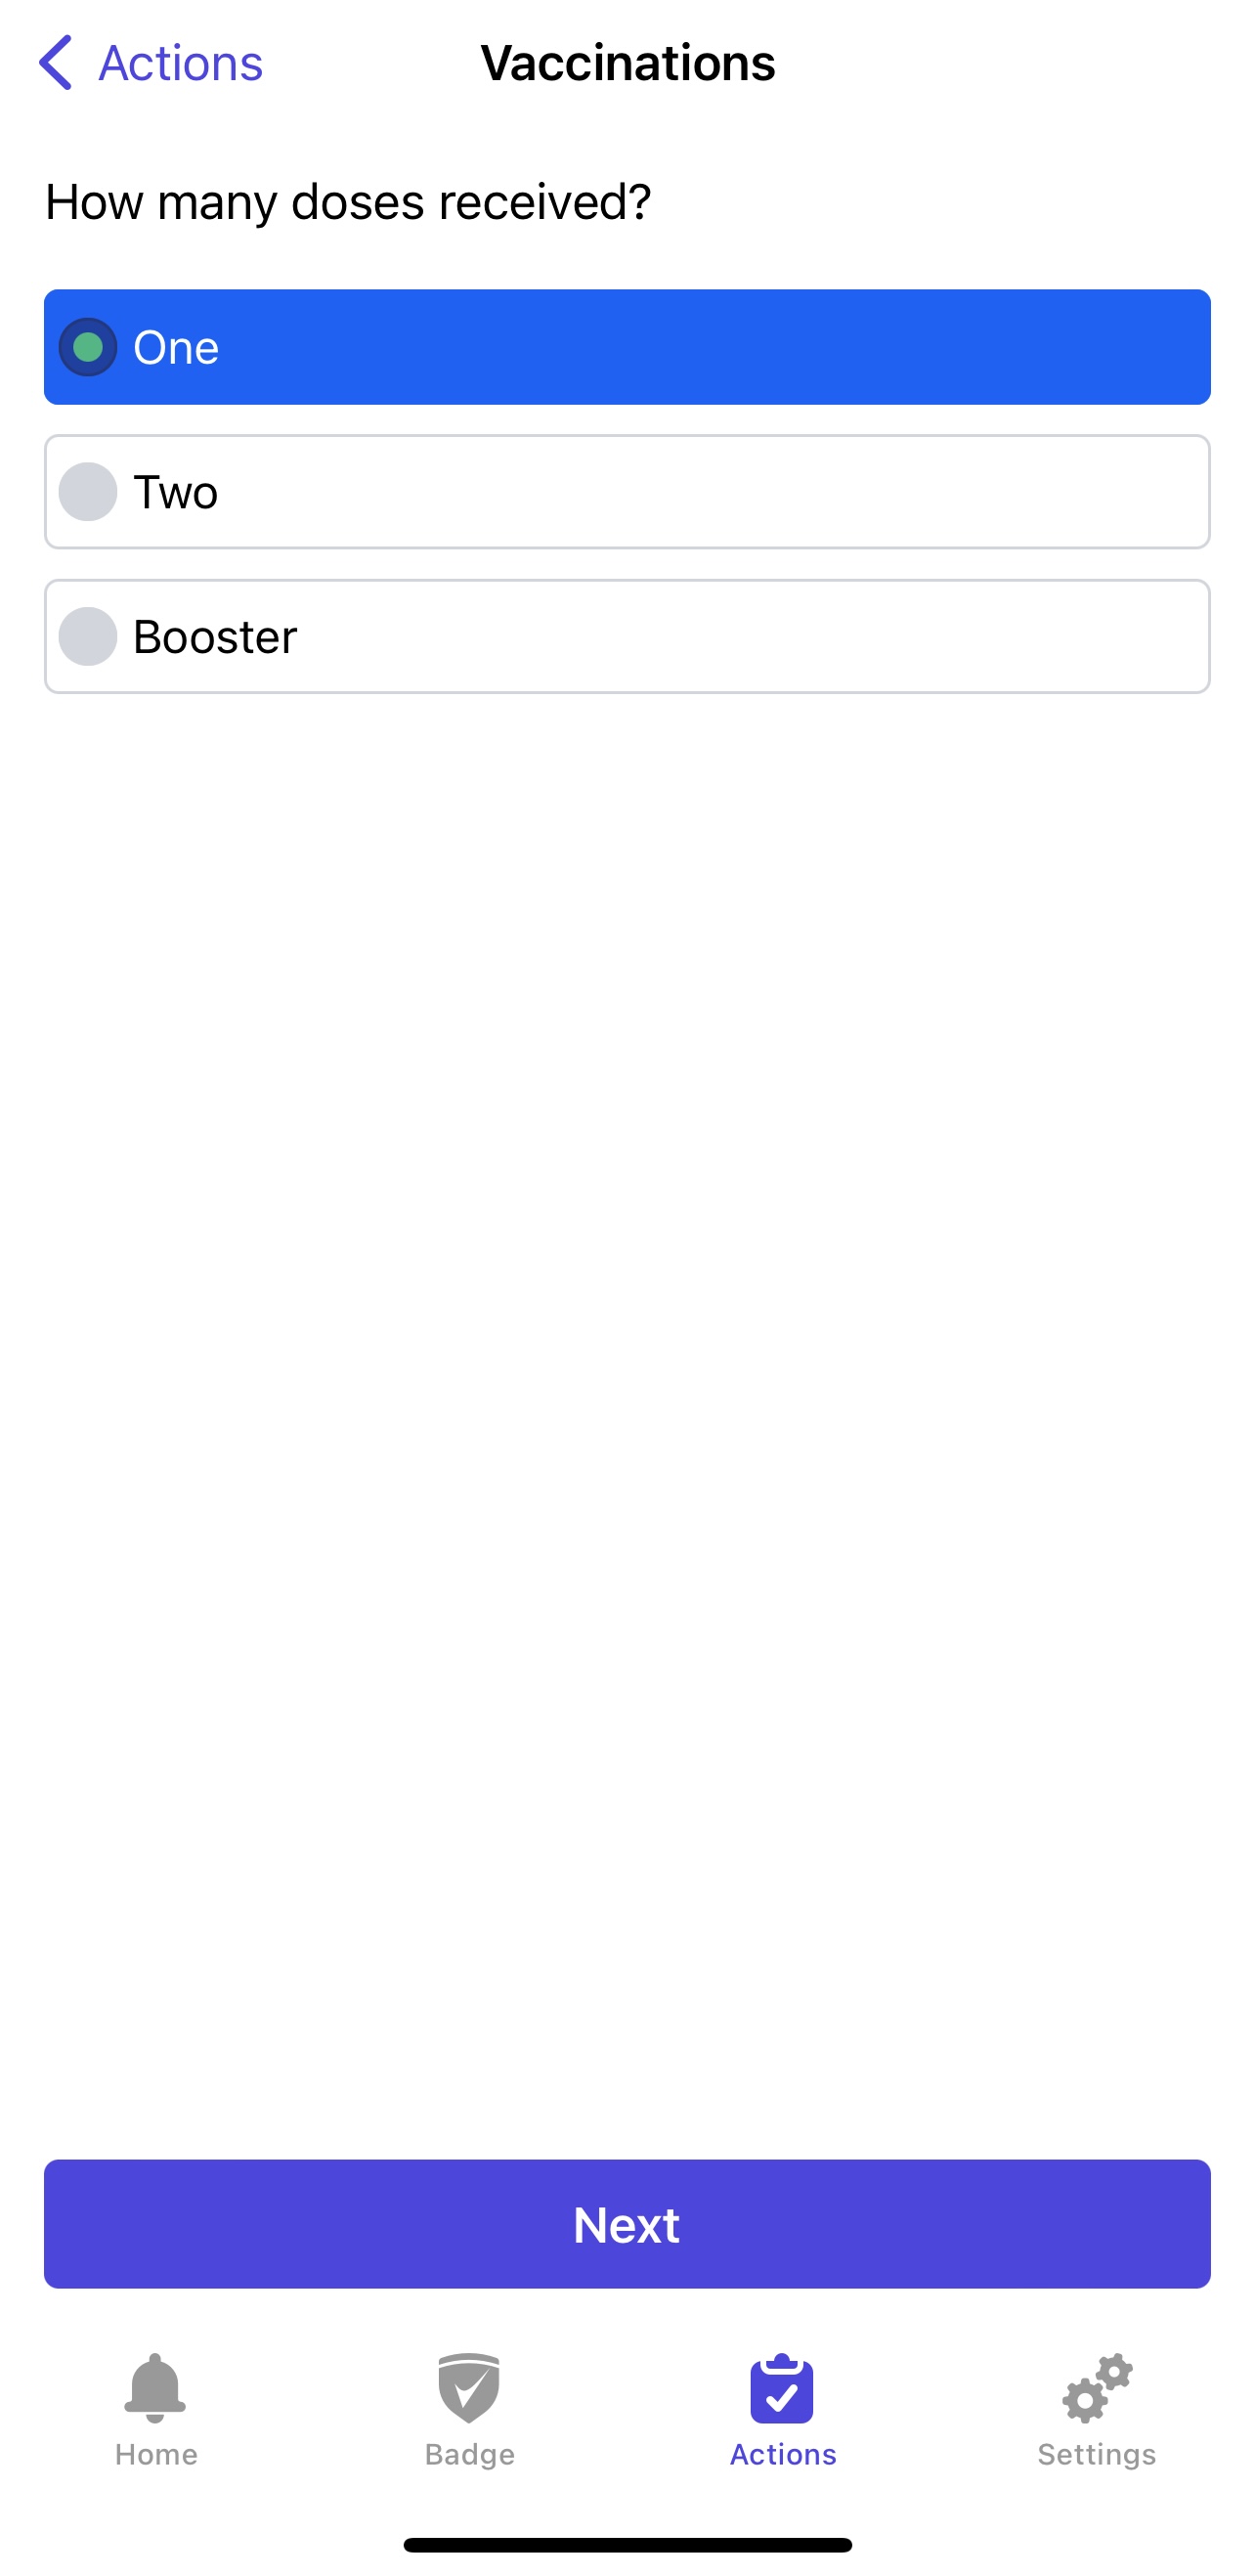
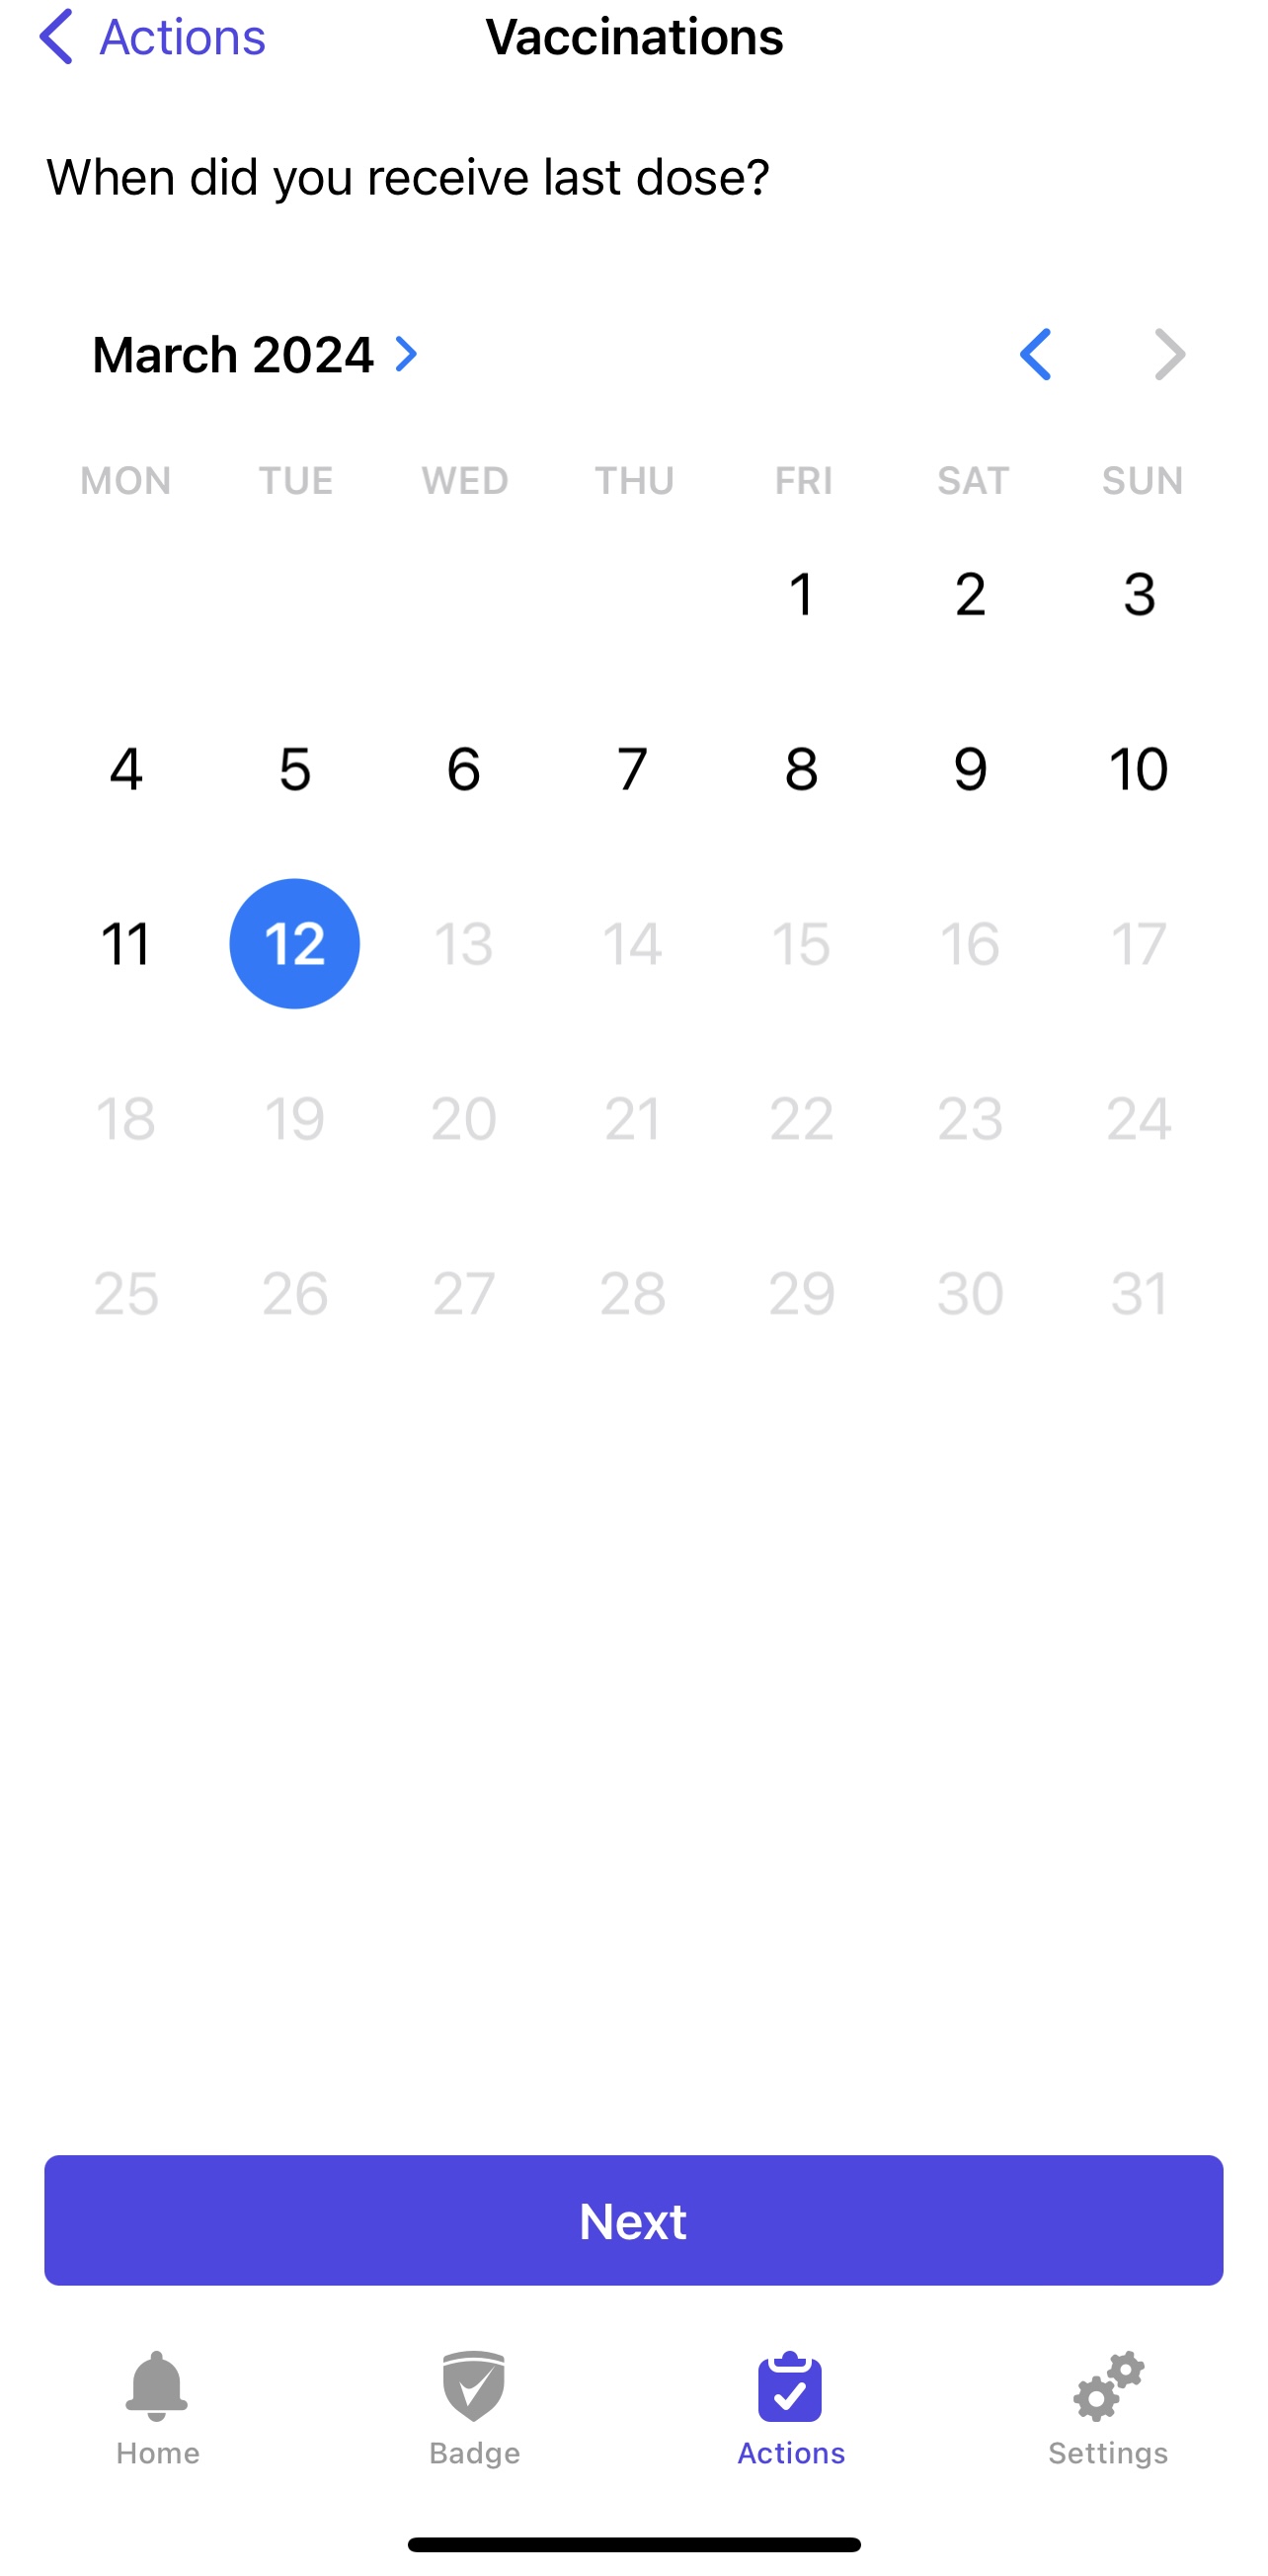
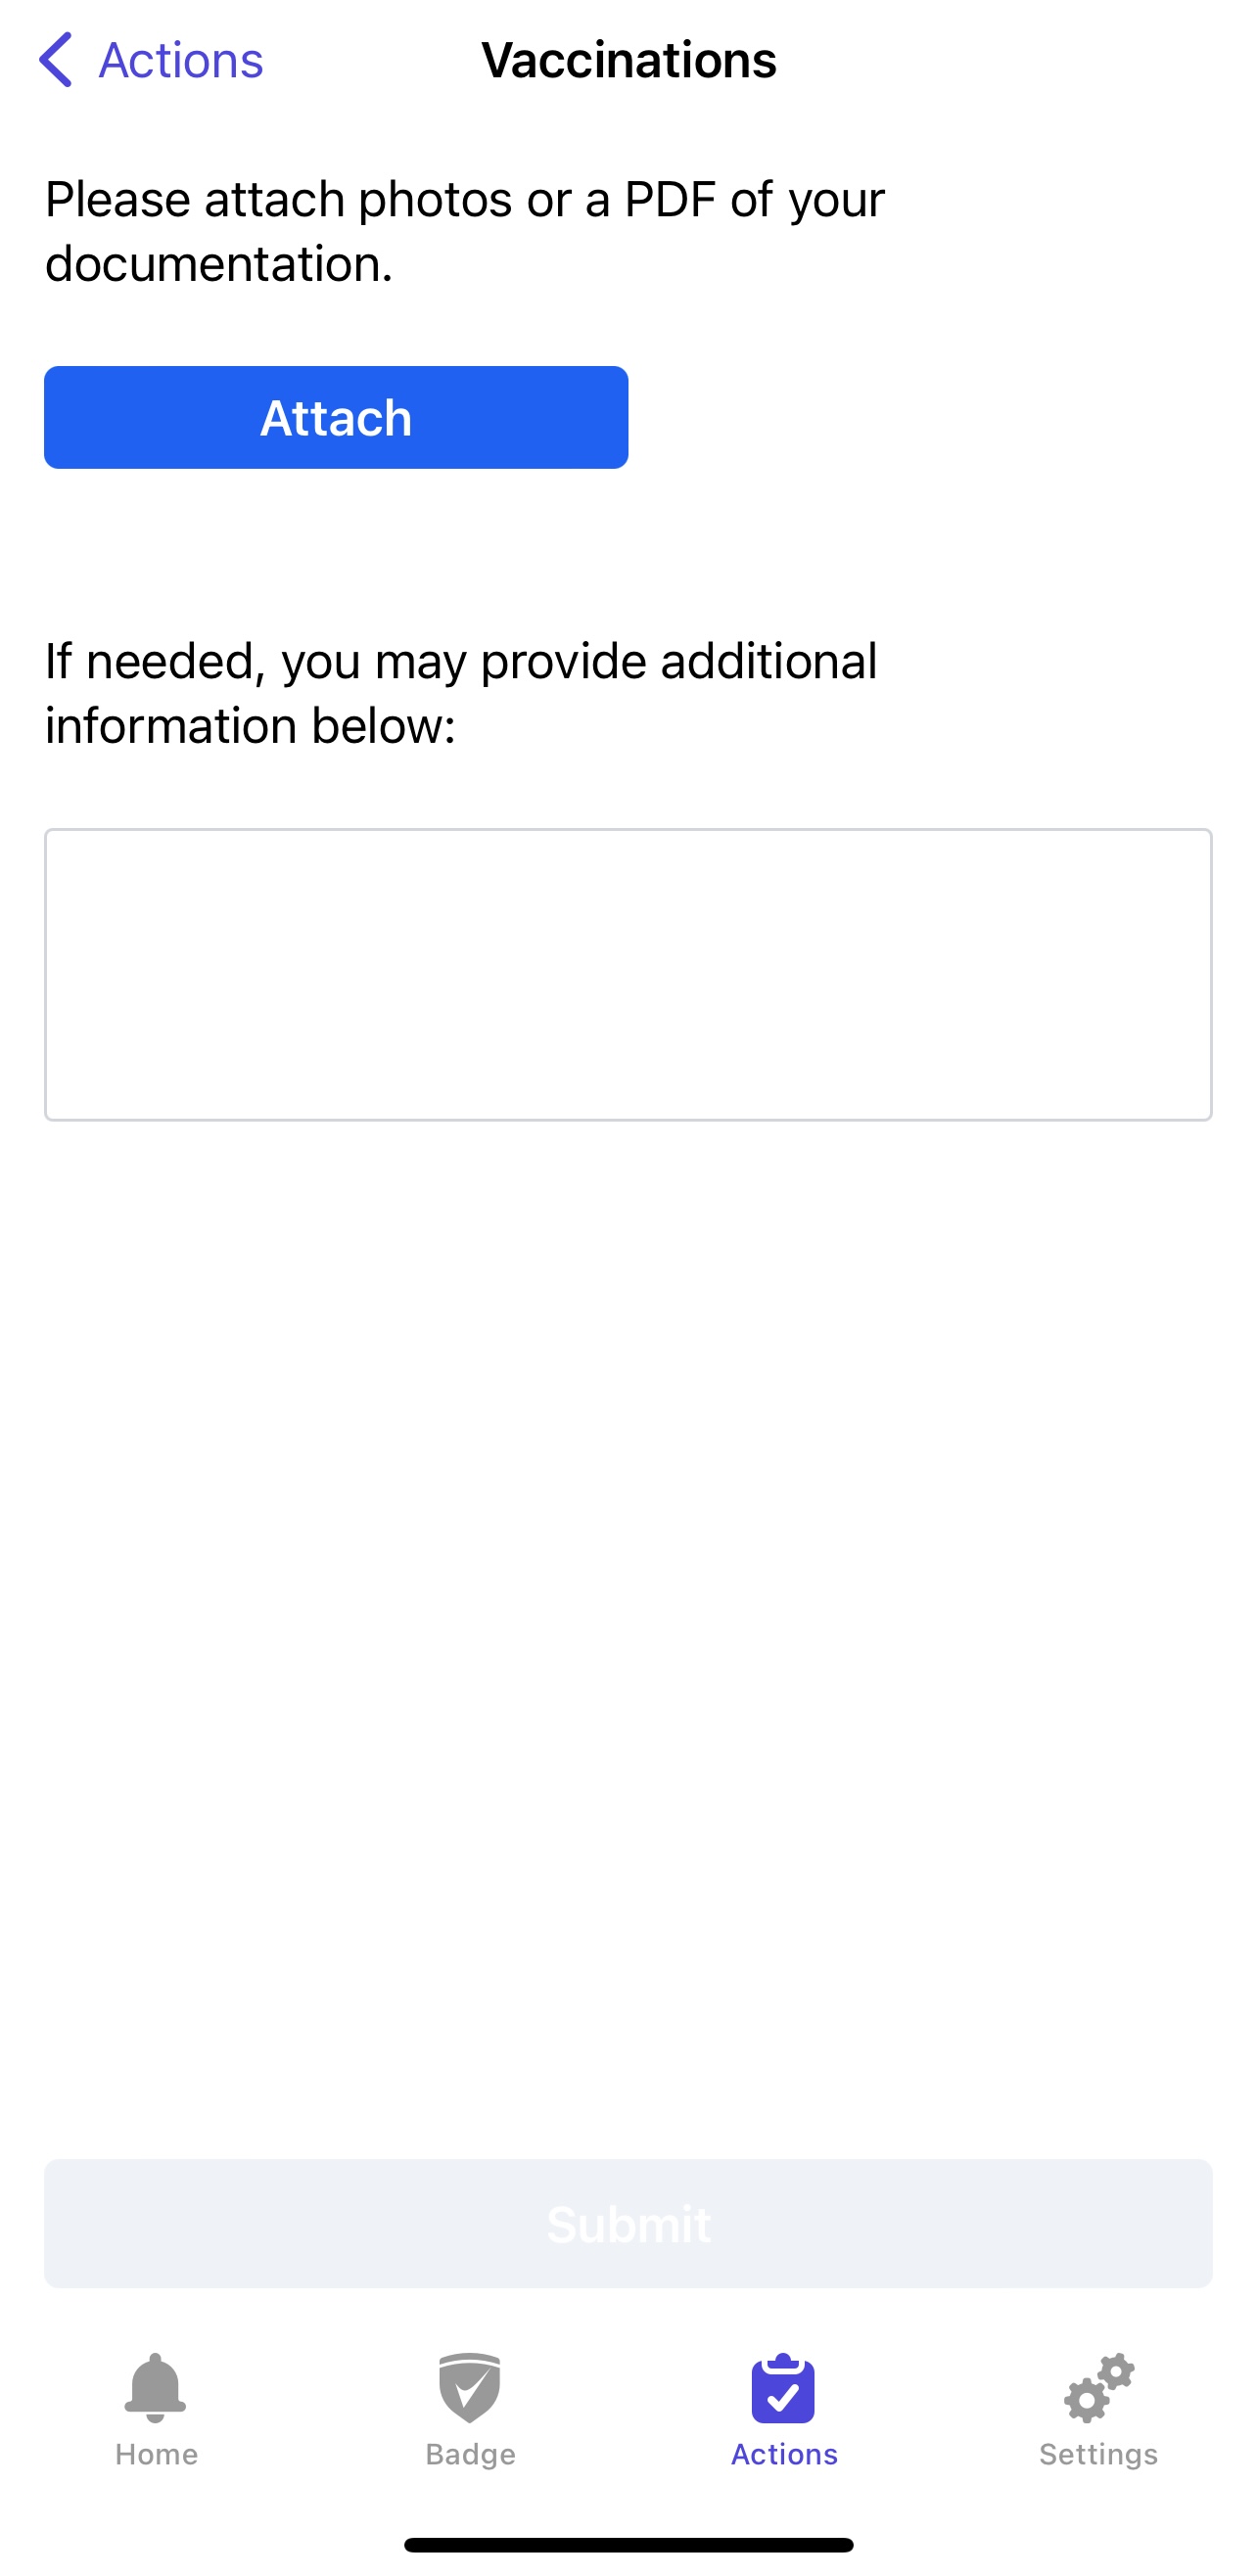
Vaccination Submission
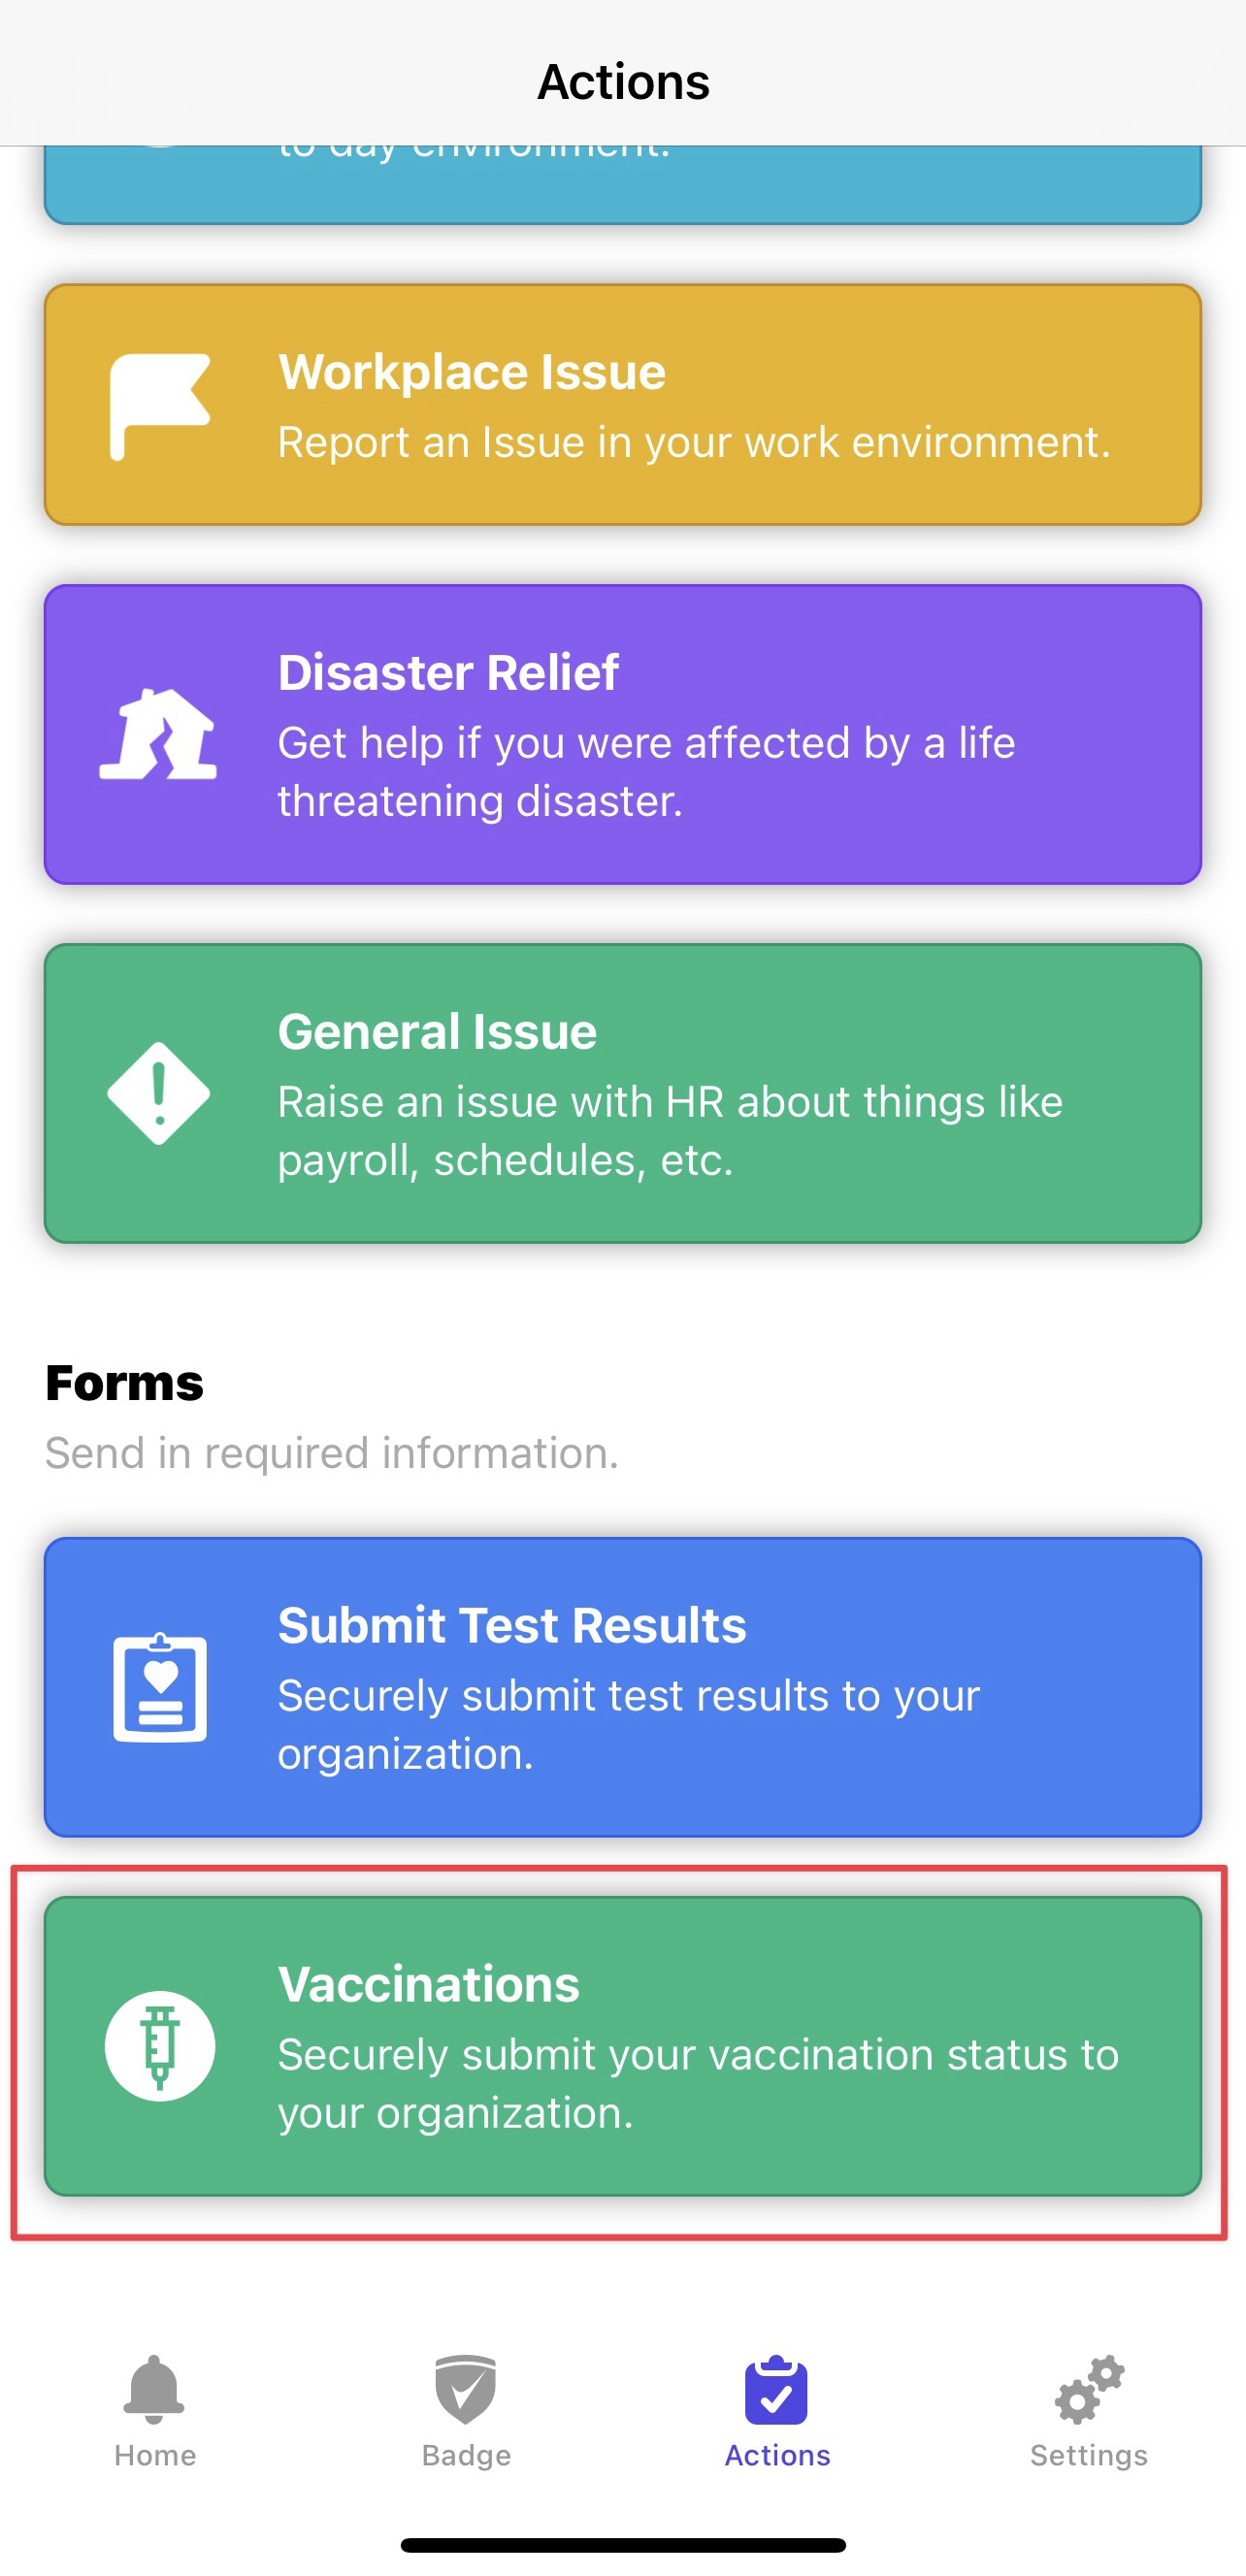
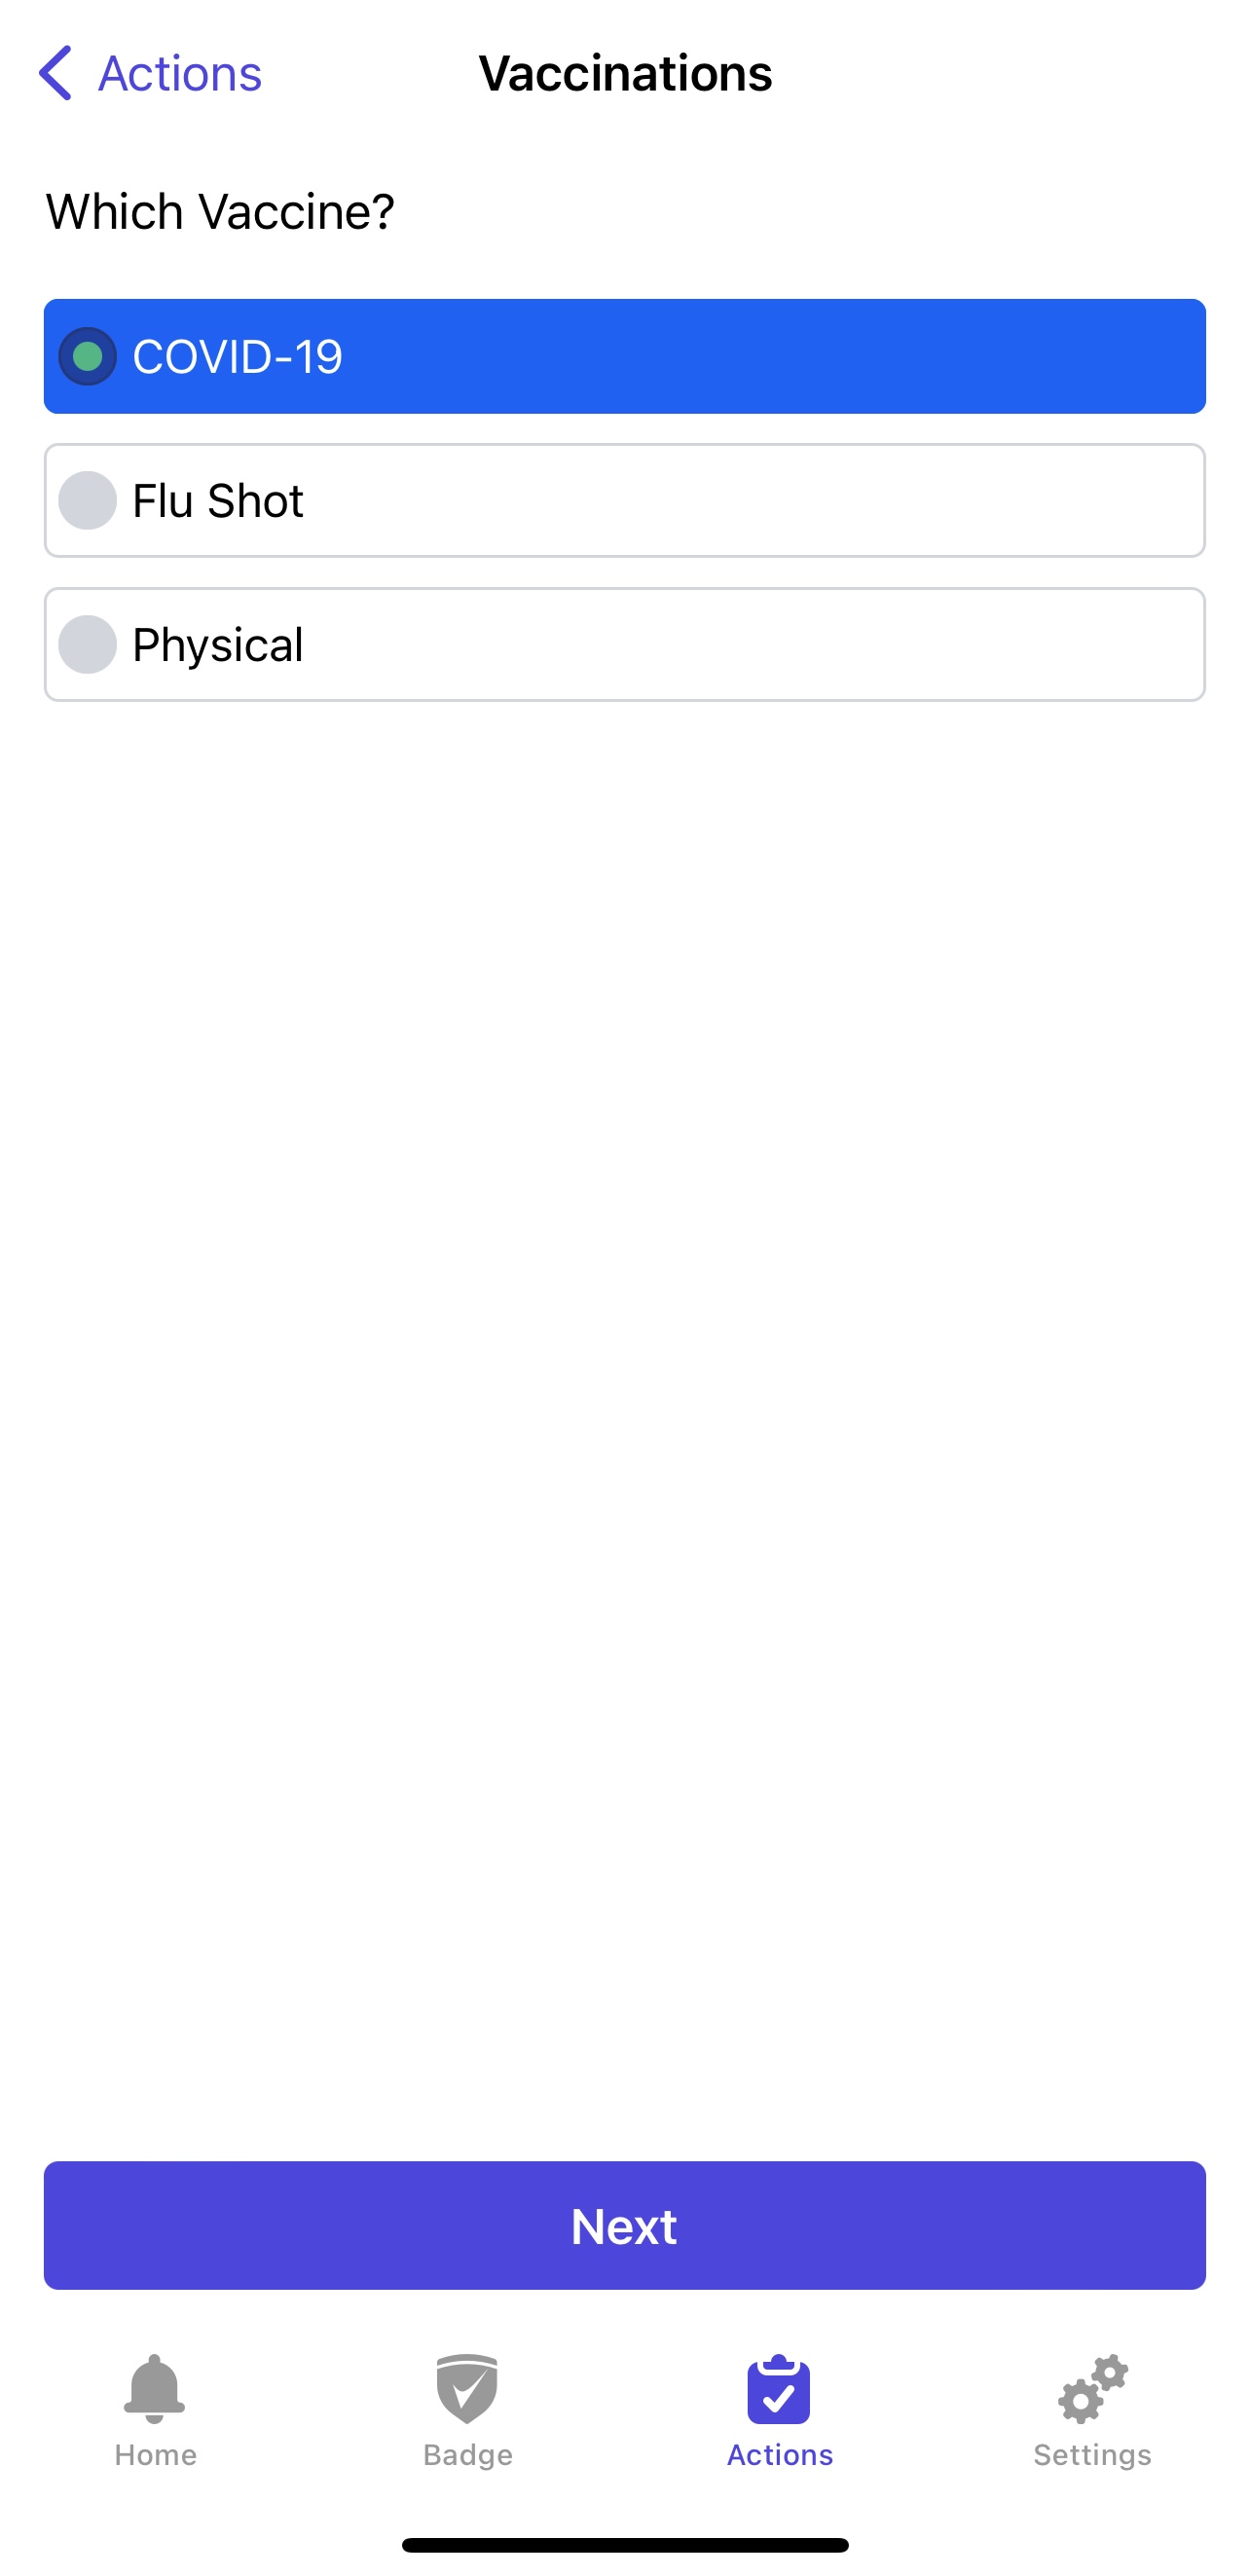
Click on the Green "Vaccinations" button, select the vaccine, or choose to opt-out, doses, date, documentation, and any additional information.
You should receive a notification stating that the submission has been sent, and then a notification based on whether the submission was accepted or rejected.
You can check the status of your submission under Submissions Status in the app.
5. Responding to an Incident Check-in
Your organization disruptions repose team can initiate a check-in to make sure that personnel is safe. You will receive an automatic notification to update your status and let the response team know if you require assistance. The notification will be delivered via the available communication channel. The example below illustrates a Mobile App Incident Check-In notification. In this case, you are prompted to respond to the questions to confirm the Check-In status.

Settings
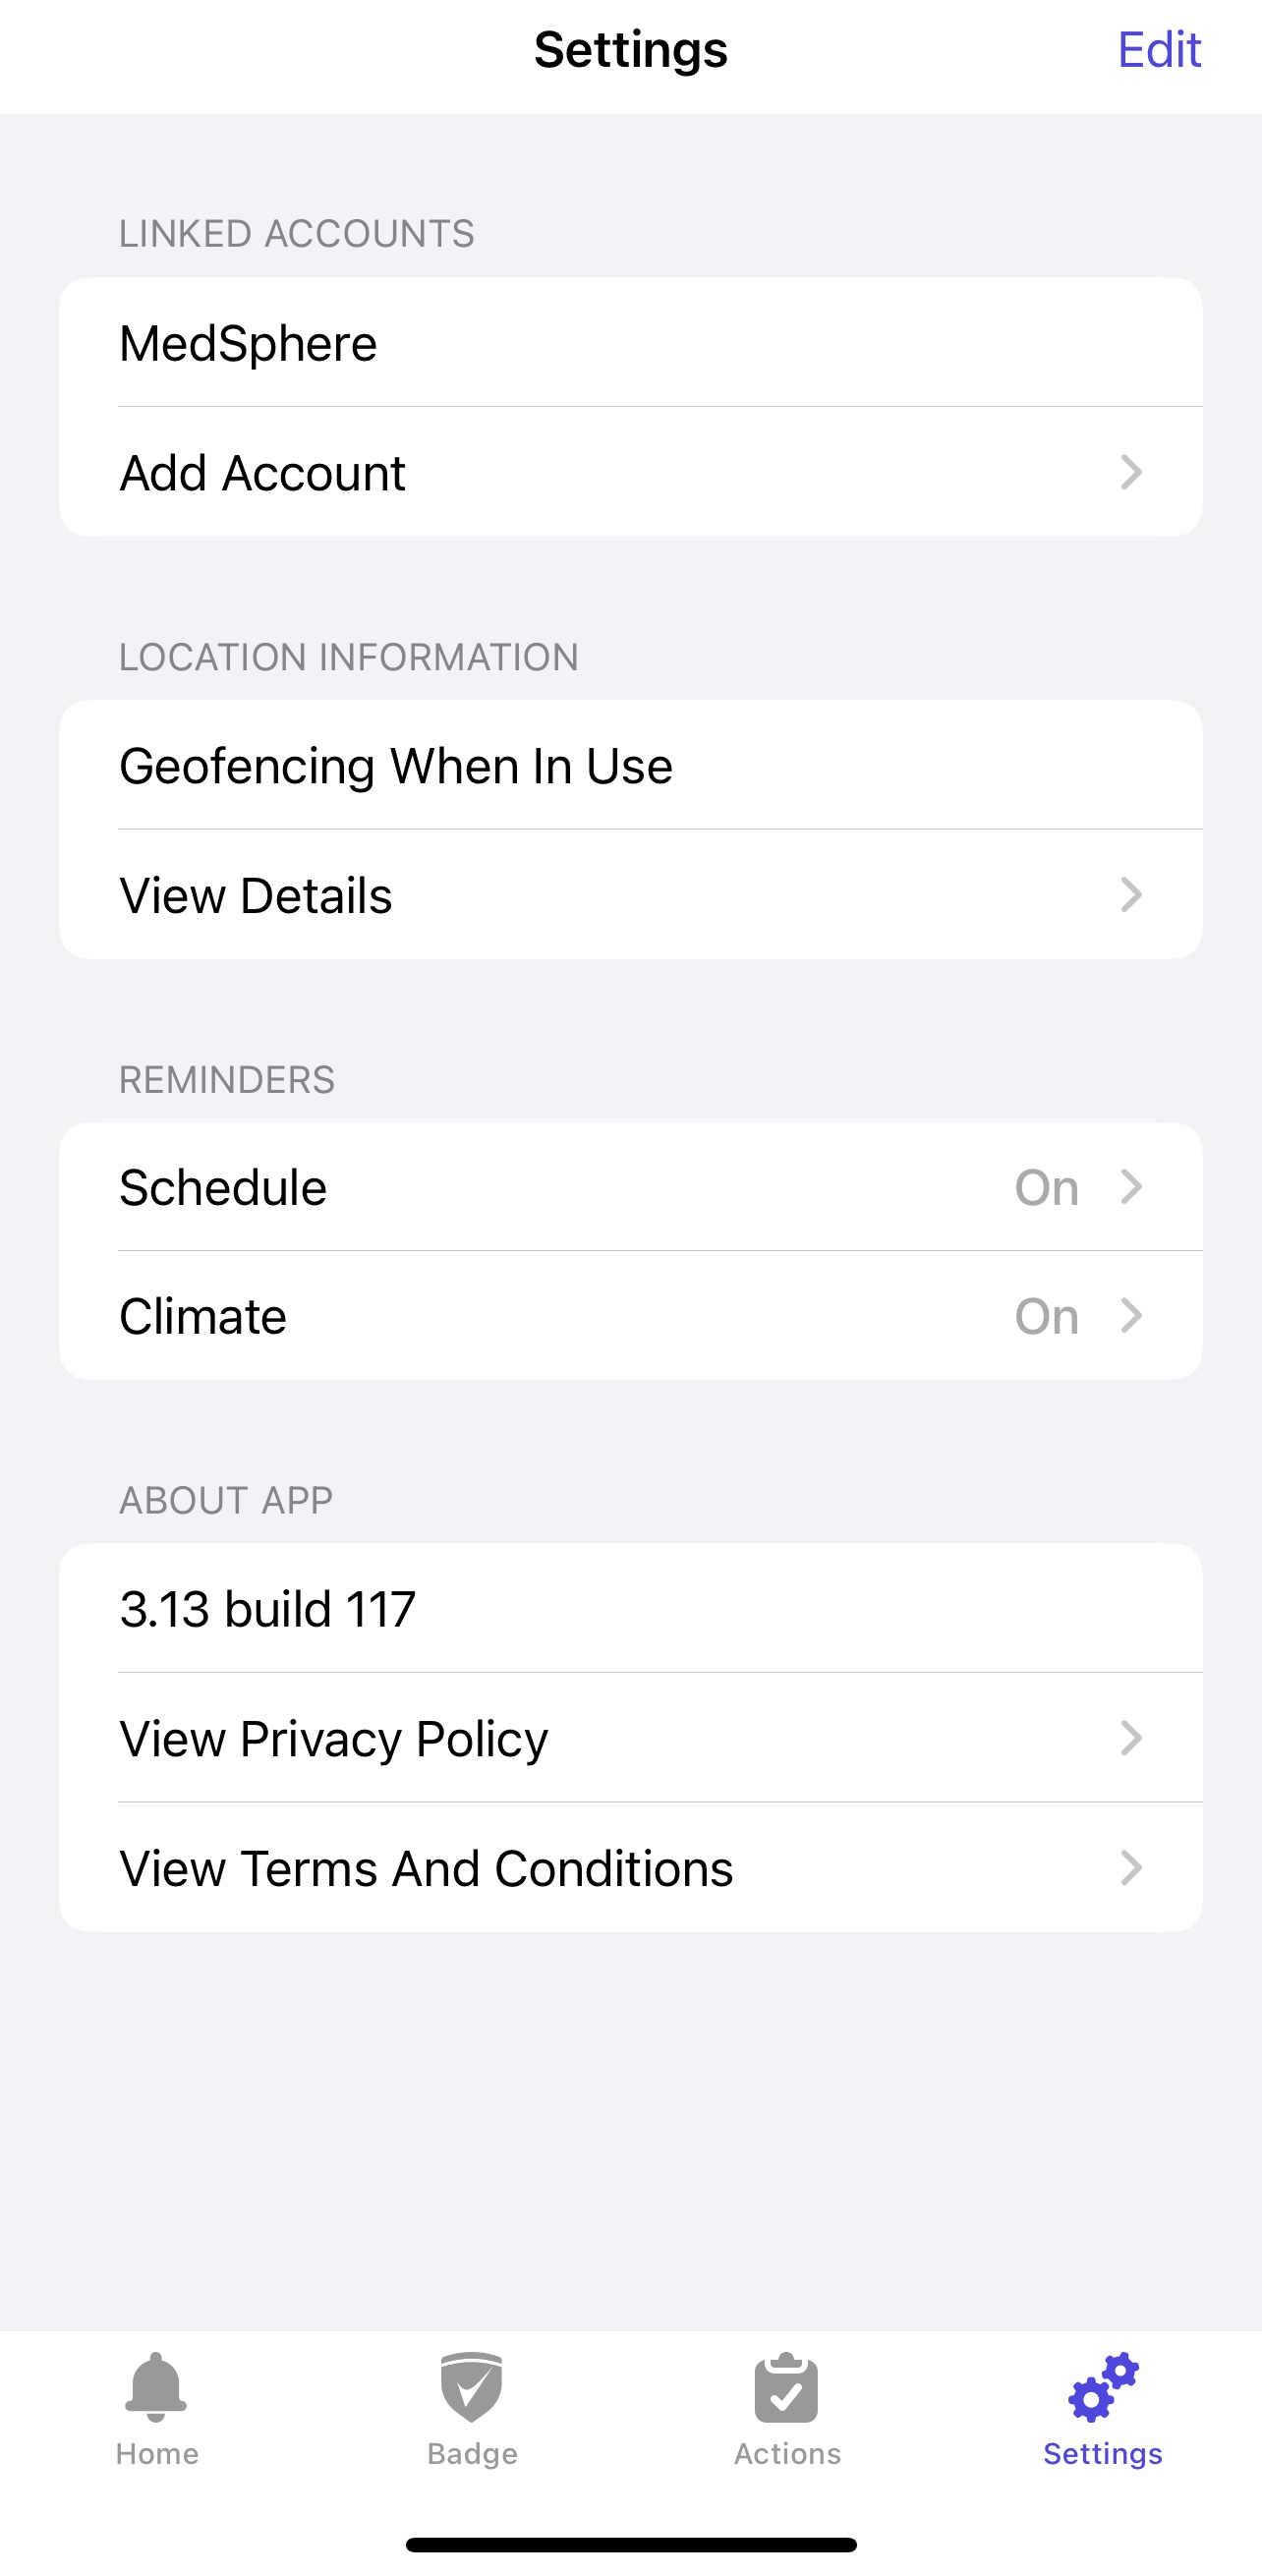
Add Account. Add more accounts if you use PrevailHQ products in multiple organizations.
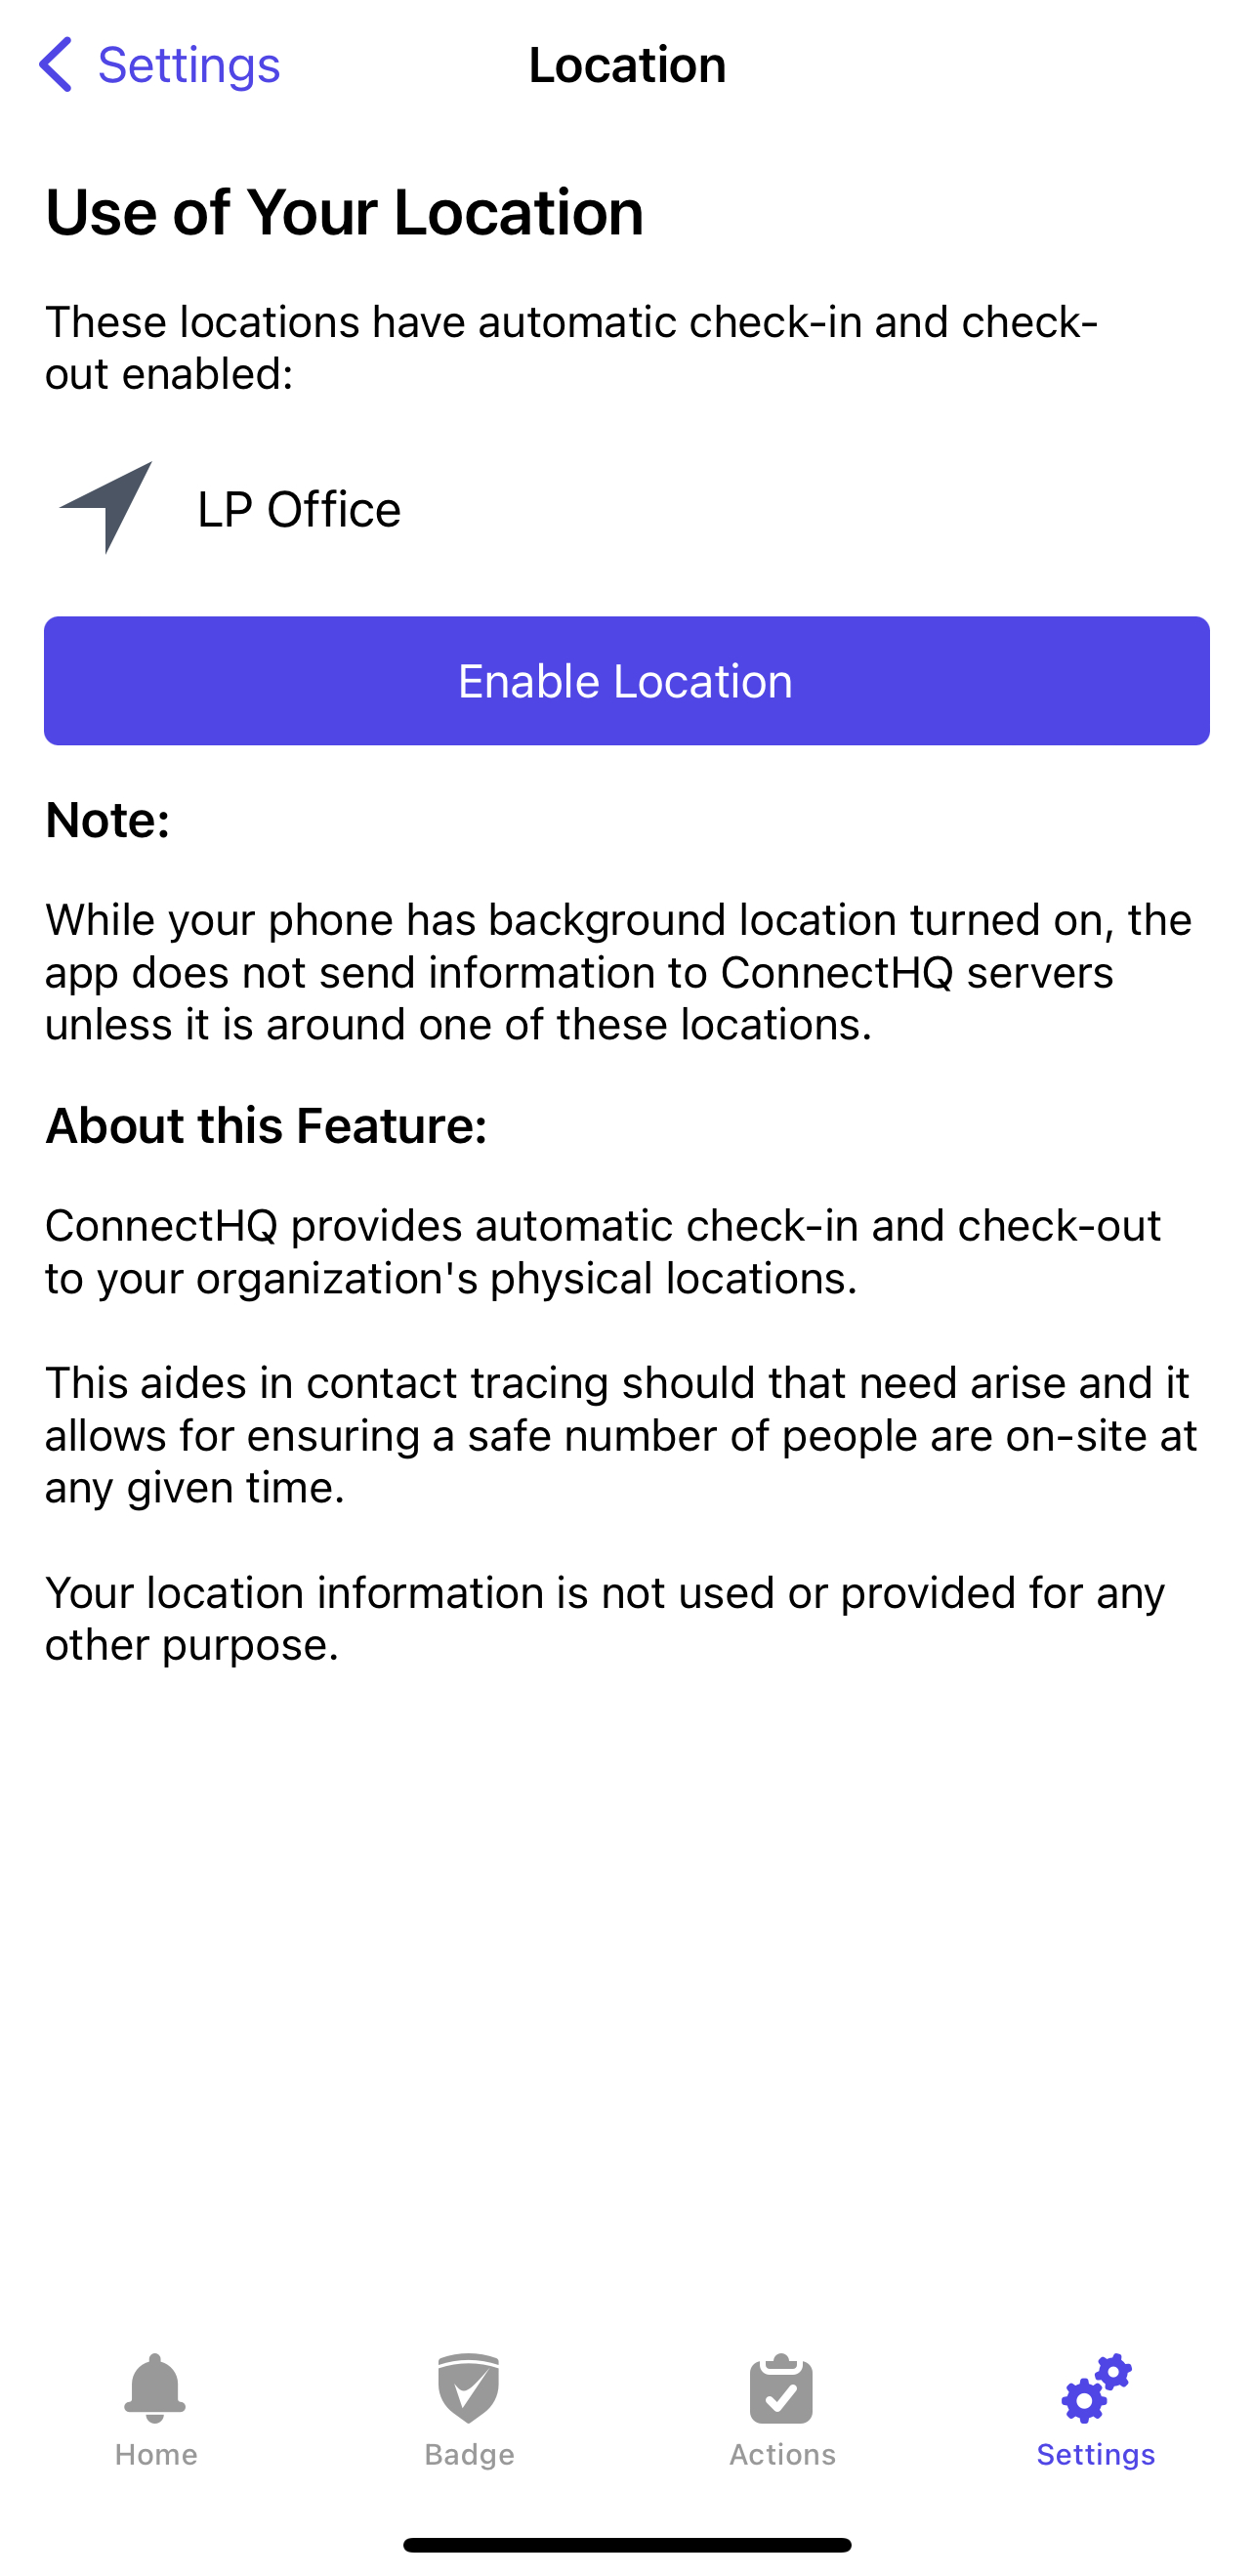
Location Information. Geofencing allows the location tracking for the ConnectHQ app to speed up the check-in/out process and simplify assistance in case of emergency. Learn more about Geofencing here.
Click Enable Location and you will be taken to the Locations Setting Page for the ConnectHQ page on your phone.
More on Location settings for your phone:
To change your Location services at any time, you can go to your in-app settings, and click "View Details" under "Location Information" to go to your phone's settings.

Reminders
Here you can set a Reminder notifications schedule for work schedule ( Who's In/OUT) and work climate submission.
With the app's default settings, you will receive weekly reminders to submit your work schedule on Sunday at 3 PM local time and work climate feedback on Wednesday at 10 AM local time. You can always adjust these settings.
About app
Here you can review your app version, privacy policy, and terms and conditions.
We recommend keeping your ConnectHQ mobile app updated to the latest version in the App Store or Google Play at all times for the best performance.