
Visitor Types Setup
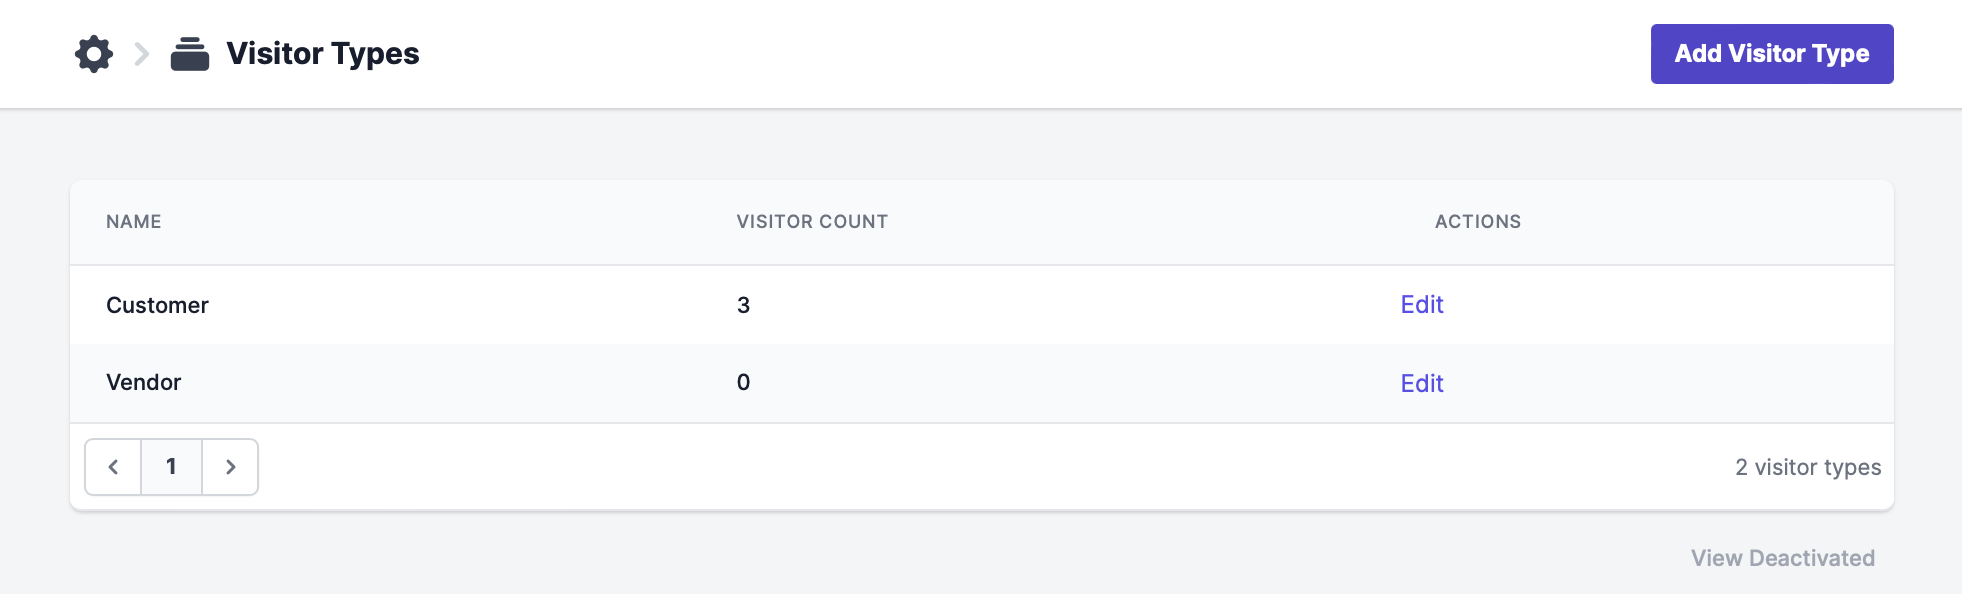
To find the Visitor Types page, head to Settings > Visitor Types.
CTG offers two default types of visitors, which can be edited at any time, to suit your needs.
Alternatively, you can add a new visitor type.
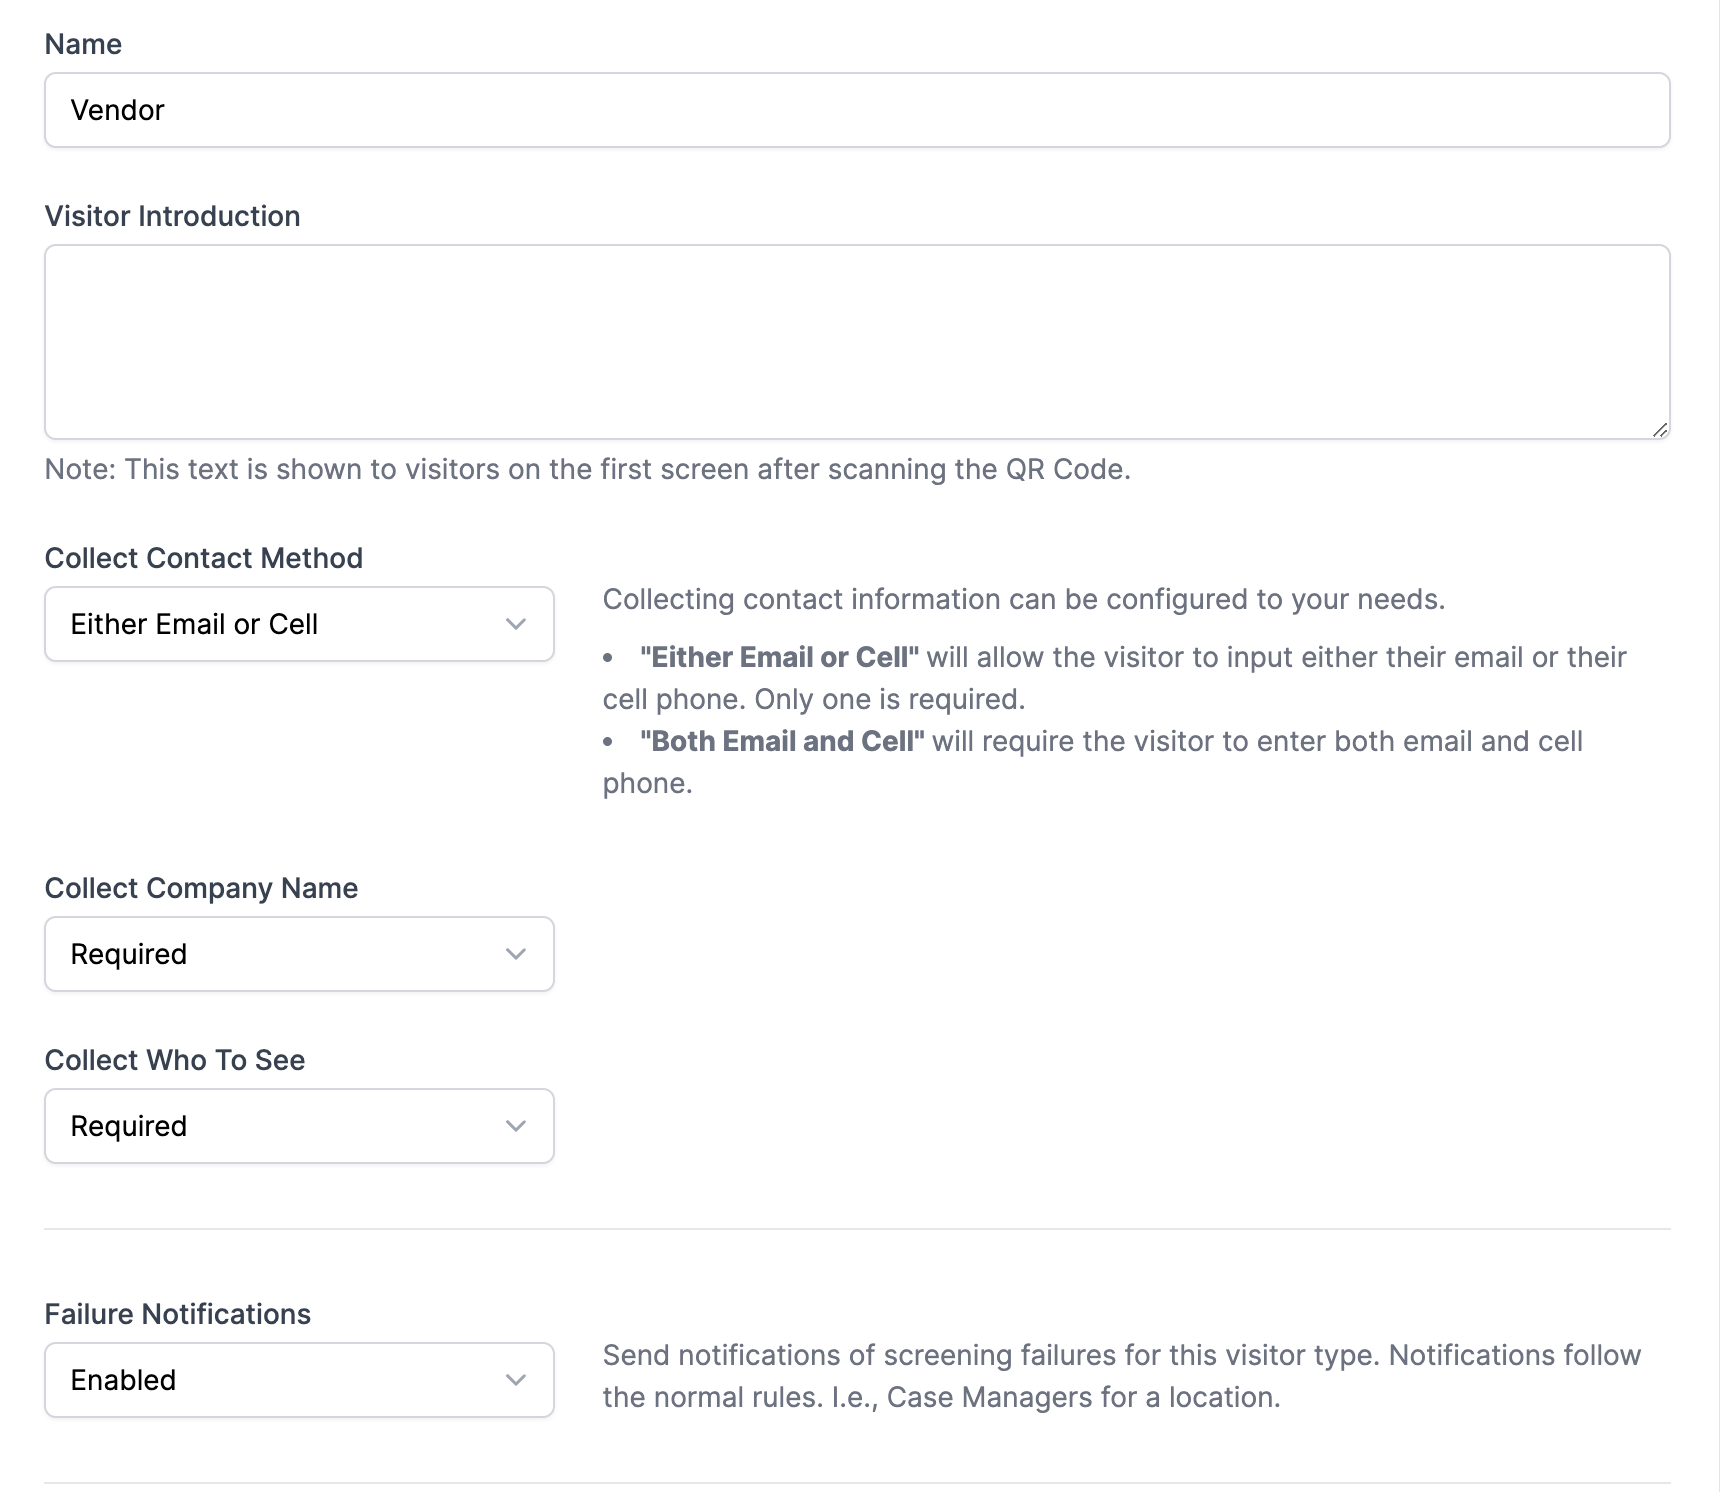
1. Visitor introduction message, contact info, and failure notifications
- Receive a custom greeting - Visitor Introduction
- Provide contact information
- Ask for the company name and who they are visiting
- Set failure notifications -send notifications of screening failures for this visitor type. Notifications follow the normal rules. I.e., Case Managers for a location.
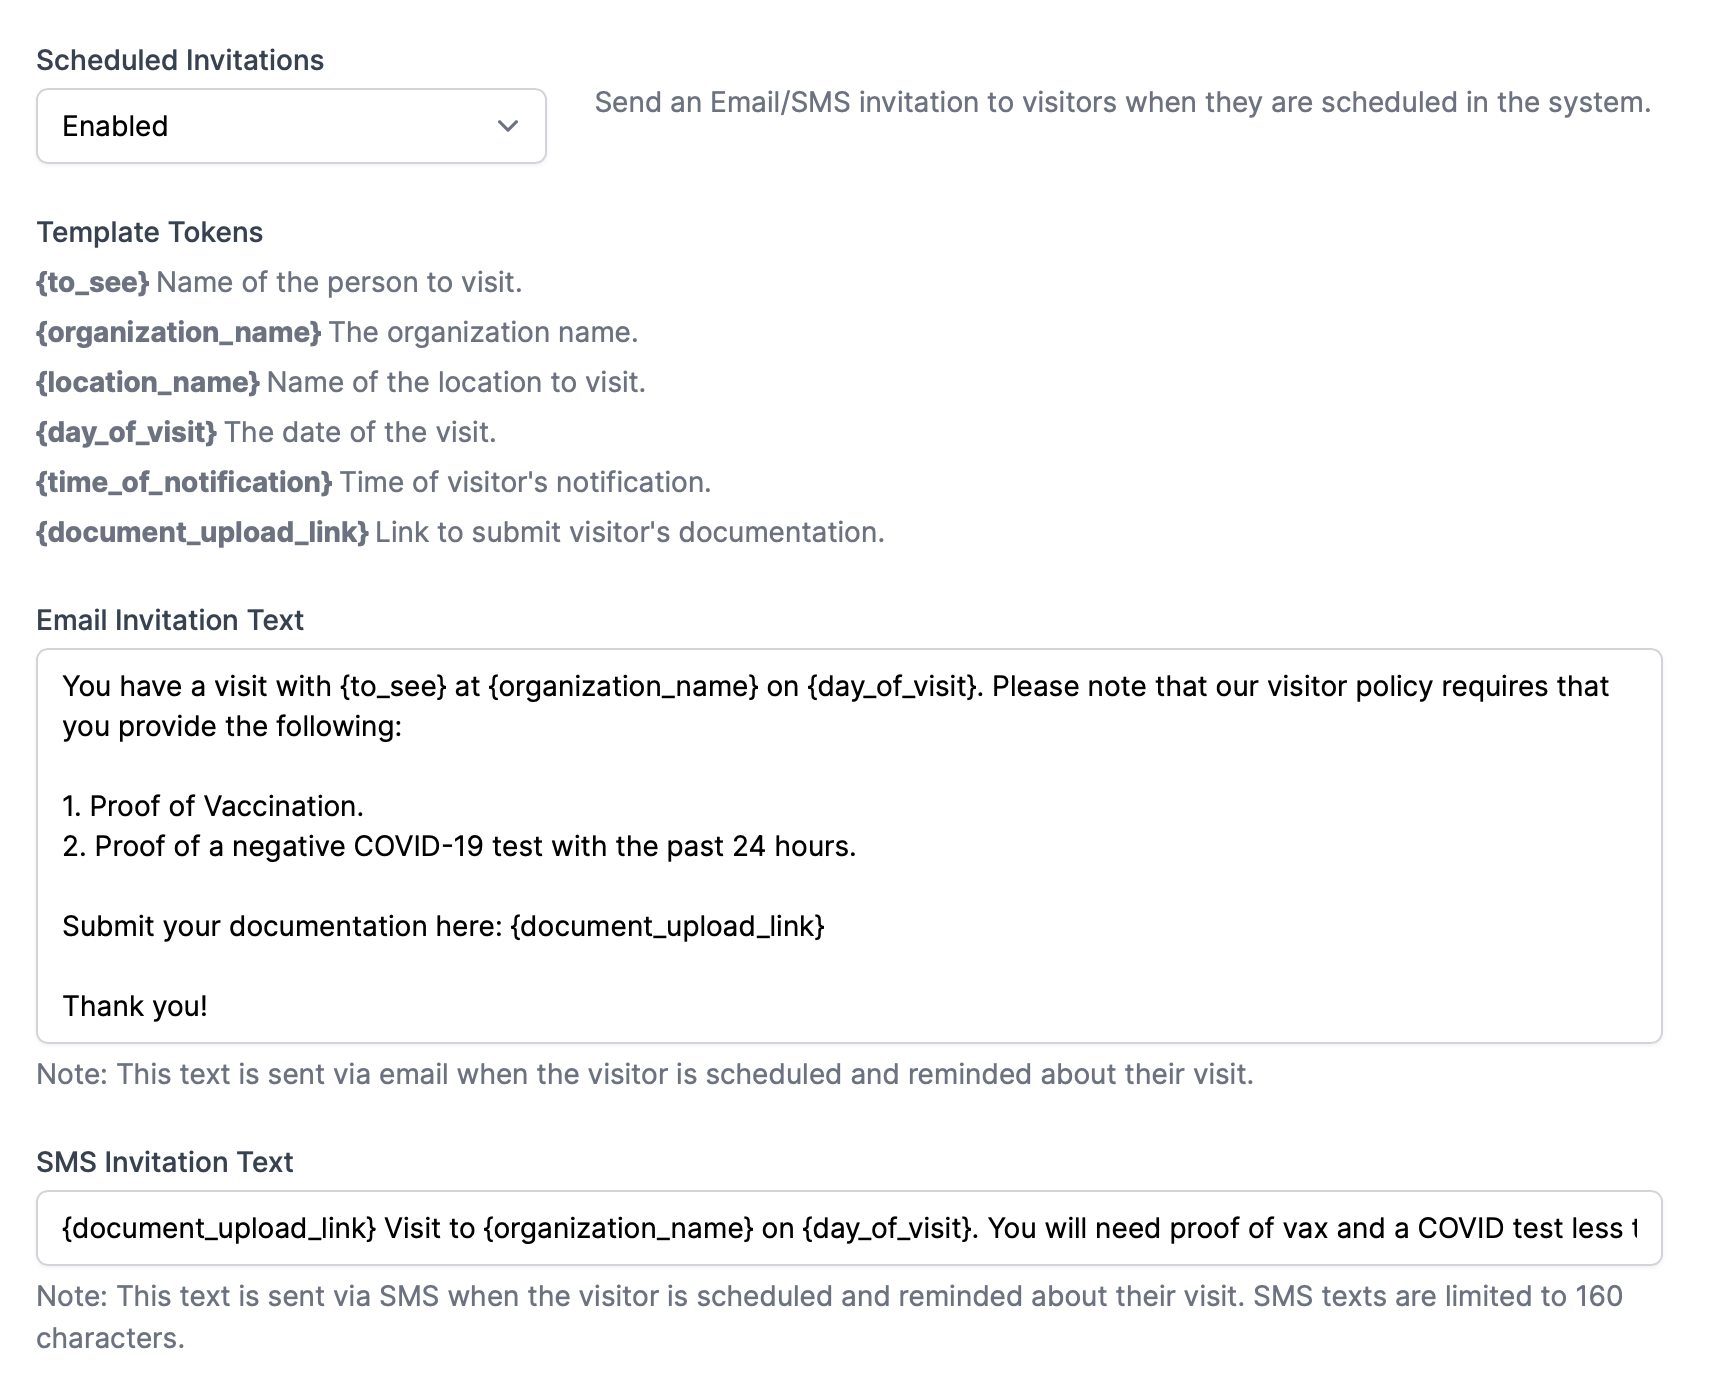
2. Schedule invitations
Enable Scheduled Invitations to keep your guests updated on upcoming visit information. Use the Email/SMS Invitation text boxes to enter the message visitors should receive prior to their visit. This message will be sent to the visitors once the invitation is created in the system.
Template tokens can be used to automate message data entry.
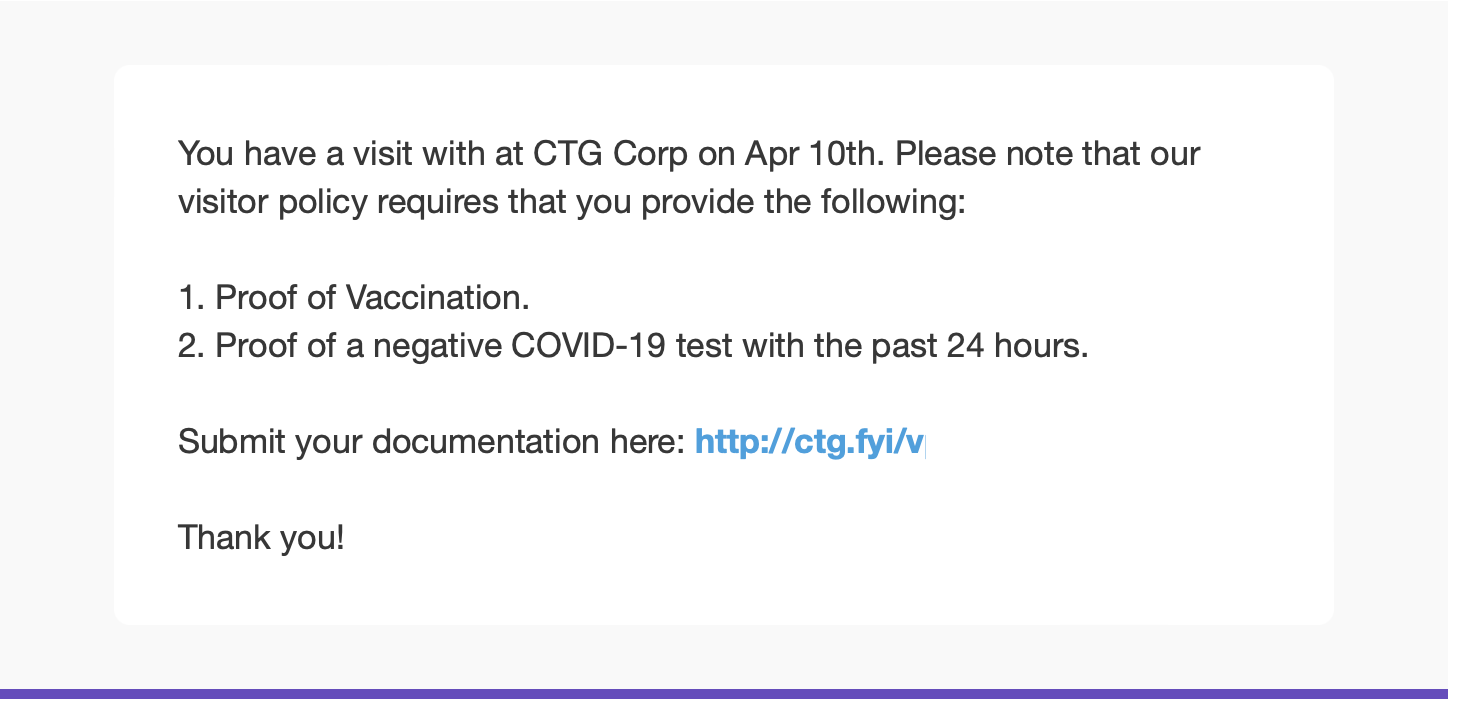
For example, {document_upload_link} token can be used to request visitors to upload any required documents in advance.
A screenshot below illustrates a scheduled invitation email example with the link to upload documents in advance.
3. Invitation reminders
Invitation reminders are sent one day before the visit. Visitors will receive a reminder with the Schedule Invitation text only if they were scheduled more than one day in advance. The reminder will not be sent if the visitor is scheduled for today. Scheduled invitations must be enabled for the Invitations Reminders to be visible.

4. Visitors' email/SMS notifications order
| Function enabled | Invitation is Scheduled in the system | 1 day before the visit | On the day of the Visit |
| Default visitor setup (Scheduled Invitations and Invitation Reminders are not enabled ) | N/A | N/A | Visitors receive a standard notification regarding their visit |
| **example below* | |||
| Scheduled Invitations Enabled | Email/SMS Scheduled Invitation customer text is sent | Email/SMS Scheduled Invitation customer text is sent ONLY IF INVITATION REMINDER IS ENABLED | Visitors receive a standard notification regarding their visit |
| **example below* |
* Visitor Standard Notification message example
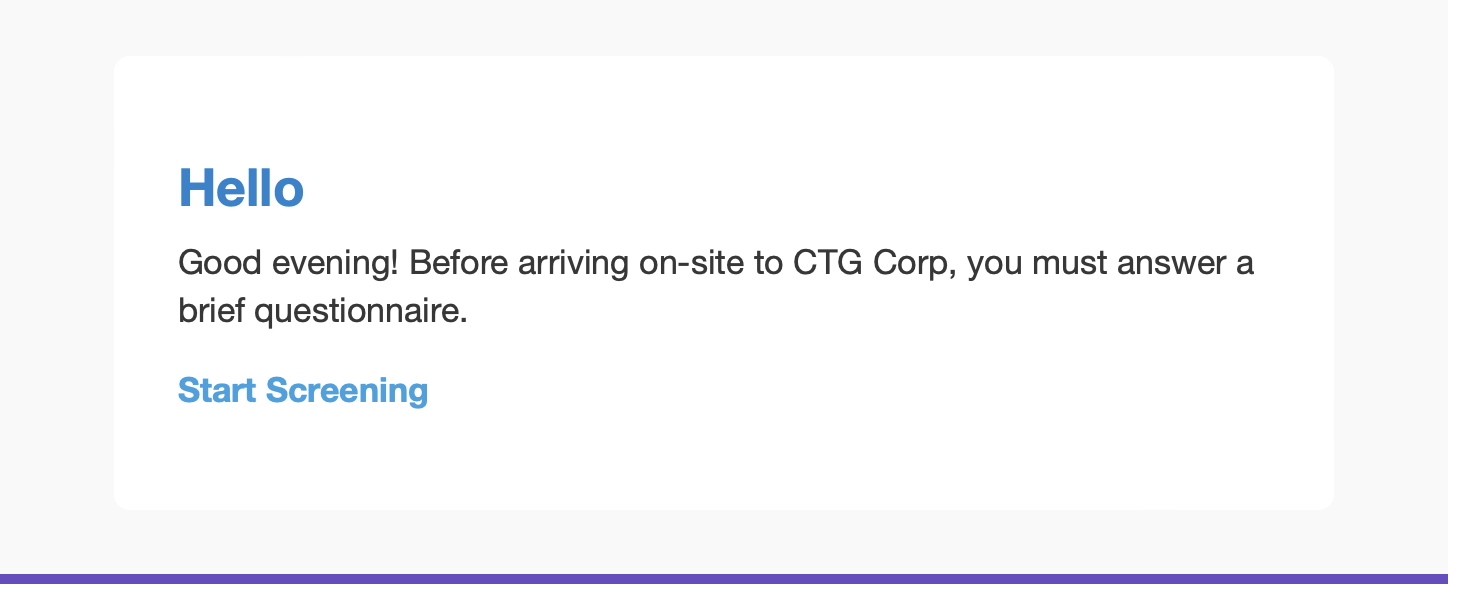
Please Note:The reminder won't be sent if the visitor was invited for today .
Also Note:The system will prioritize SMS over Email notifications. If no cell phone number is provided the notification will be delivered via email.
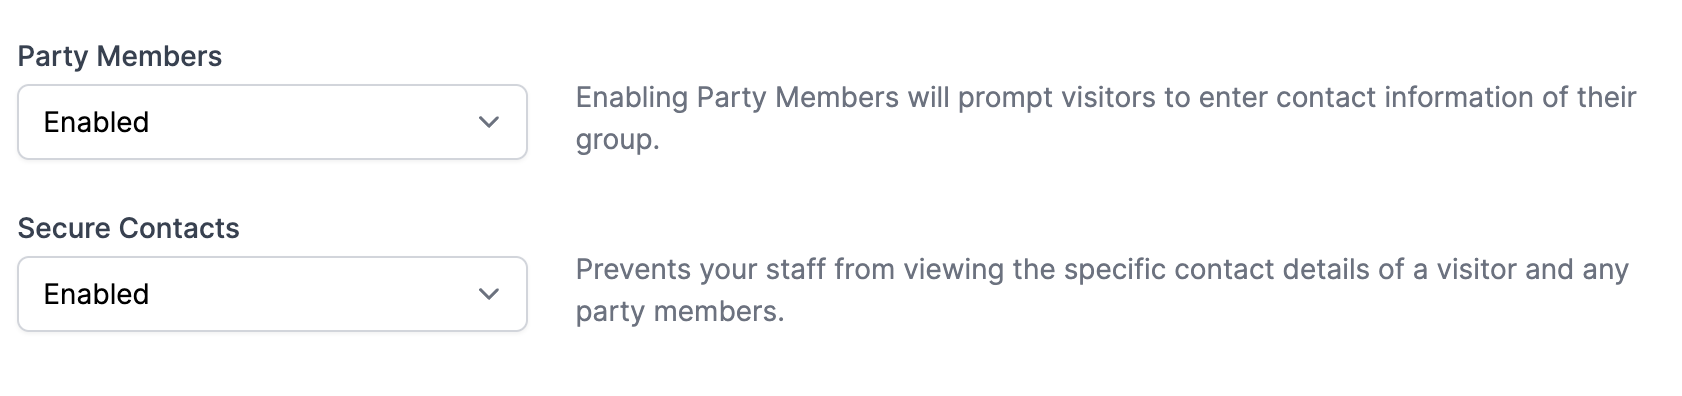
5. Party members and Secure Contacts
- The number of people arriving (Party Members).
*An example of this feature use is a restaurant with unannounced visitors. It allows the guest to add the number of people in the party.*
- Help keep visitor information safe (Secure Contacts)
An example of this feature use is a restaurant. Secure Contacts prevents the host to see the contact information (visitor's last name and cell number) of the*customers. Only users with the* manage visitors' *role permission will be able to view this information.*
6. Auto Check-In/-Out
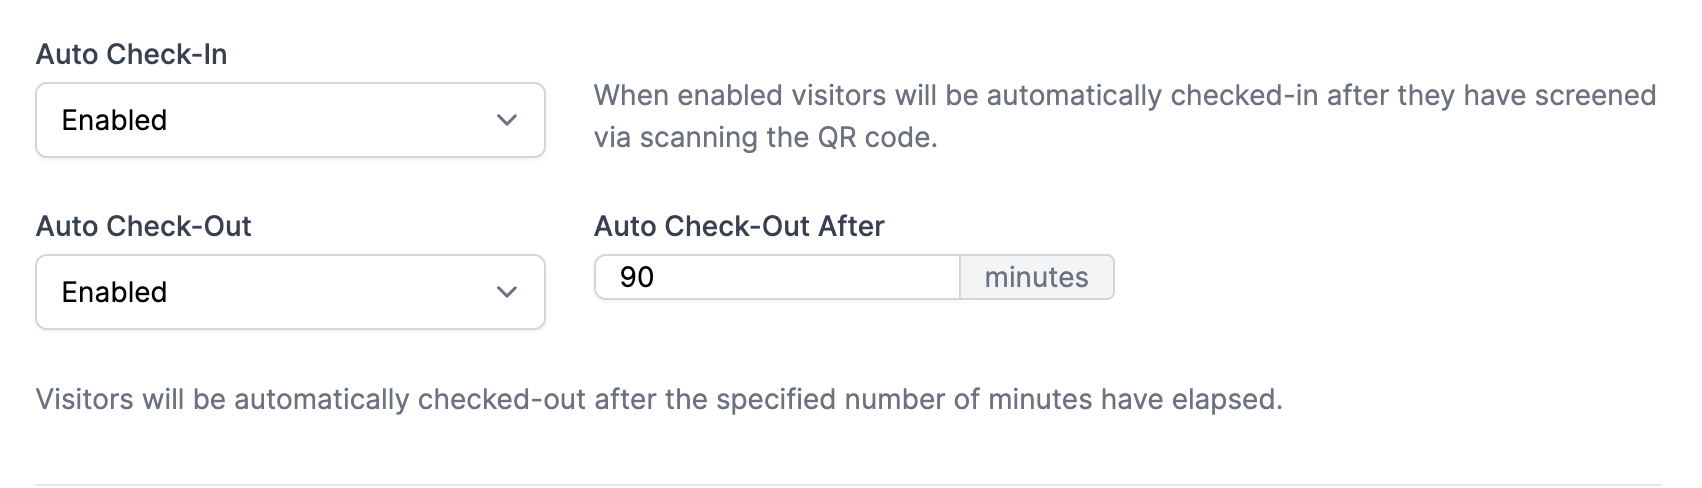
Visitors will be automatically checked-in if Auto Check-In is enabled and they have scanned the QR code using a kiosk or any other available check-in method. In this case, the receptionist would not have to check them in via the Roll-call. This can help to streamline and automate the check-in process.
Visitors will be automatically checked-out after the specified number of minutes have elapsed if Auto Check-Out is enabled. This feature can be helpful if there is no kiosk or manual check-out process is not set at the location and the organization would like to track visitors on-site in case of an emergency. Click here to learn more about Disruptions and Incident Management.
6. Registration Cutoff Time
Under the Visitor Type settings, you are able to determine how long in advance you'd like your visitors to register for their visit, and what time you'd like visitors to start registering for the following day.
First, you'll need to enable the setting by determining a time from the drop-down menu.

For instance, if you'd like your visitors to register their visits and complete their screenings by 11 am, you can select that to be the Registration Cutoff Time. Meaning, that any users who register between 11:01 am and 10:59 am the following day will have a valid badge for today. They can then be found under the "Today" tab of the Visitors page:
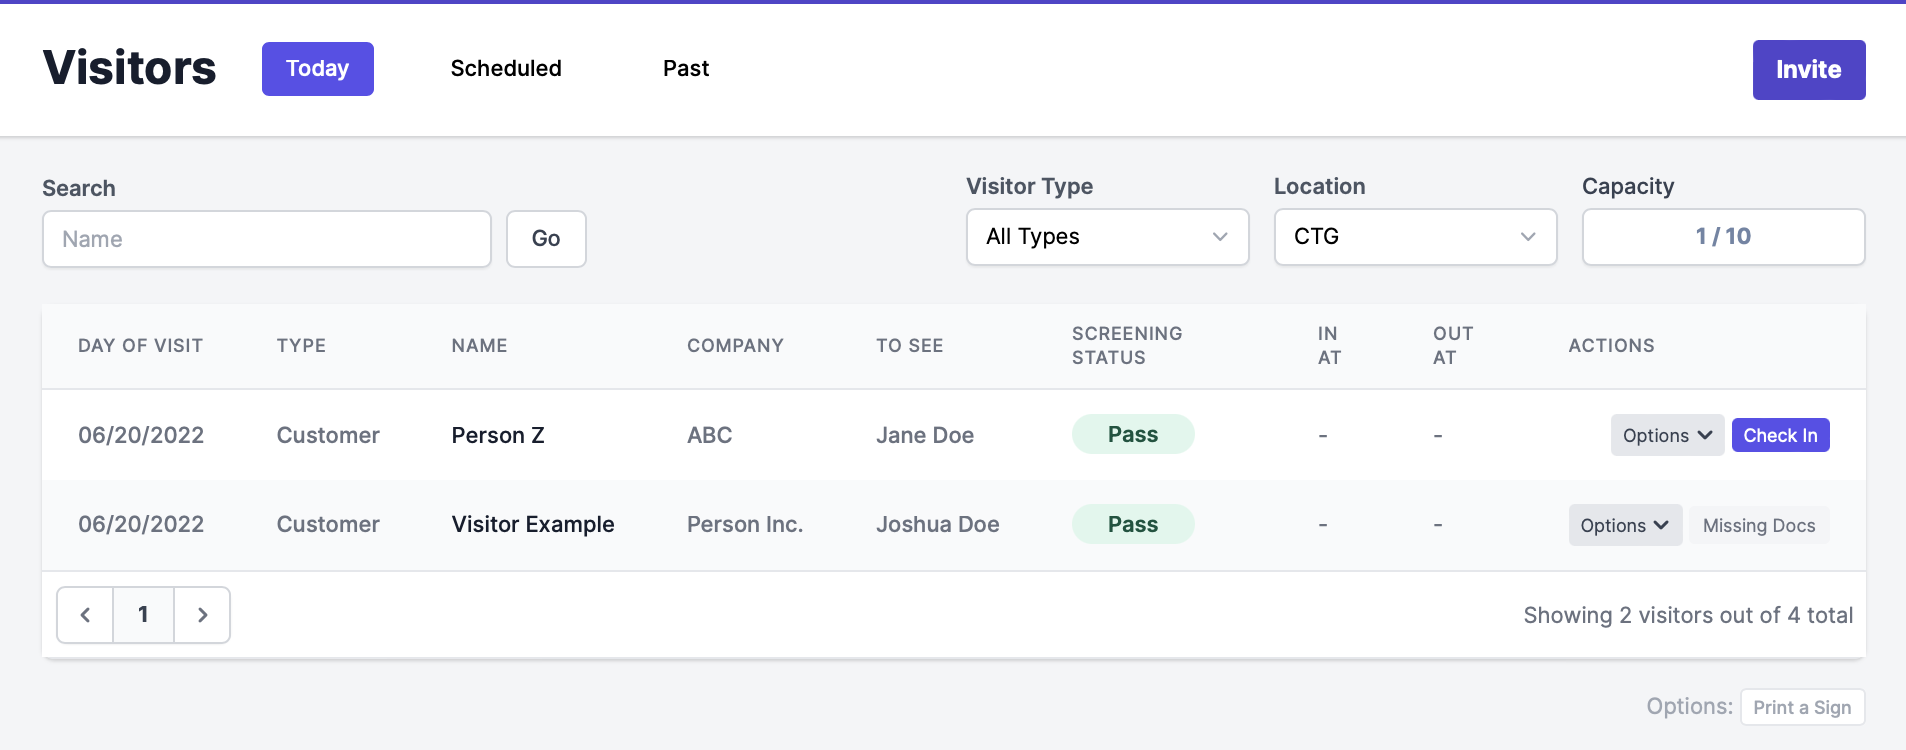
If visitors are registering at or after 11am, they will show under the "Scheduled" tab of the Visitors page, as the same-day register time has surpassed. If visitors are registering at or after 11am, they will show under the "Scheduled" tab of the Visitors page, as the same-day register time has surpassed.
You'll also see that the Day of Visit is listed, in case there is any confusion from the visitor, on why they do not have a badge valid until the next day.
Additionally, you can decide to have the badge valid until midnight of the registration date.
 ---
---
7. Visitor Documents
Visitor Documents allow you to ask visitors for vaccination information, test results, or any other documents to be uploaded prior to the visit. Documents that have been approved can be removed automatically from the visitor profile if Auto Delete is enabled.
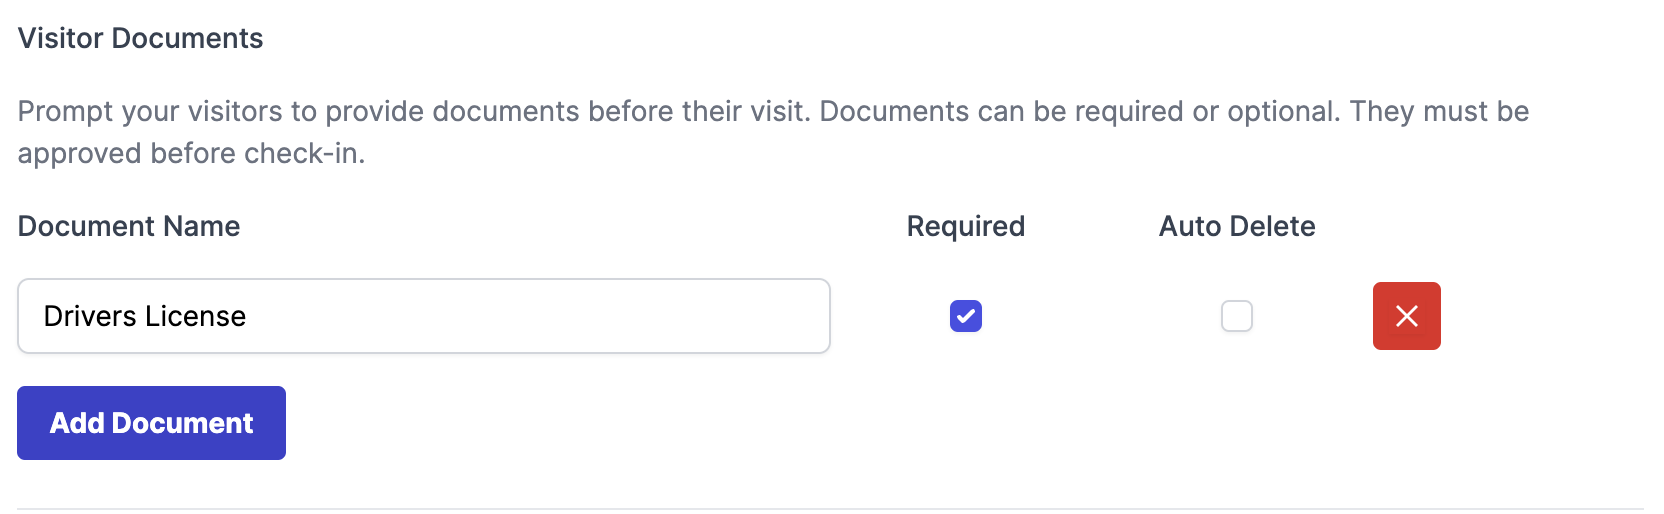
Please Note:If the documents were uploaded via Scheduled Invitations, the invitation reminder will show that it was already uploaded by following the email link.
Reviewing Visitor Documents
From the On-Site > Visitor Management page, select "Options" on a user > Review Documents
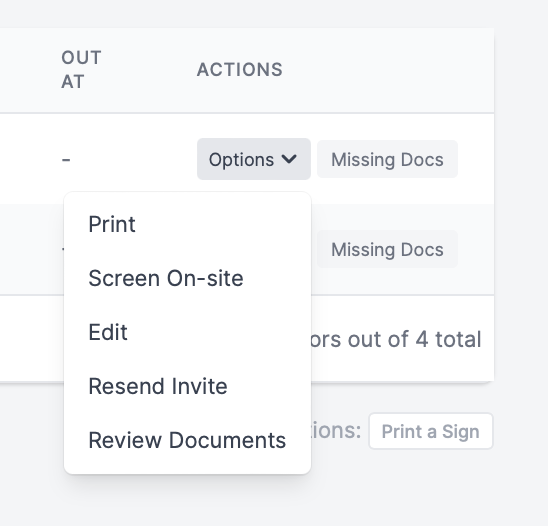
Please Note:Visitors who have submitted documents, but those documents have not been approved, may still show as "Missing Docs" as there are no approved documents.
Also Note: Documents that have been approved can be removed automatically from the visitor profile, to remove any muddiness of the information, and confusion that the above note may cause. You can edit this setting with your Visitor Documents setting, as seen above.
For more information on Scheduled Visitors, please see our guide.
For more information on unexpected/unannounced visitors, please see our guide.