
Bulk Importing/Editing Users
1. Navigate to the Employees/Students/Contractors page.
For this guide, we'll focus on an employee, but please see our student and contractor bulk uploading guides for additional information.
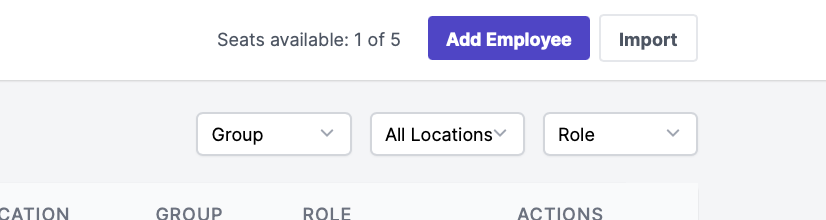
2. Select Import.
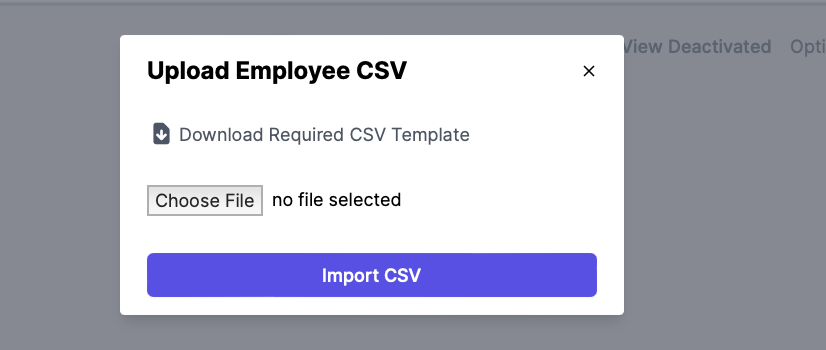
3. Select Download Required CSV Template.
| | | --- | | Please note: Employee, Student, and Contractor templates are all different. Be sure you are downloading the appropriate template. |
4. Open the file in Excel or Numbers.app and fill in the all information
| Column | Required | Description |
|---|---|---|
| role | No | Specify a system role by name. Defaults to Basic. |
| locations | Recommended | Assign a list a list of locations by name. Comma separated values are supported. The contents of this overwrites all locations. The first location specified is the person's primary location. If this field is used, do not use primary\_location. |
| Yes | One of email, employee ID, or cell phone must be present. | |
| first_name | Yes | |
| middle_name | No | |
| last_name | Yes | |
| cell_phone | Yes | One of email, employee ID, or cell phone must be present. |
| date_of_birth | No | Used for age-related functionality. (Students, Test Results, etc) |
| employee_id | yes | One of email, employee ID, or cell phone must be present. |
| badge_id | No | Used for Access Control system integration |
| title | Recommended | Used for staffing levels to assign a Job Title |
| office_phone | No | |
| shift | No | |
| home_address_1 | No | Used for disaster detection in Vantage Point |
| home_address_2 | No | Used for disaster detection in Vantage Point |
| home_city | No | Used for disaster detection in Vantage Point |
| home_state | No | Used for disaster detection in Vantage Point |
| home_zip | No | Used for disaster detection in Vantage Point |
| groups | Recommended | Assign a list of groups by name. Comma-separated values are supported. The contents of this list overwrites all groups. The first group specified is the person's primary group. If this field is used, do not use primary\_group. |
| start_date | No | Used for onboarding employees before they are active. |
| termination_date | No | Used for off-boarding employees in Staffing Levels |
| locality | Recommended | Possible values: In-Person, Remote, Hybrid |
| work_capacity | No | Possible Values: Working, Limited, Not Working |
| manager_email | Recommended | Specify the manager of this person by email address. This is recommended for notifications optimization and personal data protection. |
| removed | No | Deactivate or reactivate a person. Values: True, False. |
| primary_group | No | When HRIS data supports one group/department, use this field to import one group but allow more groups in Prevail HQ. If this field is used, do not use groups |
| primary_location | No | When HRIS data supports one location, use this field to import one location but allow adding more locations in Prevail HQ. If this field is used, do not use locations |
| | | --- | | Please note: The minimum required fields that must be populated are First Name, Last Name, Role (for Employees), and a unique identifier: one of (Employee Contractor or Student ID, Cell Phone, or Email. We also strongly recommend that Location is provided, in the event that any of our several location-based features are used. |
| | | --- | | Also Note: You can create Groups as you import. If the Group on the import file does not exist, it will be created and assigned to that person. |
- Save the CSV file. Be sure to keep the CSV format when saved.
- Return to the Employees / Students / Contractors page and select Import.
- Select Choose File.
- Navigate to where your CSV file is, save, and click Open.
- Select Import CSV.
- You will then see a screen showing the status of the import. Depending on the server workload, you may need to click Reload and you will see confirmation of the import with a list of successes and/or failure items.
Review Import Status
You can continue to use the system while the process is taking place. You can check on your last data import by going to Your Name > Import Status.
Things to consider
- When importing the users, they will not receive an onboarding email from us. Your organization will need to reach out to your employees, notifying them of the new process. For a sample email template, see our User Introduction Page.
- Users who are made of any role other than basic will be asked to create a password with us, so they will be able to access the website and see information granted by their permissions. They should be automatically notified to do this upon account creation.
| Import | Manual Add | |
| Basic | Will not be invited | Will not be invited |
| Non-Basic | No automatic notification | Automatic invite, else "Re-Invite" to send an invite to create a password |
Overwriting Web UI Changes
All of your student/employee records will directly reflect the CVS file you upload. However, admins can make changes to those records via the Web UI. In the event you continue to maintain your data via periodic manual uploads, we recommend the following process to ensure there is no data loss from a CSV overwriting changes made via the Web:
It is recommended to export your records first before an import.
- Export data as a CSV by clicking the "CSV" at the bottom of the list view.
- Open that exported CSV file.
- Make your changes and save as CSV.
- Import the modified file.
These steps will maintain all information without the risk of data loss.
Unexpected Role Changes
Please keep in mind that importing over an existing import (without first getting an export) may result in users reverting to the Basic role with no web access. To combat this, specify the Role for non-basic users. When the Role field is blank, the system assumes "Basic" as the default.
Please see this chart to see where your non-basic users may become basic upon import:
| Role to be Changed | CSV/SFTP Import | Manually Adding Employees |
|---|---|---|
| Basic | Can be left blank to assign this role by default, or "Basic" can be entered | "Basic" is selected by default or can be manually selected |
| Non-Basic (Can log in to Web) | Needs to be filled in the corresponding areas, or else these users will be reverted to Basic. | Can be changed at any time, will not default back to Basic after editing at any time; can only be changed manually |